Hello fellow plant lovers! Are you captivated by the deep, dark, velvety leaves of the Alocasia Black Velvet? You’re not alone! This stunning plant, formally known as Alocasia reginula, is a true jewel in any houseplant collection. Its compact size and dramatic foliage make it incredibly sought after by enthusiasts worldwide.
The Alocasia Black Velvet (Alocasia reginula) is a compact jewel alocasia loved for its dark, velvety leaves. It thrives in bright, indirect light and requires a chunky, free-draining soil mix. Unlike many alocasias, it prefers to dry out significantly between waterings to prevent root rot.
But let’s be honest, sometimes you hear whispers about it being a bit… demanding. Does that mean you should shy away? Absolutely not! With the right knowledge and a little consistent attention, you can absolutely help your Alocasia Black Velvet thrive and show off those incredible leaves. This guide is here to demystify its care and empower you to become a confident Black Velvet parent. Let’s dive in!
Meet the Jewel: What Makes Alocasia Black Velvet (Alocasia reginula) Special?
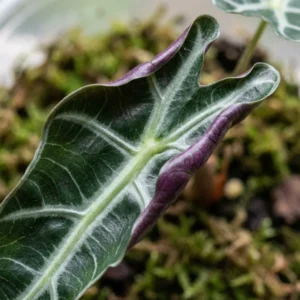
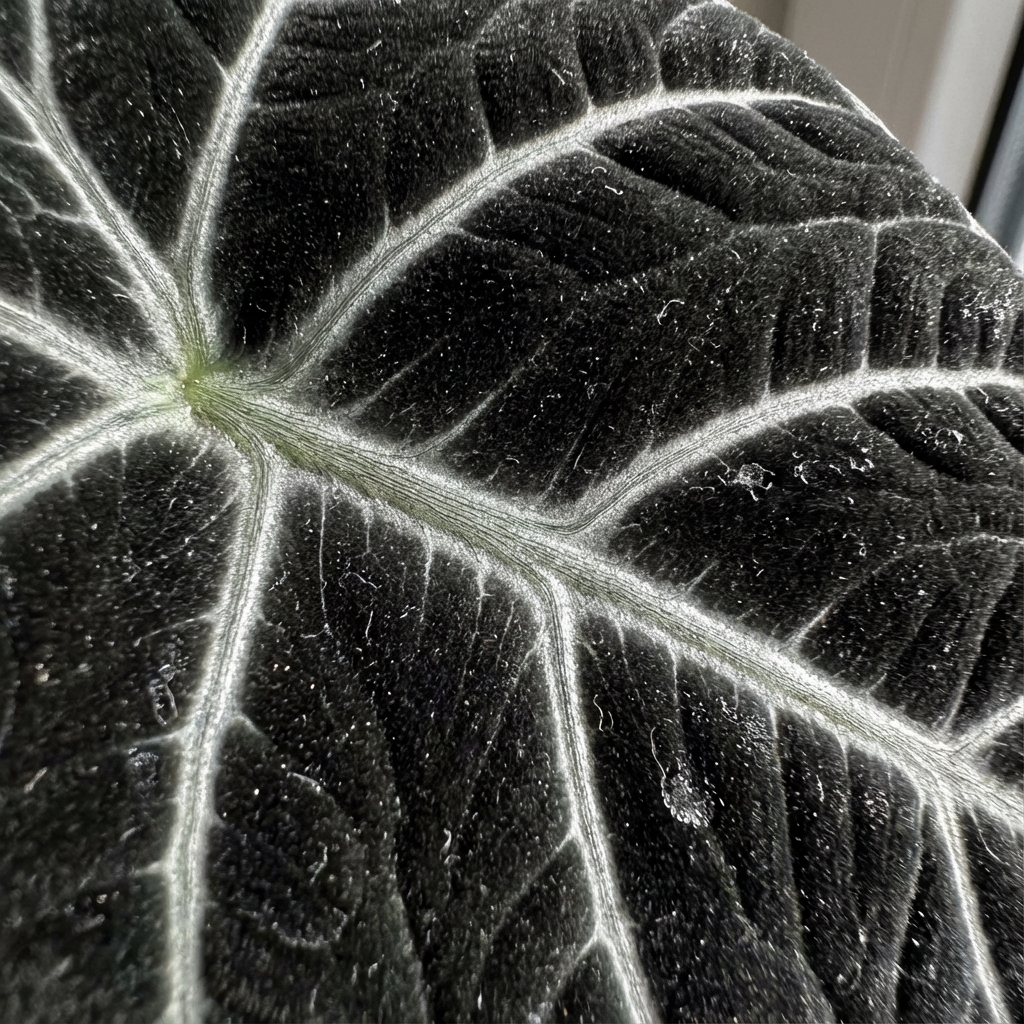
The Alocasia Black Velvet earns its ‘Jewel Alocasia’ nickname for good reason. Its most striking feature is its thick, almost succulent-like leaves that boast a deep, dark green, nearly black coloration and a luxurious velvety texture. Contrasting bright, silvery-white veins cut across the leaves, creating a breathtaking pattern.
Compared to some of its giant elephant ear cousins, the Black Velvet stays relatively compact, making it a great choice for indoor spaces. It hails from the rainforests of Borneo, which gives us crucial clues about its needs: it loves warmth, high humidity, and the kind of dappled light found under a forest canopy. Understanding its origins is the first step to recreating its happy place in your home.
Getting the Basics Right: Essential Alocasia Black Velvet Care Guide
Consistent care is the secret sauce for a happy Alocasia Black Velvet. Let’s break down the essential ingredients:
Finding the Sweet Spot: Light Requirements for Alocasia Black Velvet
Light is critical! Your Black Velvet craves bright, indirect light. Think of the dappled sunlight filtering through trees – that’s the goal.
- Too much direct sun is a no-go: It will quickly scorch those beautiful velvety leaves, leaving brown patches. Keep it away from intense afternoon sun, especially through unfiltered windows.
- Too little light isn’t ideal either: The plant might become ‘leggy’ (stretching towards light), leaves may be smaller, and that signature deep color can fade.
- Ideal Placement: An East-facing window offering gentle morning sun is often perfect. If you have South or West-facing windows, place the plant several feet back or filter the light with a sheer curtain.
- Grow Lights to the Rescue: If natural light is limited, a good quality full-spectrum LED grow light is a fantastic solution. Position it so the plant receives consistent, bright illumination for about 10-12 hours a day.
The Watering Dance: How and When to Water Your Black Velvet
This is arguably the most crucial aspect and where many new owners stumble. The mantra is: consistently moist, but never soggy.
- Check First, Water Later: Before even thinking about watering, check the soil moisture. Stick your finger about 1-2 inches deep. If it feels dry, it’s likely time to water. If it still feels damp, wait! A moisture meter can also be a helpful tool, confirming your finger test. Don’t water just because it’s “watering day.”
- Water Thoroughly: When you do water, give it a good drink. Pour water evenly over the soil surface until it starts to drain freely from the bottom holes.
- Drainage is Non-Negotiable: Immediately empty any excess water collected in the saucer or cache pot. Letting the plant sit in water is the fastest way to invite root rot.
- Know the Signs: Underwatering usually leads to drooping leaves and stems. Overwatering is trickier – leaves might yellow and droop too, but the soil will remain wet, and you risk serious root damage.
- Water Quality Matters: Black Velvets can be sensitive to chemicals and minerals often found in tap water (like chlorine and fluoride). If you notice persistent brown tips or issues despite good care, try using filtered water, distilled water, or collected rainwater.
- Seasonal Adjustment: Your plant will naturally need less water during the cooler months or if it enters a period of dormancy. Always adjust frequency based on the soil check, not just the calendar.
The Perfect Foundation: Best Soil Mix for Alocasia Black Velvet
Forget standard bagged potting soil – it typically holds far too much moisture for this sensitive plant. Your Alocasia Black Velvet needs a chunky, airy, and extremely well-draining mix. This allows roots to breathe and prevents the waterlogging that leads to root rot.
- Why it Matters: Good drainage prevents root rot, while aeration allows vital oxygen to reach the roots.
- Key Ingredients & Their Purpose: A successful mix often includes:
- Base: Coco coir (great aeration and moisture retention balance) or quality peat moss.
- Aeration: Perlite (use generously!), pumice – these create essential air pockets.
- Chunkiness: Orchid bark (fir or pine) – improves drainage and structure significantly.
- Optional Boosters: Horticultural charcoal (aids drainage, may absorb impurities), worm castings (provides gentle, slow-release nutrients).
- Simple DIY Recipe Guideline: Many experienced growers find success mixing roughly equal parts coco coir, perlite, and orchid bark. Feel free to adjust slightly based on your home environment and watering style – if you tend to overwater, add more bark/perlite. The key is a mix that water flows through readily.
Creating a Humid Haven: Alocasia Black Velvet Humidity Needs
Remember those Borneo rainforests? Your Black Velvet thrives in high humidity, ideally aiming for 60% relative humidity or more. Low humidity, very common in homes with central heating or air conditioning, is the primary cause of those frustrating crispy brown leaf edges.
- Boost the Moisture:
- Humidifier: This is the most effective and consistent method for maintaining the high humidity Alocasias love. Place one nearby.
- Grouping Plants: Clustering your Alocasia with other humidity-loving plants creates a beneficial microclimate as they collectively release moisture through transpiration.
- Pebble Tray: Place the pot on a tray filled with pebbles and water, making sure the pot’s bottom isn’t sitting in the water. Evaporation adds some local humidity. It’s less impactful than a humidifier but better than nothing.
- Why Misting Isn’t the Answer: While it feels intuitive, misting provides only fleeting humidity and doesn’t address the plant’s need for consistent moisture in the air. It can also sometimes encourage fungal spots on delicate velvety leaves.
Temperature Tolerance: Keeping Your Alocasia Comfortable
Your Black Velvet prefers stable, average room temperatures, ideally between 65-80°F (18-27°C), typical of most homes.
- Avoid Extremes: Protect it from cold drafts emanating from windows or doors during winter, and keep it away from direct airflow from air conditioning vents in summer. Also, avoid placing it right next to heat sources like radiators or fireplaces. Sudden temperature shifts can cause stress.
Feeding Your Velvet Beauty: Fertilizing Alocasia Black Velvet
During the active growing season (usually spring and summer), providing some nutrients helps support healthy growth.
- When & How Often: Feed your plant every 2-4 weeks only when you see active signs of growth (new leaves emerging).
- What to Use: A balanced liquid houseplant fertilizer (where the N-P-K numbers are relatively similar) is generally recommended.
- Dilute is Key! This is important: Always dilute the fertilizer to half, or even quarter, the strength suggested on the product label. Alocasias are sensitive to over-fertilization, which can burn roots and leaves. Less is often more.
- Know When to Stop: Cease fertilizing in the fall and winter as growth naturally slows down or the plant becomes dormant. Also, hold off on feeding for about a month after repotting to allow the roots to settle.
- Prevent Buildup: To prevent harmful fertilizer salts from accumulating in the soil, occasionally water very thoroughly, letting a good amount of water flush through the drainage holes.
Common Alocasia Black Velvet Problems (and How to Fix Them!)
Even with attentive care, issues can arise. Don’t panic! Identifying the problem is the first step to fixing it:
Decoding Yellow Leaves: Common Causes and Solutions
Yellow leaves are a common signal something’s amiss. Consider these possibilities:
- Overwatering: The prime suspect, especially if lower leaves yellow first and the soil stays wet. This can lead to root rot. Check soil moisture deeply and adjust your watering immediately. If suspected, check the roots.
- Underwatering: If the soil is very dry, and leaves (often starting lower down) yellow and perhaps wilt or crisp, the plant is thirsty.
- Nutrient Deficiency: Less common if feeding appropriately, but possible if the plant hasn’t been fed for a very long time during active growth. Rule out water issues first.
- Light Issues: Too much direct sun can cause yellowing/scorching. Significantly insufficient light can sometimes cause the plant to shed lower leaves.
- Pests: Inspect carefully, especially under leaves, for pests like spider mites causing stippling that looks yellow.
- Natural Aging: The oldest, bottom-most leaf will naturally yellow and die off periodically. If it’s just one leaf and the rest of the plant is healthy and growing, this is likely normal.
Banishing Brown Tips and Crispy Edges
This is most frequently caused by low humidity. Refer back to the humidity section for solutions. Less commonly, it can result from using tap water with high mineral content or highly inconsistent watering practices.
Why is My Alocasia Black Velvet Drooping?
A drooping plant needs immediate investigation:
- Thirst: Check the soil – if it’s dry several inches down, underwatering is the likely cause. Water thoroughly.
- Overwatering/Root Rot: If the soil is soggy and the plant is drooping, root rot is a serious possibility. Healthy roots are needed to uptake water. Proceed to root rot checks.
- Transplant Shock: A plant may droop for a few days after being repotted as it adjusts. Give it time and maintain consistent care.
- Temperature Stress: Exposure to sudden cold or heat can cause wilting.
The Dreaded Root Rot: Prevention and Treatment
Root rot is a severe condition often caused by overwatering or poor soil drainage.
- Clear Signs: Persistently wet/soggy soil, yellowing and drooping leaves (despite wet soil), a noticeable foul or marshy smell from the soil, and roots that appear brown or black, feel mushy, and may fall apart easily.
- Prevention First: The best cure is prevention! Use that chunky, well-draining soil mix and be meticulous about checking soil moisture before watering. Always ensure your pot has drainage holes.
- Emergency Treatment (If Necessary): Act fast! Gently remove the plant from its pot. Wash away as much old soil as possible to inspect the roots clearly. Using sterile scissors or shears, trim away all affected roots (brown, black, mushy) back to healthy, firm, white tissue. Be thorough. Some growers apply ground cinnamon (a natural antifungal) to the cut ends. Repot immediately into a clean pot with fresh, appropriate, well-draining Alocasia mix. Water very sparingly only when the mix is significantly dry, and be patient – recovery takes time and isn’t always possible if the damage was extensive.
Pesky Invaders: Dealing with Common Pests (Spider Mites!)
Alocasia Black Velvets are unfortunately quite susceptible to pests, especially spider mites. These tiny arachnids are hard to spot initially but cause tell-tale fine webbing between leaves/stems and tiny yellow or bronze dots (stippling) on the leaves as they feed. Also, keep an eye out for thrips (causing silvery leaf damage) and mealybugs (resembling small cotton clusters).
- Regular Inspections are Vital: Make checking the undersides of leaves and stems part of your weekly plant care routine. Catching pests early makes treatment much easier.
- Isolate Immediately: If you confirm pests, move the affected plant far away from any other houseplants to prevent the infestation from spreading.
- Persistent Treatment Required:
- Wash Off: Start by gently washing the leaves and stems with water (e.g., in the shower or sink) to physically dislodge as many pests as possible.
- Insecticidal Soap or Neem Oil: Thoroughly spray the entire plant, paying close attention to leaf undersides and crevices. These generally work by smothering pests, so good coverage is essential. Repeat applications every 5-7 days for several weeks, as they often don’t kill eggs, requiring multiple treatments to break the life cycle. Always follow product instructions.
- Systemic Options: For severe or stubborn infestations, systemic insecticides applied to the soil are absorbed by the plant, killing pests that feed on it. Use these products with caution, strictly following label directions, especially for indoor use.
Growth, Repotting, and Propagation
It’s exciting to see your Black Velvet flourish! Here’s how to manage its container and potentially create new plants:
Potting and Repotting Your Black Velvet Alocasia
- When to Repot: Black Velvets often prefer being slightly ‘pot-bound’. Repotting too soon into too large a pot can lead to overly wet soil. Repot only when necessary – typically when you see significant roots emerging from the drainage holes or tightly circling the inside of the pot. This might be every 1-2 years, depending on growth.
- Choosing the Right Pot: Select a new pot that is only about 1-2 inches wider in diameter than the current one. Excellent drainage holes are non-negotiable. Material choice depends on your habits: terracotta breathes and dries soil faster (good if you tend to overwater), while plastic retains moisture longer.
- Best Time: Spring or early summer, as the plant enters its most active growth phase, is generally the best time for repotting.
- The Process: Carefully slide the plant out of its old pot. Gently loosen any tightly circling roots, being careful not to damage them excessively. Place a layer of your fresh, well-draining mix in the bottom of the new pot. Position the plant so the top of the root ball is at about the same level as before. Fill in around the sides with fresh mix, lightly tamping it down to remove large air pockets, but don’t compact it heavily. Water lightly to settle the soil.
Multiplying Your Jewel: Alocasia Black Velvet Propagation from Corms
Propagating via corms (small bulb-like offsets) is the most common method for home growers.
- Finding Corms: You’ll often discover these small, firm corms nestled amongst the roots or attached to the base of the main plant when you repot.
- Removal: Gently break or cut them away from the parent plant. Ensure they feel firm and solid.
- Planting: Plant the corms shallowly (about half-buried, pointy end up if discernible) in a suitable propagation medium like moist sphagnum moss, perlite, or even your regular Alocasia soil mix within a small pot or container.
- Warmth & Humidity are Key: Place the container in a warm location with bright, indirect light. Cover it with a clear plastic bag or place it inside a propagation box or cloche to maintain high humidity, which encourages sprouting.
- Be Patient: Sprouting can take anywhere from a few weeks to several months. Keep the medium consistently lightly moist (not wet). Once a leaf and some roots have developed, you can pot it up like a tiny version of the parent plant.
Pro Tips for Stunning, Velvety Foliage
Want to maximize that gorgeous leaf appeal?
- Consistency Rules: Stable and correct environmental conditions (light, water, humidity, temp) are the foundation for healthy, beautiful leaves. Stress often shows on the foliage.
- Keep Leaves Clean: Dust inevitably settles on those velvety surfaces. Gently wipe leaves periodically with a soft, slightly damp microfiber cloth to keep them looking vibrant and allow for efficient photosynthesis. Always support the leaf from underneath with one hand while wiping gently with the other.
- Avoid Leaf Shine: Commercial leaf shine products can clog the leaf pores (stomata) and will ruin the beautiful natural matte, velvety texture. Cleanliness is the best ‘shine’.
- Light is Key for Color: Providing consistently bright, indirect light helps the plant maintain its deep, rich leaf coloration.
Is Alocasia Black Velvet Beginner Friendly? The Honest Truth
So, is this plant suitable for someone just starting their houseplant journey? It’s fair to say it presents more challenges than, say, a ZZ plant or Pothos. Its reputation for being ‘finicky’ primarily revolves around its sensitivity to overwatering (leading to root rot) and its demand for high humidity.
However, this doesn’t mean it’s impossible for an attentive beginner. If you’re willing to learn its specific needs, commit to using the right well-draining soil mix, are disciplined about checking soil moisture before watering, and make a genuine effort to provide adequate humidity, you absolutely can succeed. Don’t let its reputation deter you if you truly admire the plant – just approach its care with a bit more mindfulness. Remember, every plant and home environment is slightly different, so observe your plant closely and adjust care as needed.
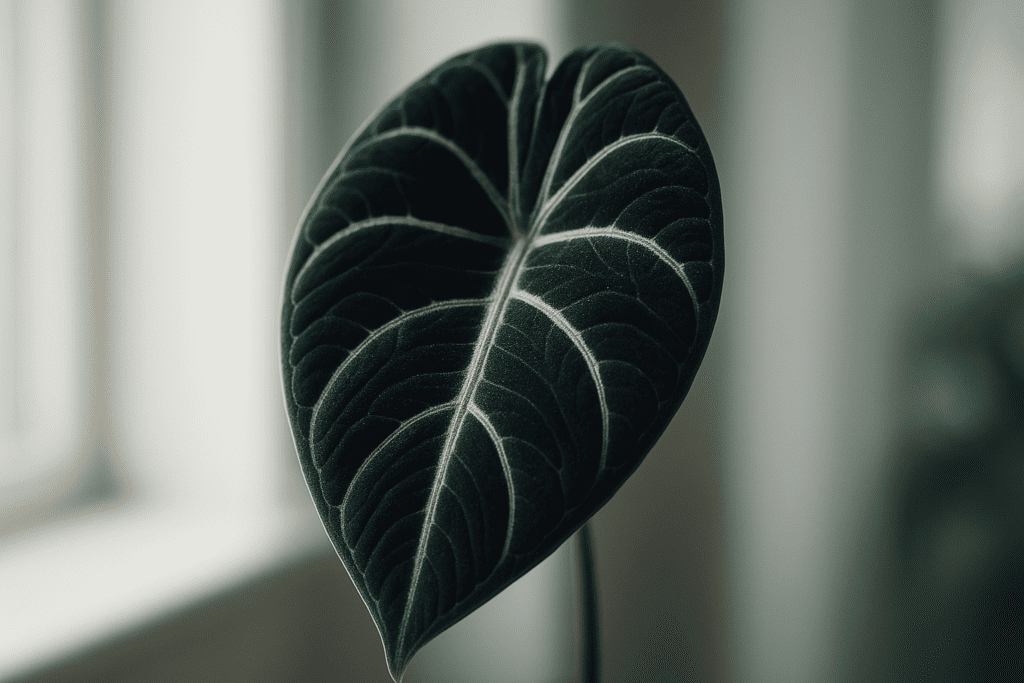
Why is it Black? The Science of Velvet
The iconic dark velvet appearance of the Alocasia Black Velvet isn’t just for show. This adaptation allows the plant to absorb as much light as possible in the dim understory of the Borneo jungle. The microscopic velvety hairs (trichomes) trap light that would otherwise reflect off the leaf surface, channeling it towards the chlorophyll. For 2026, understanding this helps us realize that while it tolerates low light, it thrives with consistent, bright indirect light to fuel those dark leaves.
Conclusion: Enjoy Your Thriving Alocasia Black Velvet
Growing an Alocasia Black Velvet is a genuinely rewarding endeavor for any plant enthusiast. There’s a unique satisfaction in nurturing this ‘Jewel Alocasia’ and watching its stunning, velvety leaves unfurl.
By remembering the cornerstones of its care – bright indirect light, a super airy and well-draining soil mix, careful and considered watering, consistently high humidity, and regular pest checks – you set yourself up for success. It might require a touch more diligence than some other common houseplants, but the visual payoff of a healthy, thriving Alocasia Black Velvet is truly exceptional. Happy growing!
🌿 Keep Exploring Alocasias:
Learn about similar stunning varieties like Alocasia Polly and Alocasia Frydek. Facing common issues? Solve them quickly with our guides on yellowing leaves and brown leaf tips.