Jump to Sections
ToggleThat Sinking Feeling: When Your Stunning Alocasia Starts to Droop
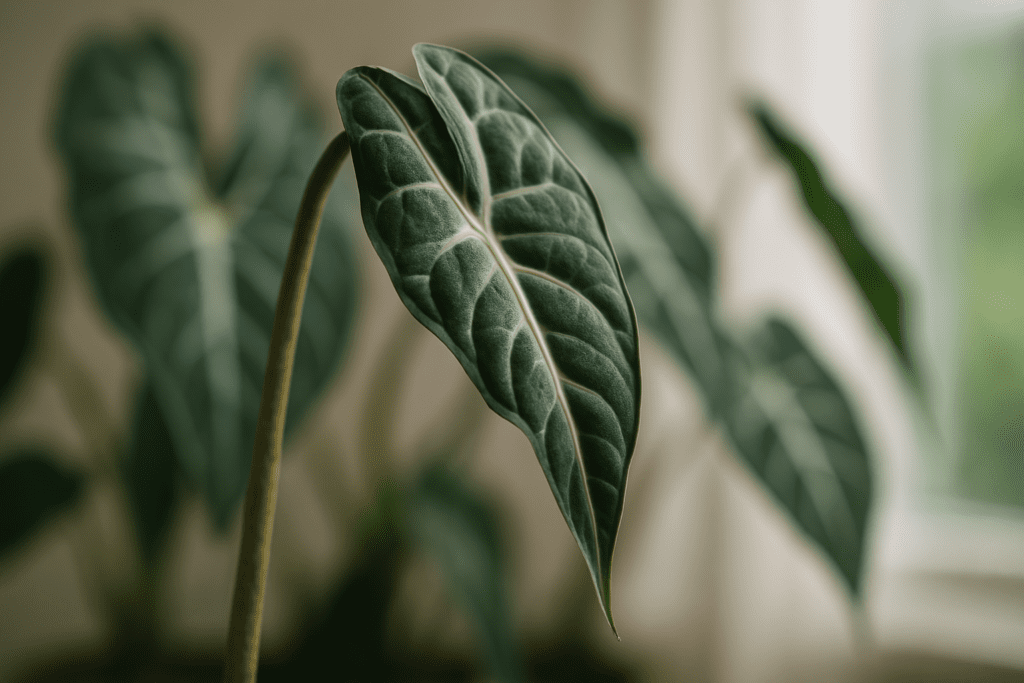
Okay, deep breaths, fellow plant parent. You walk over to admire your gorgeous Alocasia – maybe a striking ‘Polly’ or a velvety ‘Black Velvet’ – and your heart sinks. Those magnificent leaves, usually standing proud, are drooping. Limp. Sad-looking. It’s a feeling many Alocasia owners know all too well! These plants are stunning, dramatic centrepieces, so seeing them falter can cause instant panic. I remember feeling that same panic when my first Alocasia started looking sad!
But here’s the good news: You’re not alone in this, and alocasia drooping is a common signal that something needs adjusting. More often than not, it’s entirely fixable! Think of your Alocasia as trying to communicate with you. This guide is here to help you decode that message. Together, let’s play plant detective, pinpoint the cause, and learn exactly how to fix drooping alocasia leaves and get your jewel back to its dazzling self.
Is it Just Drama, or a Real Problem? Understanding Alocasia Drooping
First things first, why do Alocasias droop? It usually comes down to something called turgor pressure – basically, the water balance within the plant’s cells that keeps the leaves and stems firm. When something disrupts this balance, drooping is often the first visible sign.
However, not all drooping spells disaster. Sometimes, it’s perfectly normal or temporary:
- Acclimation: Did you just bring your Alocasia home or move it to a new spot? It might droop slightly for a week or two as it adjusts to its new environment. Give it stable conditions and patience.
- New Leaf Power: Occasionally, an older, lower leaf will start to droop and eventually yellow as the plant focuses its energy on pushing out exciting new growth.
- A Little Thirsty: Some Alocasias might show a very slight droop when they’re just about ready for water. If it perks right back up within hours of watering, that was likely just its cue.
The time to investigate further is when the drooping is persistent, seems to be worsening, or is accompanied by other worrying signs like widespread yellowing, brown spots, or visible pests. And keep in mind, especially as the days get shorter and cooler, your Alocasia might be entering dormancy. This can involve drooping and leaf loss, but it’s a natural rest period, not necessarily a problem (we’ll touch on this more!).
Playing Plant Detective: Your Step-by-Step Guide to Diagnosing the Droop
Ready to figure out what your Alocasia is trying to tell you? Let’s systematically check the most common culprits. Grab your plant and let’s investigate together!
Step 1: Check the Watering – The Most Common Culprit for Bending Stems
Watering issues are, by far, the most frequent reason for alocasia drooping. Getting it right is crucial. Why are my alocasia stems bending, you ask? Often, it’s related to water imbalance affecting that crucial turgor pressure.
- How to Check: Don’t just guess! The best way is to feel the soil. Stick your finger about 1-2 inches deep.
- Is it Soggy/Wet? -> Could be Overwatering. Other signs include lower leaves turning yellow before drooping, a stem base that feels mushy, or even little pests like fungus gnats buzzing around the soil surface. The pot might also feel unusually heavy. Overwatering essentially drowns the roots, preventing them from taking up water and leading to dangerous root rot.
- Is it Bone Dry? -> Likely Underwatering. The pot will feel light, the leaves might look limp and deflated all over, and you might see brown, crispy edges developing. Stems often droop significantly. While not ideal, an underwatered Alocasia often perks up faster than an overwatered one once corrected.
- The Fix Starts Here: Always use a pot with drainage holes! And plant your Alocasia in a well-draining alocasia soil mix – something chunky with orchid bark, perlite, or coco coir helps prevent waterlogging. Aim for that “Goldilocks” balance: moist, but not wet or soggy.
- Bonus Tip: Some growers find Alocasias can be sensitive to minerals in hard tap water. If you suspect this might be contributing to issues after ruling out other causes, try using filtered, distilled, or rainwater.
Step 2: Assess the Light Situation – Fueling Your Plant’s Strength
If watering seems okay, the next logical step is to check the light. Alocasias need the right amount of light energy to thrive and hold themselves upright.
- Too Little Light: If your plant is in a dim corner, it might develop weak, bending alocasia stems that simply can’t support the weight of the leaves (this is called etiolation). Growth will be slow, and the overall lack of energy can contribute to drooping.
- Too Much Direct Light: While they appreciate brightness, harsh, direct sunlight will scorch their sensitive leaves, causing brown patches and crispy edges. This stress can also lead to wilting and drooping as the plant tries desperately to conserve water.
- The Sweet Spot: Aim for bright, indirect light. Think of the dappled sunlight under a tree canopy. Near an east-facing window is often great, or a few feet back from a brighter south or west-facing window (in the Northern Hemisphere). If your space is naturally dark, consider investing in a grow light!
Step 3: Inspect for Pests – Are Unwanted Guests Stressing Your Plant?
Still haven’t found the cause? It’s time for a close inspection for pests. These tiny intruders can wreak havoc and stress your Alocasia, causing it to droop.
- Common culprits: Keep an eye out for:
- Spider Mites: Look for tiny dots (often red or black) and super fine webbing, especially on the undersides of leaves and where the leaf meets the stem (petiole). Be particularly vigilant with varieties like Alocasia Polly; Alocasia Polly drooping is very frequently linked to these specific pests – they seem to find them irresistible!
- Thrips: Tiny black or straw-coloured insects that cause silvery patches or streaks on leaves.
- Mealybugs: Look like small white cottony fluff, often hiding in crevices and leaf axils.
- How to Inspect: Get up close and personal! A magnifying glass can be helpful. Check under leaves, along stems, and in any little nooks. Wiping a leaf gently with a damp white cloth can sometimes reveal tiny mites or the dirty residue they leave behind.
- Why they cause drooping: Pests weaken the plant by sucking vital sap or damaging leaf tissue, causing significant stress. Early detection and treatment are vital! Many experienced growers recommend quarantining new plants for a few weeks just in case they bring unwelcome guests.
Step 4: Evaluate the Environment – Temperature and Humidity Levels
Alocasias are tropical natives and can be quite particular about their surroundings. An unhappy environment can certainly lead to drooping.
- Temperature: They dislike sudden temperature swings and drafts – whether hot or cold. Keep them away from heating/cooling vents, radiators, and drafty windows, especially in winter. An alocasia temperature shock can definitely trigger drooping. Most are happiest in a stable environment between 65-80°F (18-27°C). Temperatures dipping below 60°F (15°C) consistently will likely cause stress.
- Humidity: As tropical natives, standard plant care advice suggests they thrive in high humidity! Ideally, they prefer levels above 60%. In typical home environments, especially with central heating or air conditioning running, humidity can often drop much lower (<40-50%). This can lead to crispy leaf edges and general stress that contributes to drooping. Aim to boost alocasia humidity requirements by using a humidifier (the most effective method), grouping plants together, or placing the pot on a pebble tray filled with water (just ensure the pot bottom doesn’t sit in the water). While misting is often suggested, its effects on humidity are very temporary and frequent misting without good airflow can sometimes encourage unwanted fungal issues.
Step 5: Consider Recent Changes – The Shock Factor
If your plant was fine until recently, think about any significant changes it has experienced. Sometimes, the cause of drooping is simply shock.
- Repotting: Alocasia leaves drooping after repotting is incredibly common. Disturbing the roots, even when done gently, often causes transplant shock alocasia. It’s a normal reaction, and it can take days or even a couple of weeks for the plant to readjust and perk back up.
- Moving: Did you recently move your Alocasia to a drastically different spot (e.g., from a low-light area to a much brighter window, or into a room with very different temperatures)? This environmental shift can stress it out temporarily, leading to drooping.
- New Plant: Bringing any plant home from a nursery or store involves a significant change in environment. Acclimation stress is expected as it adjusts to your home’s unique conditions.
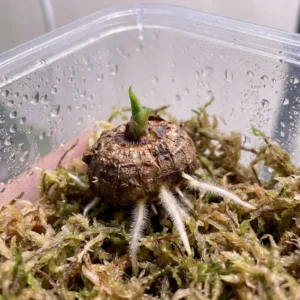
Step 6: Look Deeper – Root Health and Potential Dormancy
If none of the above checks have clearly revealed the culprit, it might be time to consider what’s happening below the soil surface, or if your plant is entering a natural rest cycle.
- Rootbound: Has your Alocasia been thriving in the same pot for a very long time? If it’s severely rootbound (meaning the roots have filled the pot entirely, are tightly circling, or even growing out of the drainage holes), it might struggle to take up enough water and nutrients efficiently, which can lead to drooping.
- Root Rot: If you strongly suspect overwatering based on Step 1 (persistently soggy soil, yellowing lower leaves), you might need to gently check the roots for rot. Carefully slide the plant out of its pot. Healthy Alocasia roots are typically firm and whitish or light tan. Rotted roots, however, will be brown or black, feel soft and mushy, and might even have an unpleasant, swampy smell. Spotting this requires immediate action to fix root rot alocasia (covered in the next section).
- Dormancy: Don’t forget about dormancy! Especially in autumn and winter when light levels decrease and temperatures cool, many Alocasia varieties naturally slow down or enter a dormant period. This isn’t cause for panic, it’s a survival strategy. Signs include slowed or completely stopped growth, and leaves yellowing, drooping, and eventually dying back, sometimes leaving just the stem or nothing above the soil line. The plant isn’t dead; it’s just resting its underground rhizome or corm. Alocasia dormancy care involves significantly reducing watering and waiting for warmer conditions.
Operation Revival: Your Action Plan to Fix Drooping Alocasia Leaves
Okay, detective work complete! Now that you have a likely diagnosis, here’s the targeted action plan – how to save a drooping alocasia based on what you found:
- If Underwatered: Give it a good, thorough drink immediately. Water until water flows freely from the drainage holes, ensuring the entire root ball is moistened. Allow it to drain completely – never leave it sitting in a saucer of water. Check the soil moisture more frequently going forward. You might also try bottom watering: place the pot in a basin with a few inches of water for 15-30 minutes, allowing the soil to soak up moisture from below.
- If Overwatered: Stop watering right away! Allow the top few inches of soil to dry out completely before considering watering again. Improve airflow around the plant if possible. If the soil is staying wet for a very long time, or if you confirmed root rot in Step 6, you need to intervene: Gently remove the plant from its pot. Inspect the roots and trim away any mushy, black, or smelly parts with clean, sharp scissors or shears. Repot the plant into a pot with drainage holes using fresh, airy, well-draining potting mix (adding extra perlite or orchid bark helps). Water very sparingly after repotting, only when the soil is nearly dry, until you see clear signs of recovery.
- If Light Issue: Gradually adjust the plant’s position. If it needs more light, move it closer to a suitable window over several days. If it’s getting scorched, move it further back or to a spot with filtered light (like behind a sheer curtain). Don’t make drastic shifts from deep shade to bright sun instantly, as this can cause further stress.
- If Pests: Isolate the infested plant immediately to prevent the pests from spreading to your other plants! Wipe down all leaves (tops and undersides) and stems with a damp cloth or paper towel to physically remove as many pests as possible. Treat the plant thoroughly with an insecticidal soap or neem oil solution, carefully following the product’s mixing and application instructions (always perform a small patch test on one leaf 24 hours before applying everywhere, just to be safe). Repeat these treatments every 5-7 days for several weeks, as this is crucial to catch pests hatching from eggs. Persistence is key to eliminating them!
- If Environment Issue: Move the plant away from drafts, heating/cooling vents, or radiators. Take steps to increase humidity around the plant using methods like a humidifier (most effective), grouping plants, or a pebble tray. Aim for providing a more stable temperature and humidity environment.
- If Transplant Shock: Patience, patience, patience! This is the most important factor. Provide consistent, gentle care – ensure it has adequate warmth and high humidity (tenting loosely with a clear plastic bag can temporarily create a mini-greenhouse effect, just ensure some air circulation). Avoid any further stress like fertilizing or moving it around again while it recovers.
- If Rootbound: Gently repot the Alocasia into a new pot that’s just 1-2 inches larger in diameter than the old one. Use a fresh, well-draining potting mix suitable for aroids. Water lightly after repotting.
- If Dormant: Accept that the plant is resting. Drastically reduce watering – perhaps just a tiny sip every few weeks, only enough to keep the soil from becoming completely bone dry and the rhizome from desiccating. Keep it in a relatively cool spot (but not freezing) with moderate, indirect light. Do not fertilize during dormancy. Wait patiently for signs of new growth emerging from the soil in spring when light levels and temperatures naturally increase.
A quick note on cutting leaves: Many plant parents ask, “Should I cut off drooping Alocasia leaves?” Generally, it’s best to leave them alone unless the leaf is completely yellow or brown and clearly dead, or if it’s heavily infested with pests you’re trying to eliminate. Even a droopy green leaf can still perform some photosynthesis and provide a bit of energy back to the plant as it recovers. Once a leaf is fully yellowed, browned, or crispy, it’s no longer benefiting the plant, and you can trim it off near the base with clean shears for aesthetic reasons.
Preventing Future Frights: Proactive Care for a Happy, Upright Alocasia
Once you’ve successfully revived your plant (high five!), the goal is to prevent future drooping episodes. Prevention is largely about providing consistent care and the right environment:
- Water Wisely: Get out of the habit of watering on a strict schedule. Instead, make it a habit to regularly check the soil moisture (using your finger or a moisture meter) and only water when the top 1-2 inches feel dry.
- Light it Right: Ensure your Alocasia consistently receives bright, indirect light. Rotate your plant about a quarter turn each time you water to encourage even growth on all sides.
- Perfect Potting: Use a chunky, airy, well-draining potting mix. Ensure your pot always has drainage holes to let excess water escape.
- Humidity Helper: If your home is dry, make an effort to maintain higher humidity levels around your Alocasia, especially during winter or if you use air conditioning frequently.
- Stable Environment: Protect your plant from sudden temperature fluctuations and drafts from windows, doors, or vents.
- Pest Patrol: Make it a routine to regularly inspect your plant, especially the undersides of leaves and new growth, for any early signs of pests. Catching them early makes treatment much easier.
- Feed Mindfully: During the active growing season (typically spring and summer), feed your Alocasia sparingly with a balanced liquid houseplant fertilizer diluted to half or quarter strength, perhaps every 2-4 weeks. Stop fertilizing completely in the fall and winter when growth naturally slows or stops.
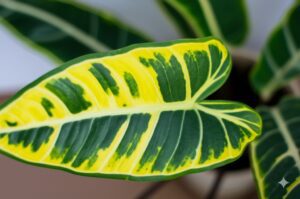
- Know Your Type: While the general care principles apply to most Alocasias, researching the specific needs of your variety (like ‘Polly’, ‘Zebrina’, ‘Black Velvet’, etc.) can sometimes reveal subtle differences in water or light preferences that can help you fine-tune your care routine.
From Droopy to Dazzling: You’ve Got This!
Seeing your beloved Alocasia droop can certainly be disheartening. But hopefully, this step-by-step guide has shown you that it’s usually a solvable puzzle. With a little careful observation (playing plant detective!) and targeted action based on your findings, revival is often very much possible.
Alocasias are incredibly rewarding plants, but they do teach us to be observant and patient plant parents. Don’t be discouraged by the occasional setback – consider it a learning experience on your plant journey! By understanding their needs and learning to interpret their signals (like drooping!), you’ll become much better equipped to provide the care they need to truly thrive and showcase their stunning, dramatic beauty in your home. Now, go give your Alocasia some love – you’ve got this! Celebrate that moment when you see it standing tall and proud again.