Jump to Sections
ToggleUh Oh, Brown Tips! Decoding Distress Signals from Your Jewel Alocasia
Aren’t Alocasias just stunning? With their dramatic shapes and striking patterns, these ‘jewel’ plants bring such a wow factor to our homes. Whether you’re nurturing an iconic ‘Polly’, a velvety ‘Black Velvet’, or a striped ‘Zebrina’, watching a new leaf unfurl is pure plant parent joy! But then… you spot it. That dreaded browning starting at the tip or edge of a precious leaf. Don’t panic! As an Alocasia aficionado who’s seen my fair share of ups and downs, I can tell you this is super common. The good news? It’s usually fixable once you understand what your plant is trying to tell you. Let’s dive in together and figure out what causes those pesky alocasia brown leaf tips and how to get your plant back to looking its best – and keep it that way!
Not Just Any Brown: Understanding What Those Tips Are Telling You
Before we jump into causes, let’s look closely. Not all brown bits are created equal, and the type of browning can give us valuable clues:
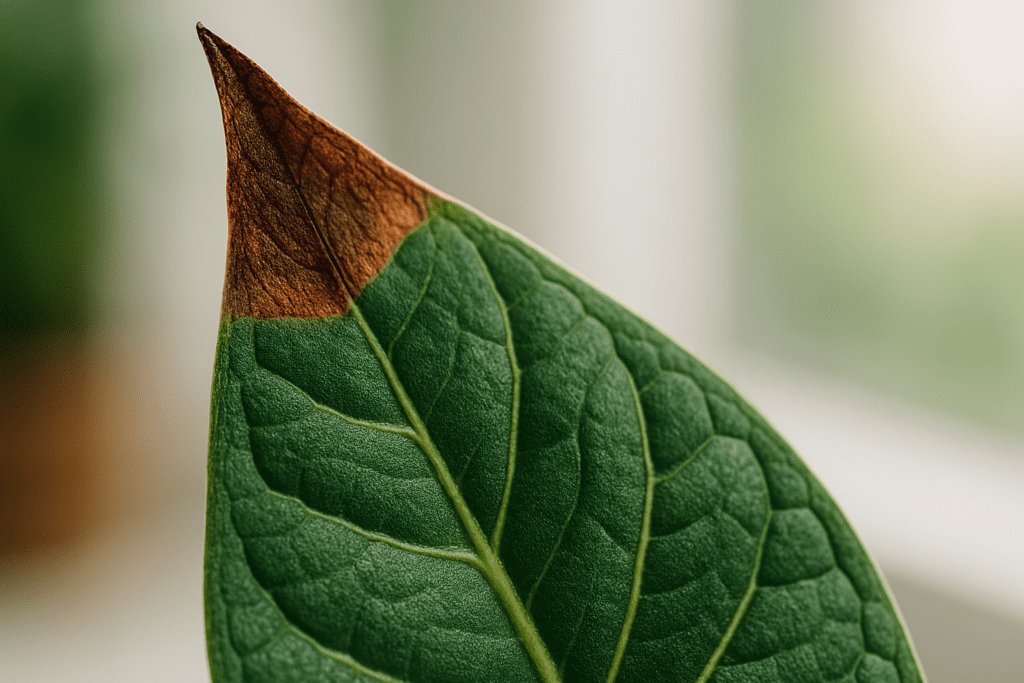
- Crispy Brown Tips: Does the brown part feel dry, brittle, and maybe even crumble a little? This often signals dryness-related issues – think low humidity, inconsistent watering leading to dryness, or potentially a buildup of minerals or salts from water or fertilizer.
- Soft, Mushy Brown Edges (Maybe Yellowing?): If the brown area feels soft, perhaps a bit limp, and especially if it’s accompanied by yellowing spreading from the edge inwards, your alarm bells should ring for too much moisture. This often points towards overwatering, poorly draining soil, or the beginnings of root rot.
- Distinct Brown Spots: While our main focus is tips and edges, definite spots elsewhere on the leaf might suggest something different, like sunburn if they’re in exposed areas, certain pest damage patterns, or sometimes fungal issues (which might have a yellow ‘halo’).
The Usual Suspects: Top 7 Reasons for Alocasia Brown Leaf Tips
Alright, let’s play detective. Here are the most common reasons your Alocasia might be showing brown tips or edges:
1. Watering Woes: Finding the “Just Right” Balance
Watering Alocasias can feel like walking a tightrope! They dislike drying out completely, but they really resent sitting in soggy soil. Both extremes stress the plant and can lead to alocasia watering problems brown leaves.
- Too Little Water (Underwatering): If the soil gets bone dry between waterings, the plant struggles to transport enough water to its furthest points – the leaf tips and edges – causing them to dry out and turn crispy brown. You might also notice droopy leaves or the whole pot feeling very lightweight.
- Too Much Water (Overwatering): This is often more dangerous. Constantly wet soil suffocates the roots, preventing oxygen uptake and leading to root rot. Damaged roots can’t absorb water effectively, paradoxically causing wilting and often soft, mushy brown or yellowing leaf edges. Persistently damp, cool conditions can exacerbate this. You might even notice an unpleasant, swampy smell from the soil if root rot has set in.
- Actionable Tip: Ditch rigid watering schedules! Instead, check the soil moisture. Stick your finger about 1-2 inches deep. If it feels mostly dry at that depth, it’s likely time to water. Water thoroughly until water flows freely from the drainage holes, then discard any excess water in the saucer – never let your Alocasia sit in standing water. Ensure your pot has adequate drainage holes and use a chunky, well-draining potting mix. Many successful growers use an aroid mix containing components like orchid bark, perlite, and coco coir to ensure good aeration.
2. Humidity Hunger: Often the #1 Cause of Crispy Tips
If there’s one thing Alocasias almost universally crave, it’s humidity! Native to tropical rainforests, they thrive in moist air, ideally 60% humidity or higher. Most homes, especially when heating or air conditioning is running, are considerably drier.
- Why it Causes Browning: Dry air significantly increases the rate of transpiration (water loss) from the leaves. The delicate leaf tips often lose moisture faster than the roots can replenish it, leading directly to those characteristic crispy brown edges on alocasia leaves. For many growers experiencing alocasia humidity brown tips on otherwise healthy plants, this is the prime suspect.
- Practical Solutions:
- Humidifier: This is generally the most effective method for consistently raising ambient humidity around your plant. Place it nearby but avoid direct misting onto leaves.
- Pebble Tray: Fill a shallow tray with pebbles and water, then place the plant pot on top of the pebbles, ensuring the bottom of the pot isn’t submerged in water. Evaporation creates a localized humid microclimate.
- Grouping Plants: Plants release moisture through transpiration. Grouping several plants together can help collectively raise the humidity in their immediate vicinity.
- Location: Bathrooms or kitchens, if they offer suitable bright, indirect light, can provide naturally higher humidity levels.
- A Note on Misting: While it provides a fleeting moment of moisture, misting offers very temporary humidity benefits and rarely addresses chronically dry air. If leaves remain wet for extended periods, it can potentially encourage fungal issues.
3. Light Issues: Sunburn Scorch or Low-Light Weakness
Alocasias have specific light preferences. Finding the right balance is key.
- Too Much Direct Sun: Those beautiful, often intricate leaves will scorch quickly in harsh, direct sunlight. This damage appears as brown, burnt patches or crispy edges on the parts of the leaves most exposed to the sun.
- Too Little Light: While insufficient light won’t directly cause brown tips, it significantly weakens the plant overall. A light-starved Alocasia lacks the energy for robust growth and becomes less resilient to other minor stresses (like a slight delay in watering or borderline humidity), which can then manifest as brown tips. Growth may also slow, and stems might become elongated or ‘leggy’.
- Finding the Sweet Spot: Aim for plenty of bright, indirect light. Think of the quality of light found under the canopy of a tree – bright enough to read by, but without direct sunbeams hitting the leaves for extended periods. Near an east-facing window (receiving gentle morning sun) is often ideal. Placement a few feet back from a brighter south or west-facing window can also work well. Observe your plant’s leaves for cues – very dark green might mean not enough light, while pale or bleached leaves suggest too much.
4. Fertilizer Faux Pas: Too Much of a Good Thing
It’s natural to want to feed our prized plants, but Alocasias can be quite sensitive to over-fertilization.
- What is Fertilizer Burn? Chemical fertilizers contain salts. When used too frequently or in concentrations that are too strong, these excess salts accumulate in the soil. This buildup can damage the plant’s sensitive roots and interfere with water uptake, effectively ‘burning’ the leaf tips and edges and causing them to turn brown and crispy. This is a classic sign of alocasia fertilizer burn symptoms.
- Signs: Brown tips or edges appearing relatively soon after fertilizing can be a strong indicator.
- Safe Fertilizing Rules:
- Less is often more with Alocasias. Standard horticultural advice suggests diluting a balanced liquid houseplant fertilizer to half or even quarter strength.
- Feed only during periods of active growth, typically spring and summer. Reduce or stop feeding entirely during the slower growth months of fall and winter.
- Never fertilize a plant that is stressed (e.g., recently repotted, suffering from pests, or already showing signs of distress) or dormant.
- Flush the soil periodically (perhaps every 2-3 months during the growing season) by watering thoroughly with plain water and allowing it to drain completely. This simple step helps wash away accumulated fertilizer salts.
5. Pesky Pests Making Their Mark
Unfortunately, those stunning leaves can sometimes attract unwanted visitors.
- The Usual Suspects: Spider mites are a particularly common nuisance for Alocasias. These tiny arachnids feed by sucking sap from the leaves. Look closely (perhaps with a magnifying glass) for fine webbing, especially on the undersides of leaves and where the leaf stem (petiole) meets the leaf blade. Other signs include tiny yellow or white dots (stippling) on the leaf surface. As the infestation progresses, leaves can yellow, develop brown patches, and become dry or crispy. Other pests like thrips or mealybugs can also cause damage leading to discoloration.
- Damage Pattern: Pest damage often appears as a more general decline, widespread stippling, or patchy browning, rather than just isolated, neat brown tips.
- Actionable Tip: Prevention starts with vigilance! Make it a habit to regularly inspect your Alocasia, paying special attention to the undersides of leaves and new growth. If you spot any signs of pests, isolate the affected plant immediately to prevent the infestation from spreading to other houseplants. Treat promptly and persistently using an appropriate method, such as wiping leaves with a damp cloth, using insecticidal soap, or applying neem oil according to product instructions.
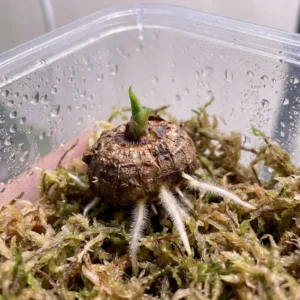
6. Acclimation Adjustment: The “New Home” Stress
Plants, like people, can experience stress when moving to a new environment.
- Why the Stress? Shifting an Alocasia from the often ideal, stable conditions of a nursery or greenhouse to the variable environment of a typical home involves changes in light intensity, temperature, and crucially, humidity levels. Even moving a plant between rooms can trigger stress.
- Normal Symptoms: It’s not uncommon for an Alocasia to react to such a change by developing a few brown leaf tips or even sacrificing its oldest, smallest leaf as it redirects energy to adapt.
- Advice: Patience is key during acclimation. Focus on providing as stable an environment as possible in its new spot. Avoid the temptation to make other major changes, like repotting, immediately after bringing it home unless absolutely necessary (e.g., if the nursery pot is waterlogged). A small amount of initial browning during this adjustment period is often temporary and not necessarily cause for alarm.
7. Water Quality Concerns: Those Hidden Minerals
Sometimes, the issue lies within the water itself, especially over the long term.
- Tap Water Troubles: Depending on your geographical location, tap water can contain varying levels of dissolved minerals (like calcium and magnesium), chlorine, and fluoride. While often fine for hardier plants, sensitive species like some Alocasias can struggle with buildup. Over time, these substances can accumulate in the potting mix and eventually concentrate in the leaf tissues, potentially leading to chemical ‘burn’ that manifests as brown, crispy alocasia brown leaf tips. Salts and fluoride are common culprits mentioned by experienced growers.
- Recommended Water: If you’ve ruled out other causes and suspect your tap water might be contributing to persistent brown tips, consider switching to alternative water sources. Filtered water (using a standard pitcher filter or reverse osmosis), distilled water, or collected rainwater are often gentler options.
- Quick Tip: While letting tap water sit uncovered for 24 hours can allow chlorine gas to dissipate, this method does not remove dissolved minerals or fluoride.
Your Alocasia Rescue Mission: Diagnosing & Treating Brown Tips
Okay, take a deep breath! You’re now armed with the knowledge of potential causes. Let’s figure out the specific issue affecting your Alocasia. It’s a process of elimination.
Step 1: Play Plant Detective – Observe Carefully
- Examine the browning: Is it primarily crispy tips? Soft edges with yellowing? Specific spots?
- Check the soil: Probe the top 1-2 inches. Is it dry? Damp? Soggy? Does the pot feel surprisingly light (dry) or heavy (wet)?
- Inspect the leaves: Look closely at both the top and undersides for any signs of pests (webs, tiny dots, actual insects).
- Assess the roots (if overwatering is suspected): Gently slide the plant out of its pot if possible. Healthy roots are typically firm and whitish or light tan. Brown, mushy, or smelly roots indicate rot. It sounds intimidating, but checking is better than guessing if you suspect root trouble!
- Review recent history: Did you recently move the plant? Repot it? Fertilize it? Has the season changed, impacting indoor heating/cooling and humidity?
- Evaluate the environment: Honestly assess the light levels throughout the day. Is the plant near a drafty window, door, or heating/AC vent? Consider using a simple hygrometer to get an actual reading of the room’s humidity.
Step 2: Connect the Clues – Identify the Likely Culprit
- Now, match your observations from Step 1 to the potential causes we’ve discussed.
- Crispy tips + soil often dry + low ambient humidity? Low humidity is a very strong suspect, possibly combined with slight underwatering.
- Soft brown/yellow edges + consistently damp or wet soil? Overwatering or poor drainage is highly likely. Check those roots!
- Brown tips appeared shortly after feeding? Fertilizer burn is probable.
- Webbing or tiny dots under leaves + general leaf decline? Pests are likely the issue.
- Plant is new or recently moved + minor tip browning? Could just be acclimation stress.
- Persistent crispy tips despite good humidity and watering? Consider water quality or past fertilizer buildup.
Step 3: Take Action! – Applying the Right Fix
- Based on your diagnosis, implement the appropriate solution:
- Watering Issue: Adjust your watering frequency or technique. If overwatered with root rot, carefully trim away dead roots with clean shears, perhaps treat remaining roots with a fungicide solution (optional), and repot into fresh, well-draining soil in an appropriately sized pot. If underwatered, water more consistently.
- Low Humidity: Deploy your chosen humidity-boosting strategy consistently (humidifier is often best).
- Light Issue: Relocate the plant to a spot with more suitable bright, indirect light.
- Fertilizer Burn: Flush the soil thoroughly by letting plain water run through the pot several times. Withhold fertilizer for at least a month or two.
- Pests: Treat diligently and repeatedly with your chosen method (insecticidal soap, neem oil, etc.). Remember to treat the undersides of leaves too.
- Acclimation: Provide stable conditions and give the plant time to adjust.
- Water Quality: Switch to filtered, distilled, or rainwater for future waterings.
To Trim or Not to Trim? Dealing with the Brown Bits
The brown tissue on the leaves, unfortunately, will not turn green again. But should I cut brown tips off alocasia? Many people do, purely for aesthetic reasons. If you choose to trim, use clean, sharp scissors or pruning shears. To minimize stress to the healthy tissue, make your cut just slightly into the brown area, leaving a very thin margin of brown bordering the green. This helps prevent the fresh cut on the green tissue from potentially browning further. Remember, trimming is cosmetic; it doesn’t solve the underlying problem causing the browning in the first place.
Prevention is Better Than Cure: Keeping Leaves Lush & Green
Want to minimize future brown tip dramas? Proactive care focused on providing a stable and suitable environment is your best strategy!
- Master Consistent Watering: Learn your Alocasia’s rhythm. Get used to checking the soil before watering. Water thoroughly when the top layer is dry, and always ensure excess water drains away freely.
- Create a Humid Haven: This is non-negotiable for most Alocasias. Consistently provide high humidity (aiming for increasing humidity for alocasia plants to 60%+) using a humidifier, pebble trays, or grouping plants, especially during dry seasons or when indoor heating/cooling is active.
- Perfect the Light Situation: Find that sweet spot of bright, indirect light and try to keep the plant there. Gently rotating your plant every week or so encourages even growth.
- Fertilize Mindfully: Remember the “less is more” mantra. Dilute fertilizer properly, feed only during active growth, and consider periodic soil flushing to prevent salt buildup.
- Stay Vigilant with Pest Patrols: Make regular inspections (especially leaf undersides) part of your plant care routine. Early detection makes pest management significantly easier.
- Consider Water Quality Long-Term: If your tap water is known to be hard or high in minerals/fluoride, consistently using filtered, distilled, or rainwater can prevent gradual buildup issues.
Happy Alocasia Parenting: You’ve Got This!
Alocasias truly are magnificent statement plants, but yes, they do ask for a bit more specific attention than some of their more laid-back houseplant cousins. Seeing brown tips can certainly be disheartening initially, but try to view it as a communication – your plant is signaling a need. It’s a lesson many of us plant parents learn along the way!
By diligently addressing their needs for consistent moisture (but not sogginess!), providing that crucial high humidity, ensuring they receive the right amount of bright, indirect light, and being mindful with feeding and pest checks, you can absolutely cultivate lush, healthy, and stunning Alocasia leaves.
Don’t get discouraged by the learning curve. Celebrate each new leaf, learn from any setbacks, and most importantly, enjoy the rewarding journey of watching your incredible Alocasia thrive under your care. Happy growing!