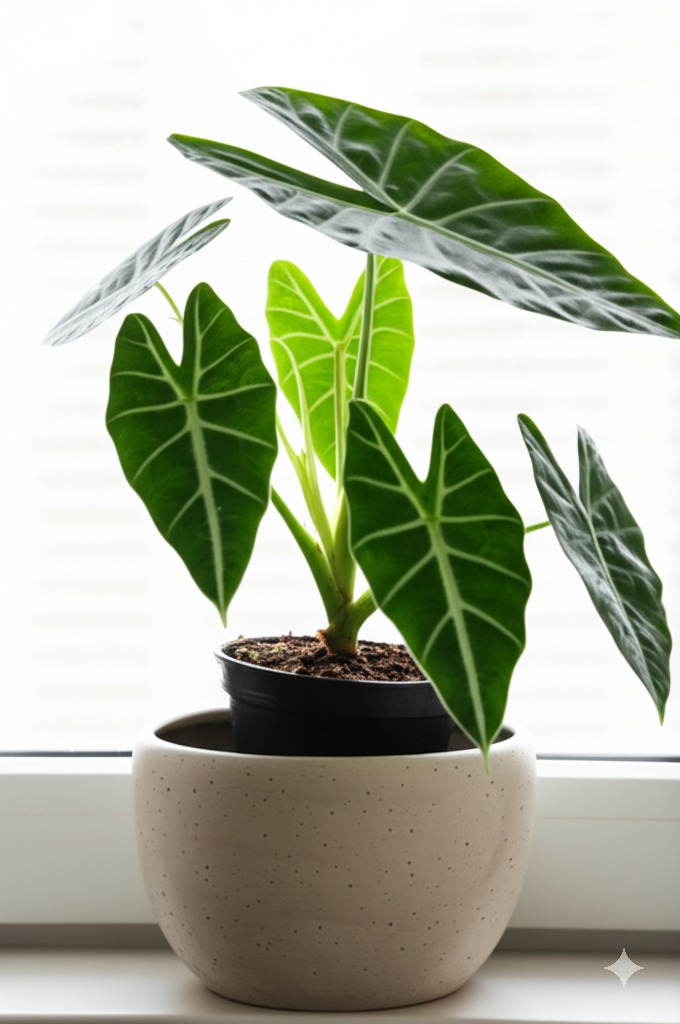
Hey there, fellow Alocasia admirers! Alex here. If you’re anything like me, you’re absolutely captivated by the stunning beauty of Alocasias – those incredible ‘jewel’ plants with their dramatic leaves. But let’s be honest, they can sometimes make us sweat when it comes to watering, right? Finding that perfect balance between consistently moist and disastrously soggy can feel like a tricky dance.
Too dry? Crispy edges and sad drooping. Too wet? Hello, dreaded root rot! It’s enough to make even seasoned plant parents a little nervous.
But what if there was a way to provide more consistent moisture, reduce some of that watering guesswork, and maybe even survive a short weekend away without sacrificing your leafy treasures? Enter the DIY self-watering pot setup for Alocasias! While not a magic bullet (and we’ll definitely talk about the cautions!), creating your own simple system can be a game-changer if done right. Ready to give your Alocasia a potential upgrade? Let’s dive in!
Jump to Sections
ToggleLet’s Talk Alocasias and Water: Why Consider a DIY Self-Watering Pot?
The Famous Alocasia Watering Dance: Finding That Perfect Balance
First, let’s quickly recap why Alocasias can be particular. Originating from humid, tropical environments, they love consistent moisture around their roots. They don’t want to dry out completely like a succulent. However, they absolutely detest sitting in stagnant water. Their roots need oxygen, and soggy soil is the fastest way to suffocation and the feared root rot, often signaled by those alarming yellowing lower leaves or mushy stems. It’s this need for ‘evenly moist but never soggy’ that makes watering a frequent point of concern for many growers.
How Self-Watering Planters Can Help Your Alocasia Thrive
This is where using self-watering planters for Alocasia potentially shines. These systems work on a simple principle: a reservoir holds water, and a wick (or sometimes the pot material itself) draws water up into the soil via capillary action, acting like a slow, steady straw for your plant. Experienced growers often find these benefits:
- Consistent Moisture: This method aims to provide a steadier supply of moisture to the roots compared to the typical wet-dry cycles of traditional top watering. This consistency can reduce stress on the plant.
- Reduced Underwatering Risk: If you sometimes forget to water or your schedule is unpredictable, a self-watering pot can act as a helpful buffer, keeping the soil appropriately moist for longer periods.
- Convenience: Let’s face it, checking a water reservoir periodically can sometimes feel easier than assessing soil moisture every few days, especially if you have a growing plant family.
Important Considerations: Is This System Right for Your Alocasia?
Now, before you enthusiastically gather supplies, a friendly but crucial word of caution! Self-watering pots are NOT a guaranteed success for Alocasias without care. According to standard practices in houseplant care, be mindful of these points:
- Overwatering Risk is Real: If the soil mix isn’t exceptionally airy, or if you keep the reservoir constantly topped up, you can inadvertently create the exact soggy conditions Alocasias despise. Careful management is absolutely essential.
- Soil Choice is Paramount: You simply cannot use heavy, dense potting soil in this setup for an Alocasia. You must use a very well-draining, airy mix designed to allow oxygen flow even with constant moisture access. We’ll detail this shortly!
- Requires Diligence: This isn’t a ‘set and forget’ solution. You still need to actively monitor the plant’s health, the soil moisture (not just the reservoir level!), and perform occasional maintenance like flushing the soil.
So, should you try it? If you fully understand the risks and are prepared to use the right soil and monitor diligently, then yes, it can be a fantastic tool in your Alocasia care arsenal! Knowing the ‘why’ behind these needs helps us build a better system, so let’s look at the materials.
Gathering Your Gear: What You Need for This DIY Self-Watering System
Alright, ready to build? It’s likely simpler than you imagine! Here’s your shopping list:
Pot Selection: Finding the Perfect Inner and Outer Containers
- Inner Pot: This holds your Alocasia and its soil. A standard plastic nursery pot with ample drainage holes is ideal. Select a size that comfortably houses your Alocasia’s current root ball plus a little extra room (perhaps an inch wider).
- Outer Pot (Reservoir): This container must be waterproof (no drainage hole!) and slightly larger than your inner pot, both in width and height. Think decorative cache pots, sturdy plastic containers, or even suitable glass jars. The critical factor is that the inner pot should sit inside with its base elevated from the bottom of the outer pot, creating space underneath for the water reservoir and that all-important air gap.
The Magic Wick: Choosing Your Wicking Material
The wick is the vital bridge delivering water to the soil.
- Good Options: Synthetic materials like polyester rope, nylon cord, or strips cut from thick felt or microfiber cleaning cloths work very well. They efficiently wick moisture and crucially resist rotting in constantly damp conditions. Many users find these last longer.
- Use Caution With: Natural fibers like cotton rope can wick water, but they tend to degrade and rot much faster in the moist soil environment, potentially failing over time.
- Size Matters: Cut a piece long enough to rest on the bottom of your outer pot’s reservoir and extend several inches (aim for at least 1/3 to 1/2 way up) into the soil mix inside the inner pot. For larger pots, using two or even three wicks can ensure more even moisture distribution.
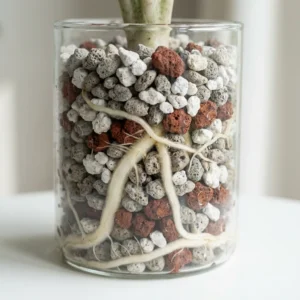
The Secret Sauce: Crafting an Alocasia-Approved Airy Soil Mix
This step is arguably the MOST critical element for success with a self watering pot alocasia. Standard bagged potting mix is almost always too dense and water-retentive for this purpose. You need to create (or buy) something chunky, light, and extremely airy!
- Why So Airy? It allows vital oxygen to reach the roots even when moisture is constantly being wicked upwards. This airflow is your best defense against root rot.
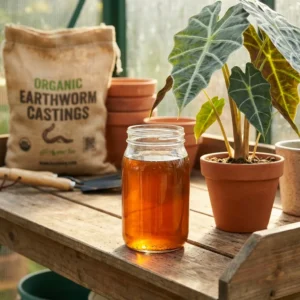
- A Great DIY Mix Recipe: A reliable starting point, often recommended by houseplant enthusiasts, is combining roughly equal parts of:
- 1 part high-quality indoor potting mix
- 1 part perlite (essential for aeration)
- 1 part orchid bark or coco chips (adds chunkiness and air pockets)
- Feel free to adjust ratios based on your conditions, but the goal is always significantly improved drainage and aeration compared to standard soil. Coco coir-based mixes amended with perlite/bark are also excellent choices.
Step-by-Step: Building Your Homemade Self-Watering Pot for Alocasia
Let’s put it all together! Here’s how to assemble your diy self watering system houseplants style:
Step 1: Prepare Your Pots and Thread the Wick(s)
- Ensure both your inner and outer pots are clean.
- Take your inner pot. Thread one end of your wick (or wicks) up through one or more of the drainage holes near the center. Pull enough through so that several inches are dangling inside the pot, ready to be surrounded by soil. The longer end should hang freely below the pot.
Step 2: Add a Base Layer of Your Airy Soil Mix
- Place a layer (an inch or two) of your custom airy Alocasia mix into the bottom of the inner pot. Arrange the wick end(s) within this layer, ensuring they make good contact with the soil.
Step 3: Planting or Repotting Your Alocasia
- Gently ease your Alocasia from its previous pot. Try to disturb the root ball as little as possible, unless it’s severely pot-bound and needs gentle loosening.
- Position the plant onto the base soil layer in the inner pot.
- Carefully fill the surrounding space with more of your airy soil mix, bringing the level up to about an inch below the pot’s rim. Gently firm the soil around the roots – just enough to support the plant, avoid hard packing! Remember, air pockets are good here.
Step 4: The Crucial First Watering and Reservoir Fill
- DON’T SKIP THIS: The very first time, water your Alocasia thoroughly from the top, letting water soak the entire soil volume and drain freely through the bottom holes. This settles the soil, removes large air pockets near the roots, and fully saturates the wick to kickstart the capillary action. It’s a fundamental step.
- Let the inner pot drain completely for several minutes.
- Now, carefully place the inner pot into its outer reservoir pot.
- Add fresh, room-temperature water to the outer pot (the reservoir). A good starting point is filling it about 1/4 to 1/3 full. Critically, check that the water level remains BELOW the bottom of the inner pot. Maintaining this air gap is vital for root health!
Using Your New Setup: Best Practices for Thriving Alocasias
Construction complete! Now comes the ongoing care. Effective self watering pot alocasia care is all about observation and understanding how the system works with your plant.
The Golden Rule: Monitor, Monitor, Monitor!
Please, please resist the temptation to treat this as a completely ‘set and forget’ system, especially during the first few weeks as you and your plant adjust.
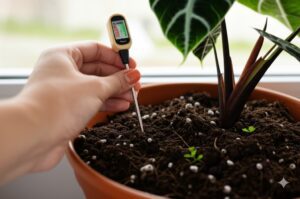
- Check Reservoir Level: Peek at the water level in the reservoir periodically (maybe weekly, adjust as needed).
- Check Topsoil Moisture: This is arguably more important. Regularly stick your finger an inch or two deep into the soil. Does it feel slightly moist? Perfect. Is it consistently soaking wet even days after filling the reservoir? That’s a red flag! Is it surprisingly dry? Another issue to investigate (wick function). Your observations here should guide your actions.
Refilling the Reservoir: Timing is Everything
This practice is absolutely key to preventing root rot in sensitive Alocasias within this system.
- Don’t Keep it Constantly Full: Avoid topping up the reservoir the instant the water level drops a bit.
- Embrace the Slight Dry-Down: It’s generally best to allow the reservoir to become nearly empty. Ideally, wait until the top inch or so of the soil begins to feel slightly dry to the touch before you refill the reservoir. This brief ‘drying’ interval allows essential oxygen to reach the root zone. Trust me, checking that reservoir isn’t just a suggestion – I learned the hard way early on that assuming it’s ‘probably fine’ can lead to a sad, waterlogged Alocasia! It’s a common lesson many plant parents learn.
Flushing the System: Preventing Mineral Buildup
Over time, as water constantly wicks upwards and evaporates, minerals from your tap water and leftover fertilizer salts can accumulate in the soil.
- Why Flush? This buildup can eventually burn roots and hinder growth, a common issue noted in long-term container gardening.
- How Often? A routine flush every 1-3 months is a sensible preventative measure, adjust based on your water quality and fertilizing habits.
- How To: Simply lift the inner pot out of the reservoir. Take it to a sink or tub. Water thoroughly from the top with fresh water, allowing a good amount to flow through and drain out completely. This helps dissolve and wash away accumulated salts. Empty any dirty water from the reservoir before placing the inner pot back. Refill the reservoir only if needed based on the ‘Timing is Everything’ principle.
Fine-Tuning for Different Alocasia Varieties and Conditions
Keep in mind that not all Alocasias are created equal. A large Alocasia Zebrina in bright light will use water much faster than a small Alocasia Black Velvet in lower light. Environmental factors like temperature and humidity also play a big role. Observe your specific plant’s response and adjust your monitoring and refilling schedule accordingly. What works perfectly for one might need tweaking for another.
Uh-Oh! Troubleshooting Common Self-Watering Pot Issues with Alocasias
Even with careful setup, sometimes things need adjusting. Here’s how to tackle common problems:
Help! Signs of Overwatering (and Quick Fixes)
- Symptoms: Classic signs include yellowing lower leaves (often becoming mushy), a waterlogged appearance at the plant base, persistently wet topsoil that never seems to dry slightly, or an increase in fungus gnats attracted to the dampness. These are widely recognized signs of excess moisture stress.
- Action: First, stop adding water to the reservoir immediately! Let the entire system dry out considerably. Double-check that your soil mix is genuinely airy – if it feels heavy or compacted, you might need to repot with a chunkier, better-draining mix. Ensure that crucial air gap exists between the inner pot’s base and the water line. Improving air circulation around the plant itself can also help the soil surface dry more effectively. Addressing these factors greatly helps in preventing root rot Alocasia self watering pot issues.
Is My Wick Working? Ensuring Proper Water Flow
- Symptom: The reservoir contains water, but the soil (especially the upper layers) feels consistently too dry.
- Action: Carefully lift the inner pot. Is the wick still making good contact with the soil? Has it become clogged or perhaps degraded (less likely with synthetics)? Is it definitely long enough to reach the water in the reservoir? You might need to gently reposition the wick within the soil or, in rare cases, replace it. Also, confirm you performed that initial top-watering correctly to establish the capillary connection – sometimes it just needs a restart.
Dealing with Pests (Yes, They Can Still Happen!)
- This setup doesn’t grant immunity from pests. Regularly inspect your Alocasia, especially the undersides of leaves, for common culprits like spider mites and thrips, which these plants can unfortunately attract regardless of the watering method.
- If the very top layer of soil stays consistently damp (often a sign the soil isn’t airy enough or the reservoir is kept too full), you might find fungus gnats become more noticeable. Allowing that top inch to dry slightly between reservoir refills is your best defense against them.
Happy Alocasia Parenting: Enjoy Your DIY Self-Watering Success!
Creating a DIY self-watering pot setup for your Alocasia can be a truly satisfying project! When implemented thoughtfully – using that essential airy soil mix and practicing diligent monitoring – it can genuinely contribute to providing the consistent moisture your stunning Alocasia loves, paving the way for happier roots and more vibrant growth.
Remember, the system is a tool; keen observation of your plant is still the most important skill. Don’t hesitate to tweak the process based on your plant’s response. Perhaps start with just one Alocasia to get a feel for it before converting your whole collection – it’s often wise to test new methods first.
Happy growing, Alocasia aficionados! I hope this guide helps you and your leafy jewels thrive!