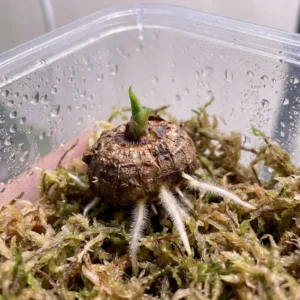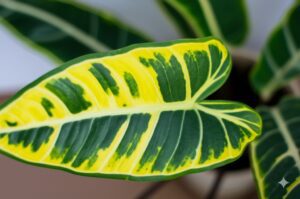
Hello fellow Alocasia enthusiasts! I’m Alex, and like many of you, I’m absolutely captivated by the stunning beauty of Alocasias. From the striking veins of a ‘Polly’ to the velvety depths of a ‘Black Velvet’ or the graphic patterns of a ‘Zebrina’, these plants truly are jewels. But let’s be honest, discovering pests setting up camp on those gorgeous leaves can be incredibly frustrating!
It happens to the best of us. Those tiny invaders can appear seemingly overnight. One popular weapon in the houseplant parent’s arsenal is Neem Oil, often recommended as a go-to for organic pest control for alocasia. But here’s the thing: Alocasias can be a bit sensitive, and using neem oil correctly is key to winning the pest battle without harming your precious plant.
So, grab a cup of tea, and let’s walk through this together. This guide will cover exactly how to use neem oil alocasia safely and effectively, and just as importantly, when you should definitely put that spray bottle down. Our goal? Healthy, happy, thriving Alocasia jewels in your home!
Jump to Sections
ToggleWhat Exactly is Neem Oil? Your Plant’s Natural Bodyguard
First off, what is this stuff? Neem oil comes from the seeds of the Neem tree (Azadirachta indica), native to India and Southeast Asia, where it’s been used for centuries. It’s not like a harsh chemical insecticide that kills instantly. Think of it more like a strategic natural bodyguard for your plants.
Its power comes mainly from a compound called Azadirachtin. This magic ingredient messes with pests in several ways: it discourages them from feeding, acts as a repellent, and interferes with their hormone systems, preventing them from growing and reproducing properly. The oil itself also helps by coating and suffocating smaller, soft-bodied insects like spider mites and aphids on contact.
Choosing neem oil is a great step towards organic pest control for alocasia. It’s biodegradable and targets a range of common plant pests, making it a versatile tool when used correctly according to standard horticultural advice.
Spotting the Enemy: Common Alocasia Pests Neem Oil Tackles
Before you spray, know your target! Neem oil is most effective against these common Alocasia troublemakers:
- Spider Mites: Ah, the dreaded spider mites! These are probably the most common pest Alocasia parents encounter. Their large, often thin leaves can unfortunately be attractive targets, especially for pests like spider mites that thrive in the warm, dry indoor conditions often found in homes. They are tiny (like moving dots) and often hang out on the undersides of leaves. Tell-tale signs include tiny yellow stippling on the leaves and fine webbing in advanced cases. Neem oil is a strong contender against spider mites, especially when you catch them early and are persistent with applications.
- Mealybugs: These look like little bits of white cotton fluff, often tucked into leaf joints or along stems. Neem oil works best on the younger, mobile ‘crawler’ stage. The waxy coating on adults gives them some protection, so repeated sprays are often necessary.
- Aphids: These small, often green or black, pear-shaped insects tend to cluster on new growth or the undersides of leaves. Being soft-bodied, they are generally susceptible to neem oil on contact.
- Thrips (Mention): These are tiny, slender insects that can cause silvery streaks or spots on leaves. Neem can help manage thrip larvae and deter adults, but established infestations can be tricky.
Remember, neem oil works best on contact and disrupts the pest’s life cycle over time. Using neem oil for spider mites on alocasia, for example, requires patience and repeat treatments to catch successive generations.
Choosing Your Neem: Concentrate vs. Ready-to-Use Sprays
You’ll generally find two main types of neem oil products:
- 100% Cold-Pressed Neem Oil (Concentrate): This is the pure stuff, containing the highest levels of Azadirachtin.
- Pros: Generally the most potent and effective, more cost-effective in the long run as you dilute it yourself. Gives you control over the concentration.
- Cons: Requires careful measuring, mixing, and adding an emulsifier (a mild soap) to help it mix with water.
- Recommendation: Ideal if you’re dealing with a persistent pest issue and are comfortable with the mixing process, as many experienced growers prefer this method for control.
- Ready-to-Use (RTU) Neem Sprays: These come pre-diluted in a spray bottle.
- Pros: Super convenient – just shake and spray! Great for beginners or quick treatments.
- Cons: Can sometimes be less potent than a freshly mixed concentrate, often more expensive per application. Check the ingredients – some RTU sprays might contain other chemicals you don’t want if aiming for purely organic.
- Recommendation: Excellent for ease of use, especially if you only need it occasionally. Just be sure to check the label to understand what you’re spraying.
The bottom line: Whichever you choose, always read and follow the product label instructions carefully!
The Safe Application Method: Step-by-Step Guide for Alocasias
Alright, let’s get practical. Here’s how to apply neem oil safely to your precious Alocasias:
Step 1: Gather Your Gear
- Your chosen Neem Oil product (Concentrate or RTU)
- If using concentrate: Mild liquid soap (like pure Castile soap, specific insecticidal soap brands, or unscented Dr. Bronner’s – definitely NOT dish detergent like Dawn, which can strip protective layers from leaves)
- Measuring spoons (if mixing)
- A clean spray bottle ( dedicating one for neem is wise due to the smell)
- Lukewarm water (not cold, not hot)
- Gloves (optional, but a good idea to avoid getting the distinctively smelling oil on your hands)
Step 2: The Crucial Patch Test – Don’t Skip This for Your Alocasia!
I cannot stress this enough: Alocasia leaves can be sensitive! Before you douse your entire plant, always perform a patch test. Trust me, taking a minute for a patch test can save you the heartache of finding scorched spots on a favourite leaf – a lesson many plant parents learn the hard way!
- How: Mix up a small batch of your neem solution (or use your RTU spray). Spray it on one or two inconspicuous leaves, preferably older ones lower down the plant. Make sure to spray the top and underside.
- Wait: Leave it for 24-48 hours.
- Check: Carefully inspect the test leaves for any signs of damage – yellowing, brown spots, burnt edges, or wilting.
- Proceed (or Stop): If the test leaves look perfectly fine after 48 hours, you’re likely good to go! If you see any negative reaction, do not spray the rest of the plant with that concentration or product. You might need to dilute it further (if using concentrate and the reaction was mild) or choose a different pest control method entirely.
Step 3: Mixing Your Neem Solution (If Using Concentrate)
If your patch test was successful and you’re using concentrate:
- Ratio: A common starting point for how to mix neem oil for houseplants is 1 teaspoon (5ml) of 100% Cold-Pressed Neem Oil plus ½ teaspoon (2.5ml) of MILD liquid soap per 1 Quart (approximately 1 Liter) of lukewarm water. This neem oil concentration for plants is a general guideline; always check your specific product label as potency can vary.
- Mixing Order: This is important for emulsification (helping the oil mix with water). Add the mild soap to the lukewarm water first and gently swish it around. THEN, add the neem oil.
- Shake it Up: Close the spray bottle tightly and shake vigorously. You’ll need to shake it well before you start spraying and periodically during application, as the oil and water will naturally try to separate over time.
Step 4: Technique for Spraying Alocasia Leaves with Neem Oil
Okay, time to spray!
- Timing is Everything: The best time to apply neem oil indoors is in the evening or very early morning when light levels are low. Never spray in direct sunlight or when the plant will receive direct sun shortly after. The combination of oil and intense light can act like a magnifying glass and scorch those beautiful leaves.
- Coverage is Key: Mist the plant thoroughly when spraying alocasia leaves with neem oil. Pay special attention to the undersides of the leaves, as this is where pests like spider mites love to hide. Get the tops of the leaves, the petioles (leaf stalks), and the main stems too.
- Goal: Aim for an even coating, but not so much that the solution is pooling heavily or dripping excessively off the leaves. You generally want to avoid soaking the soil unless you’re specifically targeting soil-dwelling pests (which neem foliar spray isn’t ideal for anyway, requiring different methods like soil drenches which carry their own risks).
- Post-Spray: Keep your Alocasia out of direct sunlight for at least 24 hours after spraying to minimise any risk of leaf burn. Provide good air circulation if possible.
Red Flags: When You Should NOT Use Neem Oil on Your Alocasia
Knowing when not to use neem oil is just as important as knowing how to use it. Hold off on spraying if:
- Your Alocasia is Stressed: Is it freshly repotted? Suffering from root rot, severe underwatering, showing signs of shock, or battling another disease? Stressed plants are weaker and more susceptible to damage from any treatment. Let it recover and stabilize first.
- It’s in Direct Sunlight or High Heat: This significantly increases the risk of neem oil burn on alocasia leaves. Wait for cooler temperatures and lower light conditions, typically evening.
- Your Patch Test Failed: If the test leaves showed burning, spotting, or other damage, listen to your plant! Don’t use it.
- You’re Treating Very Young, Tender New Leaves: These are often more sensitive. Either avoid spraying them directly or be extra cautious and definitely patch test if pests are present there. Standard advice suggests waiting for leaves to harden off slightly.
- You Have a Massive, Out-of-Control Infestation: While neem is great for management, a huge outbreak might require a faster initial knockdown. Consider physically wiping off as many pests as possible or using a contact spray like insecticidal soap first, then following up with neem oil for ongoing control and to target remaining pests and potential eggs.
- You Have Fish or Aquatic Pets Nearby: Neem oil can be harmful to aquatic life. Be mindful of overspray or runoff if you have tanks in the vicinity.
After the Spray: What to Expect and Follow-Up Care
So, you’ve sprayed your Alocasia. What now?
- Be Patient: Remember, neem oil isn’t an instant kill chemical. It works strategically by disrupting the pests’ life processes. You should start seeing a reduction in activity over several days as they stop feeding, fail to molt properly, or can’t reproduce.
- Monitor Closely: Keep inspecting your plant regularly (especially those leaf undersides!) to see if the pest population is declining. Use a magnifying glass if needed for tiny pests like spider mites.
- Repeat Applications: This is usually necessary! Pests like spider mites have fast life cycles, and neem oil doesn’t always kill all stages (like hardy adults or hidden eggs) with one spray. To effectively break the cycle, plan on determining how often to spray neem oil on indoor plants for an active infestation: typically every 5-7 days for at least 2-3 weeks is a common recommendation. Consistency is your friend here!
- Keep Up the Good Work: Don’t get discouraged if you still see a few pests after the first or second spray. Persistence really does pay off in winning the battle!
Thinking Bigger: Neem Oil within Integrated Pest Management (IPM)
While neem oil is a fantastic tool, it’s often most effective as part of a larger strategy – what growers call Integrated Pest Management (IPM). Think of it as building multiple layers of defense for your Alocasia:
- Inspect Regularly: Make it a habit to closely examine your Alocasias (tops and bottoms of leaves, stems) every week or whenever you water. Catching pests early makes them much easier to deal with.
- Keep Leaves Clean: Gently wiping down leaves with a damp cloth periodically not only keeps them looking gorgeous but also physically removes some pests, eggs, and dust that mites love.
- Optimize Humidity: Spider mites, in particular, thrive in dry conditions common indoors. Increasing humidity around your Alocasia (using a humidifier, grouping plants, or using a pebble tray) can make the environment less inviting for them.
- Quarantine New Plants: Always isolate new plants away from your existing collection for at least a few weeks. This prevents hitchhiking pests from spreading like wildfire.
- Consider Alternatives: Sometimes, another tool might be needed alongside or instead of neem. Insecticidal soap is great for a quick knockdown of soft-bodied insects on contact with less residual effect. Physical removal (wiping, dabbing with isopropyl alcohol on a Q-tip for stubborn mealybugs) is always an option too.
This holistic approach to alocasia pest treatment gives you the best chance of keeping those jewel-like leaves healthy and pest-free long-term.
Conclusion: Confidently Caring for Your Alocasia Jewels
So there you have it! Neem oil can be a truly valuable ally in protecting your beautiful Alocasias from common pests, if you use it correctly and respect its limitations.
The key takeaways? Always, always patch test first – it’s non-negotiable for these potentially sensitive beauties. Mix and apply carefully, paying close attention to timing and light exposure. And know the red flags – understanding when not to spray is crucial for preventing accidental harm.
Don’t worry if pests appear – it’s a common challenge in plant parenthood! With careful observation, consistent care, and the right tools used wisely, you’ve absolutely got this. Here’s to enjoying the stunning beauty of your happy, healthy, and pest-free Alocasia jewels!