Hey there, fellow Alocasia admirers! If you’ve fallen for the stunning, dramatic foliage of these ‘jewel’ plants, you know they can sometimes be a little particular about their care. But don’t let that intimidate you! One area that often causes confusion is feeding, or fertilizing. Get it right, and you’ll be rewarded with lush, vibrant growth. Get it wrong, and… well, let’s just say Alocasias aren’t shy about showing their displeasure!
This guide is here to demystify fertilizing Alocasia plants. We’ll break down exactly what they need, when they need it, and crucially, how much to give them, ensuring your beauties thrive. Ready to unlock the secret to happier, healthier Alocasias? Let’s dig in!
Jump to Sections
ToggleWhy Your Alocasia Needs the Right Food: Fueling Those Jewel Leaves
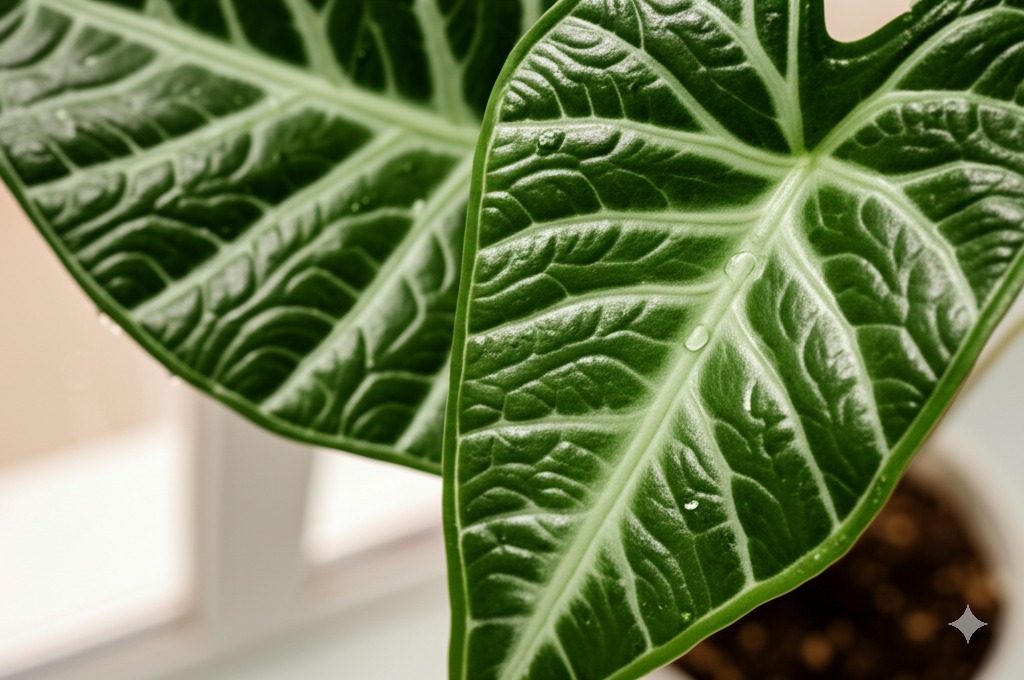
Think of those magnificent Alocasia leaves – some varieties boast enormous, intricate patterns! Producing and maintaining that impressive foliage takes energy and nutrients. While your potting mix initially provides some food, your plant will eventually use up those resources, especially during periods of active growth.
That’s where fertilizer comes in. It’s like a multivitamin for your plant, replenishing the essential elements it needs to keep pushing out those gorgeous leaves and stay healthy overall. Providing the right nutrients at the right time is a key part of successful Alocasia care and feeding. Don’t worry, it’s much simpler than it sounds!
Choosing the Best Fertilizer for Alocasia Growth: Decoding the ‘What’
Walking down the fertilizer aisle (or browsing online) can feel overwhelming. So many options! Let’s simplify it for our beloved Alocasias.
Understanding Fertilizer Basics: NPK Explained Simply
You’ll often see three numbers on fertilizer packaging, like 10-10-10 or 20-20-20. This is the NPK ratio, representing the percentage of three main macronutrients:
- N (Nitrogen): The leaf-grower! Essential for lush, green foliage.
- P (Phosphorus): Focuses on roots, flowers, and fruit development. Important, but Alocasias are primarily grown for leaves.
- K (Potassium): The all-rounder, supporting overall plant health, resilience, and functions like water uptake.
Good quality fertilizers also include micronutrients (like iron, magnesium, zinc) which are vital in smaller amounts. Look for these listed on the label too!
Liquid Gold: Why Liquid Fertilizer Often Wins for Alocasias
For most indoor Alocasias, a liquid fertilizer is generally preferred. Why? Control! You can easily measure and dilute it precisely, which is super important for these potentially sensitive plants. The nutrients are readily available for the roots to absorb (when diluted correctly, of course!). Using liquid fertilizer for Alocasia gives you the most immediate control over feeding.
What About Granular or Slow-Release Fertilizers?
Granular fertilizers need to be broken down in the soil, and slow-release pellets release nutrients over time. They offer convenience – feed it and forget it for a while. However, it’s much harder to control the rate of nutrient release. Temperature and watering frequency can affect how quickly they break down, increasing the risk of accidentally releasing too much at once and burning delicate Alocasia roots. While some growers use slow-release fertilizer on Alocasia successfully (often mixed sparingly into soil at repotting), liquid offers more safety, especially for beginner and intermediate owners.
Finding the Ideal Balance: The Best Fertilizer Ratio for Alocasia
Keep it simple: a balanced fertilizer is usually perfect. Look for formulas where the NPK numbers are roughly equal, like 10-10-10 or 20-20-20. An NPK like 3-1-2 is also commonly recommended for foliage houseplants. Avoid high-Phosphorus “bloom booster” fertilizers, as heavy flowering isn’t the primary goal for most Alocasia varieties. The key is finding a good quality, balanced Alocasia fertilizer ratio.
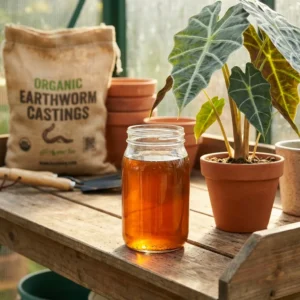
Considering Gentle Giants: Organic Fertilizer Options
If you prefer an organic approach, options like worm castings (you can mix into the topsoil or brew into a “tea”), fish emulsion, or seaweed extract are great choices. These are generally gentler and less likely to cause fertilizer burn. They also contribute to overall soil health. The downside? Nutrients are released more slowly as soil microbes break them down, and some (like fish emulsion) can have a distinct odor for a day or two. Using organic fertilizer for Alocasia can be a fantastic supplement or alternative if you’re cautious about synthetics.
Timing is Everything: The ‘When’ and ‘How Often’ of Fertilizing Alocasia
Okay, you’ve picked your fertilizer. Now, when and how often do you actually use it?
Feed Me! Fertilizing During the Active Growing Season
Alocasias do most of their growing during the spring and summer months. This is when they appreciate – and need – regular feeding. Look for signs of active growth: new leaves unfurling, noticeable increase in size. That’s your cue!
Finding the Sweet Spot: How Often Should I Fertilize My Alocasia?
Here’s a common question: how often should i fertilize my alocasia? During the active growing season (spring/summer), a good rule of thumb is to feed your Alocasia with diluted fertilizer every 2 to 4 weeks.
- If your plant is pushing out new leaves rapidly, feeding every 2 weeks might be beneficial.
- If growth is steady but slower, every 3-4 weeks is likely sufficient.
- Always observe your plant! It’s the best indicator.
Winter Rest: Why You Should Stop Fertilizing Alocasia in Fall/Winter
As days get shorter and temperatures cool in fall, Alocasias naturally slow down their growth. Some may even go dormant. During this time, they aren’t actively using nutrients. Stop fertilizing (or drastically reduce frequency to maybe once every 6-8 weeks if it’s still showing some slow growth in a warm, bright spot). Fertilizing Alocasia in winter is unnecessary and can lead to harmful salt buildup in the soil when the plant isn’t using the nutrients. Give them their beauty sleep!
Quick Tip: What About Fertilizing After Repotting?
Just repotted your Alocasia into fresh soil? Hold off on the fertilizer! Fresh potting mix usually contains enough nutrients for the first few weeks, and more importantly, the plant needs time to settle its roots without the added stress of fertilizer salts. Wait at least 4-6 weeks after repotting before resuming your normal (diluted!) fertilizing schedule.
The Perfect Portion: Getting the ‘How Much’ Fertilizer Right
This might be the most crucial part of fertilizing Alocasias. They have sensitive roots that are easily burned by too much fertilizer.
The Golden Rule: Dilute, Dilute, Dilute!
Whatever fertilizer you choose, DO NOT use it at full strength! Always dilute it much more than the label might suggest for other plants.
- Start with 1/4 strength: Mix your liquid fertilizer to one-quarter of the concentration recommended on the packaging.
- Maybe move to 1/2 strength: If your plant is growing well and shows no signs of stress after a few feedings at 1/4 strength, you might increase to 1/2 strength. But honestly, sticking with 1/4 strength is often perfectly fine and much safer.
- Think “weakly, bi-weekly/monthly.” It’s far better to provide a little bit regularly than too much at once. Remember
how much fertilizer for Alocasiais needed – less is more! Properdiluting of fertilizer for Alocasiais paramount.
How to Apply Fertilizer Safely and Effectively
Follow these simple steps for happy roots:
- Water First: This is non-negotiable! Always water your Alocasia thoroughly with plain water and let it drain before you fertilize. Applying fertilizer to dry soil is a recipe for root burn.
- Mix Your Dose: Prepare your fertilizer solution, diluted to 1/4 or 1/2 strength.
- Apply to Soil: Gently pour the diluted fertilizer solution evenly over the soil surface, aiming for the roots, not the leaves.
- Drainage is Key: Add enough solution so that a little bit starts to drip from the pot’s drainage holes. This ensures the entire root ball gets moistened. Discard any excess water sitting in the saucer after about 15-20 minutes to prevent soggy roots.
Spring Cleaning for Roots: The Importance of Flushing the Soil
Even with careful fertilizing, salts can gradually build up in the potting mix over time. Every few months (say, 3-4 times a year), it’s a good idea to “flush” the soil. Simply water your plant thoroughly with plenty of plain water, letting it run freely through the drainage holes for a minute or so. This helps wash away any excess accumulated salts and gives the roots a fresh start.
Reading the Signs: Avoiding Common Alocasia Fertilizing Mistakes
Alocasias are quite good at telling us when something’s wrong. Pay attention to their leaves!
Uh Oh! Spotting the Signs of an Overfertilized Alocasia
Giving too much food is a common mistake, especially for enthusiastic plant parents! Look out for these overfertilized Alocasia signs:
- Brown, crispy leaf tips or edges: The classic symptom of fertilizer burn.
- White, crusty buildup: You might see this on the soil surface or around the rim of the pot (excess salts).
- Yellowing lower leaves: While other things cause this too, sudden yellowing after fertilizing can be a sign.
- Stunted or deformed new growth: The plant is stressed and can’t grow properly.
- Wilting: Even if the soil feels moist, severe root burn can prevent water uptake, causing wilting.
If you suspect over-fertilizing, flush the soil immediately with plenty of plain water and hold off on feeding for at least a month or two while the plant recovers.
Is My Alocasia Hungry? Recognizing Under-Fertilizing
While less immediately damaging than over-fertilizing, consistently under-feeding can lead to lackluster growth. Signs of Alocasia nutrient deficiency symptoms include:
- General pale green or yellowish leaves: Especially older, lower leaves (often indicates lack of Nitrogen).
- Slowed or completely stopped growth: During the prime growing season when it should be active.
- New leaves are noticeably smaller: Than previous healthy leaves developed during the same season.
- Overall lack of vigor: The plant just looks ‘tired’ or ‘stalled’.
If you see these signs and you haven’t fertilized in a long time (or ever), introducing a regular (remember: diluted!) feeding schedule during the growing season might be the answer. For Alocasia yellow leaves, fertilizer (specifically lack of Nitrogen) can be a factor, but always check other potential causes first.
Fertilizer Friend or Foe? Ruling Out Other Issues
Important: Don’t immediately blame fertilizer for every yellow leaf or brown tip! These symptoms can ALSO be caused by much more common issues:
- Improper Watering: Too much or too little water is arguably the most frequent Alocasia problem.
- Low Humidity: Alocasias crave humidity; dry indoor air often causes crispy edges.
- Lighting Issues: Too much direct sun leads to scorch, while too little light causes yellowing and weak growth.
- Pests: Spider mites, in particular, love Alocasias. Inspect leaves (especially undersides) closely.
- Acclimation Stress: If the plant is new to your home or recently moved, it might take time to adjust.
Before adjusting your fertilizing routine, always double-check the basics – consistent watering habits, appropriate light levels, and decent humidity are foundational to Alocasia health. It’s tempting to reach for the fertilizer bottle as a quick fix, but ensure the fundamentals are right first.
Happy Alocasia, Happy Plant Parent: Your Fertilizing Success Plan
Whew! That might seem like a lot, but successful fertilizing Alocasia really boils down to a few key things:
- Choose Wisely: A balanced liquid fertilizer is usually easiest and safest for indoor use.
- Dilute Generously: Start with 1/4 strength – less is definitely more with Alocasias!
- Time it Right: Feed every 2-4 weeks only during active spring/summer growth. Take a break in fall/winter.
- Water First: Never, ever fertilize dry soil.
- Observe: Watch your plant – it will show you if it’s happy!
You’ve got this! Feeding your Alocasia correctly is a huge step towards keeping these stunning plants thriving in your home. Don’t be afraid to learn what your specific plant prefers by starting cautiously. Enjoy the rewarding journey of watching your Alocasia flourish! Happy growing!