Jump to Sections
ToggleHey Fellow Alocasia Lovers! Let’s Talk Watering Woes (and Wins!)
Aren’t Alocasias just stunning? With their striking leaves and unique personalities, they truly earn their nickname as ‘jewel’ plants. But let’s be honest, keeping these beauties happy can sometimes feel like a bit of a puzzle, especially when it comes to watering. We’ve all been there – anxiously poking the soil, terrified of giving too much or too little water! It’s probably the number one worry I hear from fellow Alocasia parents trying to avoid common pitfalls like yellowing leaves or root rot.
Lately, there’s been a lot of buzz in the houseplant community about a different technique: bottom watering. You might have seen it mentioned online or heard other plant parents raving about it. This naturally leads to the big question: Is bottom watering alocasia plants actually better than the traditional top watering method we’re all used to?
Well, you’ve come to the right place! In this guide, we’re going to dive deep into the world of bottom watering specifically for our beloved Alocasias. We’ll explore how it works, weigh the pros and cons compared to top watering, and give you a clear, step-by-step guide so you can decide if it’s the right approach for you and your leafy friends. Let’s demystify Alocasia watering together!
Watering 101: Understanding the Two Main Techniques
Before we compare, let’s quickly get on the same page about what these methods actually involve.
Quick Refresh: What is Top Watering?
This is the classic method most of us start with. You simply pour water onto the surface of the soil, letting gravity pull it down through the pot and (hopefully!) out the drainage holes. It mimics natural rainfall and it’s quick and straightforward. However, according to standard plant care principles, it can sometimes lead to uneven moisture – think annoying dry pockets hidden in the pot – and the top layer of soil stays wet longer, which isn’t always ideal for plants prone to stem rot or attracting pests like fungus gnats.
The Alternative: What is Bottom Watering?
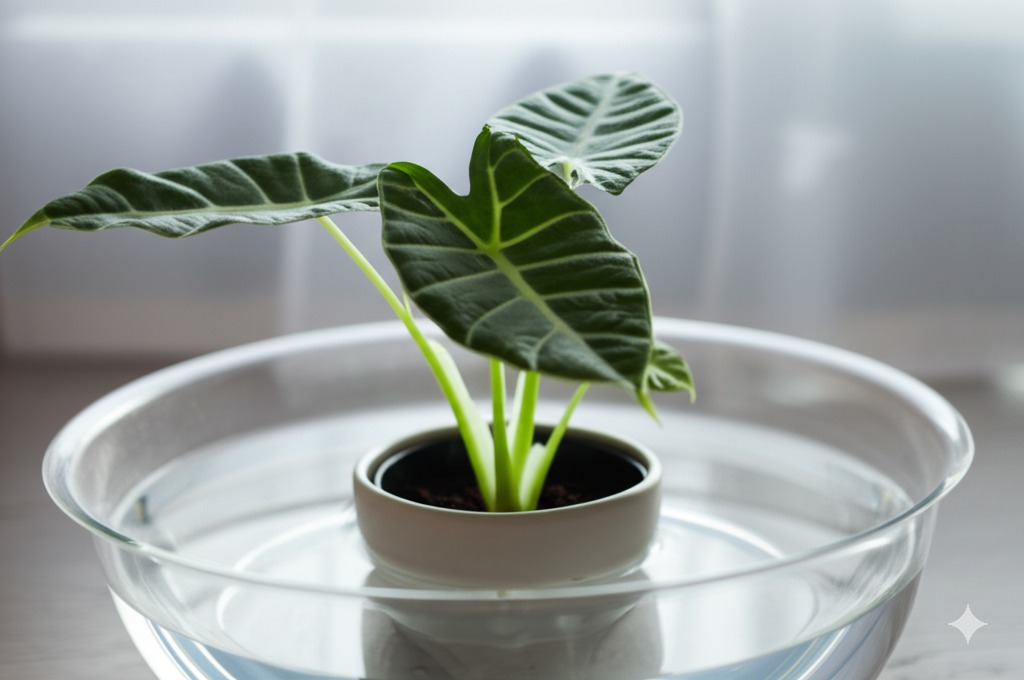
Bottom watering flips the script. Instead of pouring water on top, you place your plant’s pot (which must have drainage holes) into a larger container filled with a few inches of water. The dry soil then acts somewhat like a sponge, drawing water upwards through the drainage holes via a natural process called capillary action. The main idea is to hydrate the soil mass thoroughly from the bottom up. Many find the benefits of bottom watering houseplants include more even moisture and potentially happier roots when done correctly.
The Allure of the Soak: Why Consider Bottom Watering Your Alocasia?
So, why is this bottom watering method gaining popularity, especially for somewhat finicky plants like Alocasias? There are actually some compelling reasons many growers appreciate:
Benefit #1: Encourages Stronger, Deeper Root Growth
When you water from the bottom, the lower layers of soil get hydrated first. This encourages your Alocasia’s roots to grow downwards towards the moisture source, potentially leading to a stronger, more robust root system over time. Deeper roots generally mean a more resilient plant!
Benefit #2: Achieve More Consistent Soil Moisture
Alocasias are famous for disliking inconsistency – they don’t want to be bone dry one minute and soaking wet the next. Bottom watering helps saturate the soil more evenly from the base upwards, reducing the chance of those hidden dry pockets that can sometimes happen with top watering. This consistent moisture level can make a big difference in keeping your Alocasia looking its best.
Benefit #3: Helps Deter Pesky Fungus Gnats
Ugh, fungus gnats! These little critters love damp topsoil to lay their eggs. Because bottom watering hydrates from below and ideally leaves the very top layer of soil relatively drier compared to top watering, it makes the surface less appealing to these annoying pests. While not a guaranteed cure, many users find it contributes to reducing their numbers.
Benefit #4: Reduces Risk of Wet Leaves and Crown Rot
Pouring water from the top can sometimes splash onto Alocasia leaves or collect around the base of the stems (the crown). Some Alocasia varieties are particularly sensitive to this, and prolonged moisture on leaves or at the crown can invite fungal issues or rot. Bottom watering avoids this completely by keeping the water focused on the roots and soil.
Benefit #5: Potentially More Control Over Saturation
With bottom watering, you’re actively deciding when the plant has had enough to drink by removing it from the water source. While you still need to pay close attention, some growers find this gives them a better sense of control over achieving that ‘just right’ level of moisture compared to estimating how much to pour on top.
Your Step-by-Step Guide: How to Bottom Water Alocasia Correctly
Ready to give how to bottom water alocasia correctly a go? It’s simpler than it sounds! Here’s a straightforward guide based on common practices:
Gather Your Supplies
You’ll need:
- Your Alocasia in its pot (critically, the pot must have drainage holes – this method won’t work without them!)
- A clean basin, sink, tub, or container that’s wider than your plant pot’s base and can hold a few inches of water.
- Room temperature water. Filtered, distilled, or rainwater is often recommended if accessible, as Alocasias can sometimes show sensitivity to the chlorine, chloramine, or high mineral content found in certain tap water sources.
Step 1: Is Your Alocasia Actually Thirsty?
This is arguably the most important step! Don’t bottom water just because it’s ‘watering day’ on your calendar. Check the soil first. Stick your finger about 1-2 inches deep – if it feels dry to the touch, it’s likely time. You can also get a feel for the pot’s weight; it will feel noticeably lighter when thirsty. Some subtle visual signs alocasia needs water might include slightly drooping or curling leaves (though try to water just before it gets dramatically wilted!). Always rely on checking the soil, not assumptions.
Step 2: Prepare Your Watering Station
Pour 1-3 inches of your room temperature water into the basin or sink. You want enough water for the pot base to sit in comfortably, but the water level should definitely be below the top of the soil line in the pot itself.
Step 3: The Soaking Ritual (The Important Part!)
Gently place your Alocasia pot into the water-filled basin. Now, let it soak! How long to bottom water alocasia? There’s no single magic number, as it depends on pot size, soil density, and how dry it was. A good starting point is often 10-20 minutes, but always check rather than relying purely on a timer. Smaller pots might be quicker, larger or denser ones longer. The key is to monitor the progress. Carefully touch the top surface of the soil periodically. Once you feel moisture just at or slightly below the surface, it’s generally considered done! You typically don’t want the entire top layer to become visibly wet or soggy, as a slightly drier surface helps deter pests.
Step 4: Drain, Drain, Drain!
This step is absolutely crucial for preventing root rot, a common Alocasia ailment! As soon as the soil is sufficiently hydrated (don’t leave it sitting for hours!), lift the pot out of the water basin. Place it in an empty sink, on a draining rack, or even an old towel for at least 10-15 minutes, sometimes longer for larger pots, until it completely stops dripping. It’s vital that the plant isn’t left sitting in a puddle of excess run-off water in its saucer or cache pot, as this leads to waterlogged roots.
Quick Tips for Bottom Watering Success
- Soil Matters Greatly: Standard practice dictates using a chunky, airy, well-draining aroid mix. Heavy, standard potting soil will retain too much water for too long, significantly increasing rot risk even with careful watering.
- Frequency Varies: How often you need to bottom water depends entirely on factors like light levels, temperature, humidity, the pot size and material, and the soil mix. Check the soil moisture regularly; don’t stick to a rigid schedule.
- Pot Type Impact: Remember that plants in porous terracotta pots generally dry out much faster than those in plastic or glazed ceramic pots, so adjust your checking frequency accordingly.
Hold On! Potential Downsides of Only Bottom Watering Alocasias
Okay, bottom watering sounds pretty great for Alocasias, right? It often is! But like any technique, it’s wise to be aware of potential drawbacks, especially if it becomes the only method you use long-term.
The Hidden Menace: Salt and Mineral Buildup
This is perhaps the most significant consideration based on horticultural principles. When you top water, excess minerals and salts (originating from tap water and fertilizers) tend to get flushed downwards and out through the drainage holes. With exclusive bottom watering, the water wicks upwards, but these substances can get left behind near the soil surface as water evaporates. This accumulation, often referred to as salt buildup bottom watering houseplants can cause, may eventually lead to issues like crispy brown leaf tips, reduced growth, and overall plant stress over extended periods.
Time and Space Commitment
Let’s be practical – setting up a basin, allowing the plant adequate time to soak, and then ensuring it drains fully often takes more active time and potentially more space (especially for draining) compared to quickly watering with a can. If you have a large collection, this time can add up.
Dusty Leaves Remain Dusty
Top watering provides the incidental benefit of rinsing accumulated dust off leaves. Bottom watering doesn’t offer this perk, so you’ll need to make a separate habit of gently wiping your Alocasia’s leaves clean periodically with a damp cloth. Clean leaves function better for photosynthesis and simply look nicer!
When Top Watering Your Alocasia Still Makes Sense
So, does this mean you should toss your watering can entirely? Absolutely not! Traditional top watering still plays a valuable role in comprehensive Alocasia care.
The Essential Flush: Tackling Salt Buildup
Precisely because of the salt buildup issue discussed above, it’s highly recommended by many experienced growers to periodically top water your primarily bottom-watered Alocasias. Think of it as a ‘reset’ for the soil. How often? A common guideline is roughly once a month, or perhaps every 4-6 regular waterings, depending on your water quality and fertilizing habits. When you do this, water thoroughly from the top, letting water flow freely out the drainage holes for a good minute or two. This action is crucial for flushing soil after bottom watering and helping prevent harmful mineral accumulations.
Quick Hydration or Convenience
Sometimes life gets busy, and a quick, thorough top water is certainly better than letting your Alocasia dry out excessively. Or perhaps you only have one or two plants needing a drink, and setting up the whole bottom watering station feels like more effort than it’s worth at that moment.
Applying Certain Treatments or Fertilizers
While you can often add diluted liquid fertilizer to your bottom watering basin (ensure it’s well-mixed), some specific treatments (like systemic insecticides applied as a soil drench) or particular fertilizing techniques might be designed for, or simply easier to apply evenly via, top watering. Always check and follow product instructions carefully.
The Verdict: Is Bottom Watering Truly Better for Your Alocasia?
We’ve circled back to the main question! So, after considering all the angles, is bottom watering alocasia the definitively superior method?
The most accurate answer is that it’s often highly beneficial, but nuanced. Bottom watering offers significant advantages that align well with the specific needs of many Alocasias – particularly regarding delivering consistent moisture deep into the root zone and reducing surface wetness, which certainly helps mitigate risks like fungus gnats and crown rot. For numerous Alocasia enthusiasts, it becomes the preferred primary method because it directly addresses these common pain points. I remember early on when I started with Alocasias, I was hesitant about bottom watering myself, worried I’d somehow drown my favorite ‘Polly’, but learning to diligently check the topsoil moisture and resist the urge to leave it soaking for ages was absolutely key to success!
However, it’s not a flawless magic bullet and isn’t automatically “better” without mindful application. The potential for salt buildup is a genuine factor that must be managed with those occasional top-watering flushes. It also typically requires a bit more patience and attention during the process compared to a quick top drench.
Recommendation: A fantastic and commonly successful approach for many happy Alocasias, endorsed by numerous houseplant resources, is to consider using bottom watering as your main hydration method, but consciously incorporate a thorough top watering flush roughly every month or so. This strategy allows you to leverage the benefits of consistent moisture and deep root hydration while actively preventing the main drawback of salt accumulation.
Ultimately, the best watering method is the one that helps you reliably provide consistent moisture (crucially, avoiding prolonged sogginess!) for your specific Alocasia in its unique growing environment. Pay close attention to your plant’s signals, check the soil condition regularly before watering, and don’t be afraid to adjust your technique as you learn what works best through observation.
Happy Alocasia Parenting!
Caring for Alocasias is such a rewarding journey, often filled with fascinating learning curves! Hopefully, this detailed exploration of bottom watering versus top watering has equipped you with the confidence and knowledge to make informed watering choices for your stunning ‘jewel’ plants. Don’t be intimidated by their sometimes-fussy reputation; with a little understanding, observation, and consistent care, you can absolutely help your Alocasia thrive and bring that incredible tropical vibe to your space.
What are your own experiences? Have you found success with bottom watering your Alocasias, or do you stick to top watering? Feel free to share your thoughts and any helpful tips in the comments below – collective wisdom helps us all become better plant parents! Happy growing!