Hey fellow Alocasia lovers! Alex here. If you’ve welcomed one of these stunning ‘jewel’ Alocasias into your home, you already know they possess a unique beauty. But let’s be honest, sometimes they can seem a little particular, especially when it comes to their soil! Finding the best soil mix for alocasia can feel like cracking a secret code, but I promise you, it’s much simpler than it seems.
Forget those dense, water-logged bags of standard potting soil that often lead to sad, yellowing leaves. Today, we’re rolling up our sleeves and creating a fantastic diy alocasia potting soil recipe. This is the kind of airy, well-draining home your Alocasia dreams of – the kind that promotes optimal growth & drainage. Ready to become your Alocasia’s favourite soil chef? Let’s dive in!
Jump to Sections
ToggleWhy Your Alocasia is Picky About Its Potting Mix (Hint: It’s Not Being Difficult!)
It’s easy to think Alocasias are just being fussy, but their soil needs are deeply rooted in their natural origins. Understanding this is key to keeping them happy indoors. Understanding why they need this special care helps us choose the right ingredients for their success.
Learning from the Wild: What Alocasia Roots Really Want
Imagine tropical forests – Alocasias often grow on the forest floor in loose, organic debris, or even clinging to trees (epiphytically). Their roots are used to having access to plenty of air circulation, not sitting in dense, compacted mud. It’s generally understood that mimicking this airy environment indoors is crucial.
The #1 Danger for Alocasias: Understanding Root Rot Risk
This is often considered the big one, folks. Alocasias grow from corms and have relatively thick roots that are incredibly susceptible to rot if they sit in constantly wet, airless soil. Soggy soil basically suffocates the roots, inviting nasty fungal and bacterial infections. Root rot is frequently the culprit behind yellowing lower leaves, a mushy stem base, and sadly, plant demise. A good soil mix is your first line of defense!
The Soil Sweet Spot: Balancing Drainage, Aeration, and Moisture
So, what’s the goal? We need a mix that achieves three things simultaneously:
- Drains Fast: Allows excess water to flow through quickly, preventing waterlogging.
- Stays Airy: Contains lots of pockets for oxygen to reach the roots.
- Holds Some Moisture: Doesn’t dry out instantly, providing roots with the hydration they need between waterings.
It sounds like a balancing act, but the right ingredients make it quite achievable!
The Magic Ingredients: Building the Best Soil Mix for Alocasia
Creating that perfect balance comes down to choosing the right components. Think chunky, airy, and full of goodness! Here are the stars of our show:
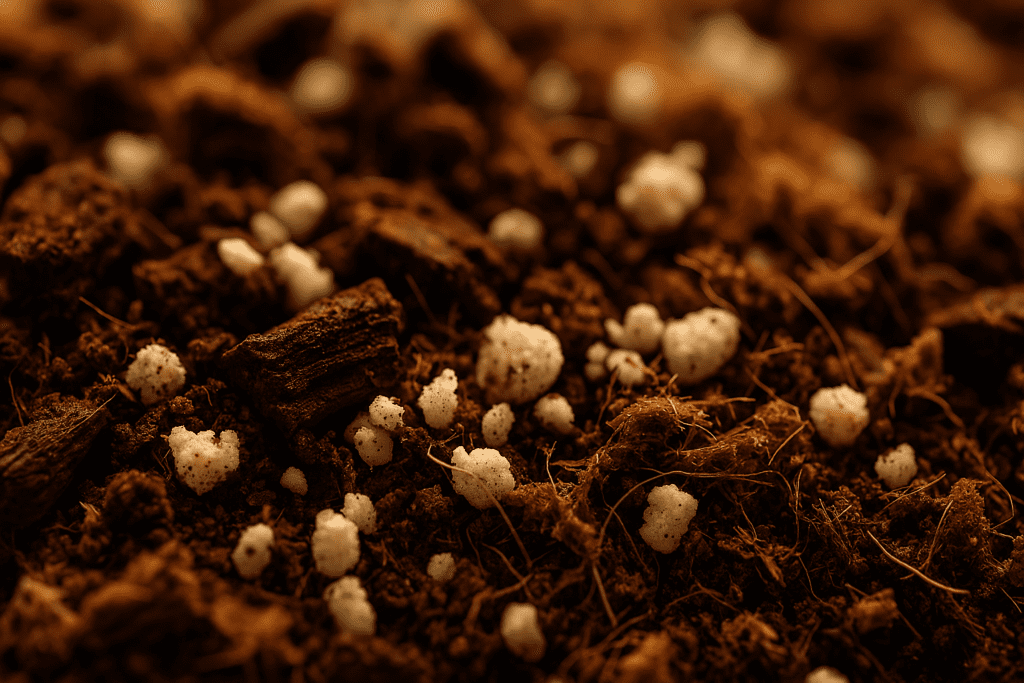
Coco Coir: The Sustainable, Fluffy Foundation
This is our base – shredded coconut husks. It holds moisture well but doesn’t compact like traditional peat moss, offering better aeration. Plus, it’s a more renewable resource! Quick Tip: Some coco coir brands, especially compressed bricks, can be high in salts. Many growers recommend giving it a good rinse with fresh water before using, just to be safe. Using coco chips or coarse fiber adds even more airiness.
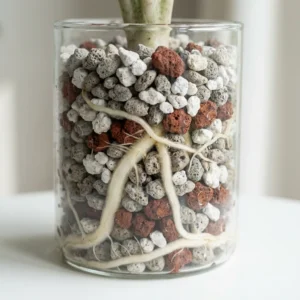
Orchid Bark: Creating Vital Air Pockets (Essential for a Chunky Soil Mix for Aroids!)
These are chunks of fir or pine bark, and they are fundamental for a truly great Alocasia mix. They create larger air pockets throughout the soil, dramatically improving drainage and aeration – exactly what those roots crave. This is the key ingredient for achieving that desirable chunky soil mix for aroids. Medium grade bark usually works perfectly.
Perlite: The Lightweight Champion of Drainage
Those little white, almost styrofoam-like balls are actually heat-expanded volcanic glass. Perlite doesn’t hold much water itself, but its porous structure creates space, lightens the mix, and helps water drain freely. It’s inexpensive and readily available.
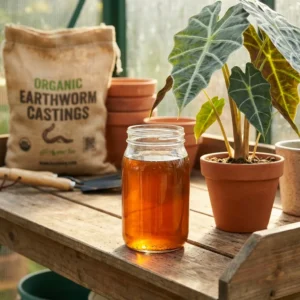
Worm Castings: A Gentle Boost for Optimal Growth
Think of this as nature’s perfect, gentle fertilizer. Worm castings (or vermicompost) provide a slow release of essential nutrients without the risk of burning delicate roots. They also improve soil structure slightly and introduce beneficial microbes – a fantastic addition for encouraging optimal growth.
Horticultural Charcoal: The Optional ‘Freshness’ Factor
This isn’t the same as BBQ briquettes! Horticultural charcoal is porous and can help absorb impurities and potentially improve aeration further. While its necessity is sometimes debated, many experienced growers include it for keeping the soil ‘sweet’ and adding to the chunky texture. Think of it as an optional but beneficial bonus.
Let’s Get Our Hands Dirty! Your Easy DIY Alocasia Potting Soil Recipe
Ready for the magic formula? It’s super simple – we’re working with ‘parts’, so you can use any measuring tool you like (a scoop, a cup, a small yogurt pot), just keep it consistent.
The Simple, Proven Ratio (No Complex Math Needed!)
- 1 Part Coco Coir (rinsed, if necessary)
- 1 Part Orchid Bark (medium grade)
- 1 Part Perlite
- ½ Part Worm Castings (approximate)
- ½ Part Horticultural Charcoal (approximate, optional)
Step-by-Step Mixing Guide for the Perfect Consistency
- Gather Up: Find a mixing bin, bucket, or even a tarp. Grab your ingredients. Safety First: Perlite can be dusty, so wearing gloves and maybe a simple mask while mixing is a good idea.
- Combine the Bulk: Add the Coco Coir, Orchid Bark, and Perlite to your container. Mix these together thoroughly first.
- Add the Goodies: Sprinkle in the Worm Castings and Horticultural Charcoal (if you’re using it).
- Mix Like You Mean It: Get your hands in there (with gloves!) and mix everything evenly. You want a consistent blend, with no clumps of just one ingredient.
- Slightly Dampen (Optional but helpful): Using a spray bottle, lightly mist the mix with water as you combine it. Don’t make it soggy! Just enough to keep the dust down and make it slightly easier to handle when potting.
Potting Up Your Alocasia: Using Your New Custom Soil Mix
You’ve mixed up a batch of beautiful, airy soil – now it’s time to give your Alocasia its upgrade!
Choosing the Right Pot: Drainage Holes are Non-Negotiable!
Seriously, this is crucial. Your pot must have drainage holes at the bottom. No exceptions! As for material, terracotta pots breathe and help wick away excess moisture (great if you tend to overwater). Plastic pots retain moisture longer (potentially better if you live in a dry climate or tend to underwater). When sizing up, only choose a pot that’s about 1-2 inches wider in diameter than the current root ball. A pot that’s too large holds excess soil that stays wet too long, risking root rot.
Repotting Your Alocasia Without the Stress
- Gently Remove: Carefully slide your Alocasia out of its old pot. Try not to yank it by the stems.
- Inspect the Roots: Gently loosen any compacted old soil. Have a look at the roots – trim off any that are black, brown, mushy, or smelly with clean scissors or snips. Healthy roots are usually firm and whitish/cream-colored.
- Positioning: Add a layer of your fresh DIY mix to the bottom of the new pot. Place the plant in the center, ensuring the top of the root ball sits about an inch below the pot rim.
- Fill ‘Er Up: Fill in around the root ball with your new soil mix. Gently tap the sides of the pot on your work surface to help the soil settle around the roots. Resist the urge to pack the soil down firmly! You want to keep it nice and airy.
- Water Thoroughly: Once potted, give your Alocasia a good drink. Water until you see excess flowing freely from the drainage holes. Let it drain completely, and don’t let the pot sit in a saucer full of water. Remember, this new airy mix might dry out faster than dense soil, so you may need to adjust your watering frequency slightly – always check the top inch or two of soil before watering again.
Is Your Alocasia Thriving? Signs Your DIY Mix is a Success (or Needs Tweaking)
You’ve done the work, now how do you know if your Alocasia is loving its new home? Your plant usually gives you clues!
Happy Plant Signals: What to Look For
- New Growth: Seeing new leaves unfurl is always a fantastic sign!
- Perky Leaves: Healthy Alocasias hold their leaves upright and look vibrant.
- Good Drying Time: The soil should feel noticeably drier in the top inch or two within roughly a week (this varies hugely with your environment, pot size, and plant size, but it shouldn’t stay soggy for ages).
Warning Signs: When Your Soil Might Be the Issue
- Soil Stays Soggy: If the mix is still wet deep down after a week or more, it might not be airy enough. Consider adding more orchid bark or perlite next time you repot.
- Persistent Yellowing Lower Leaves: While losing an old leaf occasionally is normal, constant yellowing often points to overwatering, which is made worse by dense soil. Check those roots!
- Mushy Stem Base: This is a red alert for root or corm rot. You’ll need to investigate the roots immediately and repot into fresh, airy mix if the plant is salvageable.
- Fungus Gnats: These annoying little flies love consistently moist topsoil. While they don’t usually harm the plant directly, their presence indicates the soil surface might be staying too wet.
You’ve Got This! Final Encouragement for Alocasia Soil Success
Creating your own DIY Alocasia potting soil recipe might seem like an extra step, but it’s one of the most impactful things you can do for the health and happiness of these gorgeous plants.
Key Takeaways Recap:
Remember, Alocasias need excellent drainage and aeration due to their sensitive roots. A chunky soil mix combining coco coir, orchid bark, and perlite, boosted with worm castings, provides just that.
A Final Friendly Tip from an Alocasia Fanatic:
Don’t be afraid to observe your plant and your environment. This recipe is a fantastic starting point, but the real magic happens when you learn to read your Alocasia’s signals. Trust me, making the switch from generic soil to a mix like this was a game-changer for my own Alocasias – I saw fewer yellow leaves almost immediately! You’ve totally got this.
Happy planting, and enjoy watching your Alocasias thrive in their new custom home!