Hello fellow Alocasia enthusiasts! If you’re anything like me, you adore these stunning plants – the velvety leaves of a ‘Black Velvet’, the striking veins of a ‘Polly’, the architectural elegance of a ‘Zebrina’. But let’s be honest, keeping them perfectly happy, especially with watering, can sometimes feel like walking a tightrope. That’s where a little tool can make a world of difference: the soil moisture meter.
Jump to Sections
ToggleWhy Your Finicky Alocasia Deserves an Accurate Moisture Meter
Alocasias, our beloved ‘jewels’, have a bit of a reputation, don’t they? They’re gorgeous, but notoriously fussy about water. They absolutely despise sitting in soggy soil – “wet feet” is a fast track to root rot, one of the most common heartbreaks for Alocasia parents. On the other hand, letting them dry out too much stresses them out, leading to crispy edges or drooping leaves.
So, how do you find that perfect balance? Many of us start with the classic “finger test” – sticking a finger into the soil. It’s a decent starting point, but honestly? It’s not always reliable for Alocasias. In deeper pots, the top inch or two might feel dry while the crucial root zone below is still quite damp. And those wonderful chunky, airy soil mixes we use to promote drainage? They can make the finger test even trickier, with dry pockets misleading you.
This is where a good soil moisture meter becomes your best friend. It takes the guesswork out of watering. Instead of wondering and worrying, you get an objective reading of the moisture level right down where the roots are. This consistency helps your Alocasia thrive and significantly reduces the risk of overwatering – the number one culprit behind yellowing leaves and that dreaded root rot. Think of it as giving your Alocasia care superpowers! Using a soil moisture meter properly empowers you to meet their specific needs.
Understanding Soil Moisture Meters: Your Options for Houseplants
When you start looking, you’ll find a few main types of moisture meters designed for houseplants. Let’s break them down so you can choose wisely:
Analog Probe Meters (The Classic Choice)
You’ve likely seen these – they usually have a single probe and a dial with zones like ‘Dry’, ‘Moist’, and ‘Wet’. They work through a neat bit of science called a galvanic reaction. Two different metals in the probe react with the water in the soil to create a tiny electrical current, which moves the needle on the dial.
- Pros: They are typically very affordable, super simple to use (just stick it in!), require no batteries, and are available everywhere.
- Cons: Their accuracy can sometimes be debated. The probes can oxidize over time if not cleaned, affecting readings. They might struggle a bit in very chunky or airy soil mixes where probe contact is patchy, and readings can sometimes be influenced by salts or minerals in your soil or fertilizer. The ‘Dry/Moist/Wet’ zones are also less precise than a numerical reading.
- Relevance for Alocasia: A perfectly fine starting point, especially if you’re on a budget. The key is diligent cleaning of the probe after every single use to keep it reading as accurately as possible.
Digital Probe Meters (For a Precise Reading)
These meters step things up a notch, usually giving you a specific number (often on a scale of 1-10) or a percentage reading on an LCD screen. They work by measuring electrical resistance or capacitance in the soil, which changes depending on moisture content.
- Pros: The numerical reading allows for more precise tracking of how quickly your soil is drying out. Many plant parents feel these offer better accuracy and consistency, providing a more accurate moisture reader experience for plants. Some models feature thinner or longer probes.
- Cons: They require batteries, which will eventually need replacing. They generally cost more than analog meters, and like any electronic device, they can potentially malfunction over time.
- Relevance for Alocasia: Excellent if you love data and want very specific control over your watering routine. Knowing your Alocasia likes to be watered when the meter hits ‘3’ gives you great confidence and helps achieve digital soil moisture meter accuracy.
Multi-Function (3-in-1) Meters: Are They Worth It?
These gadgets promise to measure moisture, soil pH, and sometimes even light levels, all in one device. Sounds great, right?
- The Catch: While tempting, the reality is often disappointing based on general user experience. The moisture sensor is typically a basic analog type, subject to the same limitations mentioned earlier. More importantly, the pH and light sensors on most affordable 3-in-1 soil meter models are widely considered by experienced growers to be very inaccurate and unreliable for the specific needs of houseplants like Alocasias.
- Recommendation for Alocasia: Honestly, as an Alocasia aficionado focused on optimal watering, I’d suggest skipping these. You’re better off investing your money in a dedicated moisture meter that excels at its primary job: accurately measuring soil moisture. You can get separate, more reliable tools for pH or light if those are genuine concerns.
Key Features: Finding the Best Moisture Meter for Your Alocasia
Okay, so you know the types. But what makes a meter genuinely good for our sensitive Alocasias? It’s not just about picking any meter off the shelf. Here’s what I look for and recommend you prioritize:
Accuracy and Consistency: The Non-Negotiables
This is number one. You need a meter that reliably tells you the difference between “too wet,” “just right,” and “getting dry” in the specific range Alocasias care about. Consistency is also key – it should give you similar readings if you test the same spot twice (allowing for settling time). This is crucial for preventing root rot.
Probe Length Matters: Reaching the Root Zone
Alocasia roots aren’t just sitting at the surface; they explore deeper for water. You need to know what’s happening down there. A probe that’s too short won’t give you the full picture.
- For smaller pots (approx. 4-6 inches diameter): A standard 6-8 inch probe length is usually adequate.
- For medium to larger pots (8 inches+): Look for probes around 8-12 inches or even longer for really big floor plants. You want to comfortably reach about halfway to two-thirds down the pot depth to measure where the main roots reside.
Probe Durability & Type: Navigating Chunky Mixes
Our preferred Alocasia soil mixes – full of orchid bark, perlite, charcoal, coco chunks – are great for drainage but can be tough on flimsy probes. Look for a reasonably sturdy probe (often stainless steel) that can navigate these ingredients without easily bending or breaking. Most reliable meters use a single probe design. Remember to insert gently to avoid damaging roots or the meter itself, especially when dealing with a chunky soil mix moisture meter reading.
Readability: Getting Clear Information Quickly
Whether it’s an analog dial or a digital screen, you need to be able to read it easily in typical indoor lighting without squinting or needing a flashlight. Clear markings or bright numbers are essential for quick checks.
Value for Money: Balancing Cost and Quality
You don’t need a super expensive, lab-grade instrument. But the absolute cheapest option might prove unreliable and frustrating. Aim for that sweet spot – a meter with a good reputation for accuracy and durability that fits a moderate budget (often found in the
10−10−30 USD range).
How to Use Your Soil Moisture Meter Correctly with Alocasias
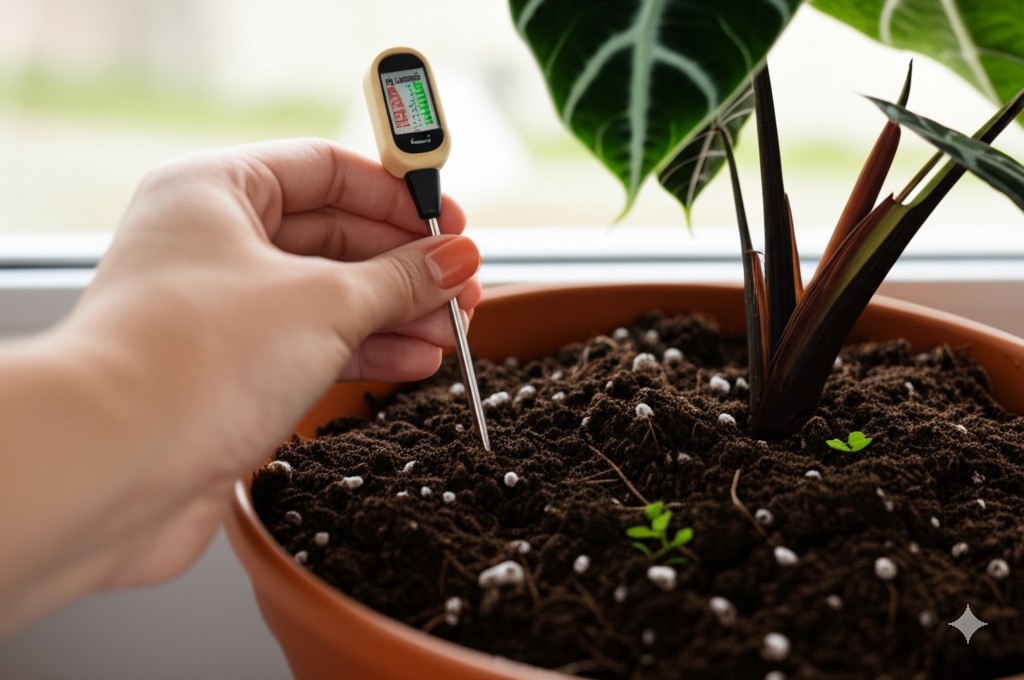
Buying the meter is just the first step; using soil moisture meter houseplants correctly is crucial for getting trustworthy results. Here’s my simple routine, honed through experience:
- Step 1: Always Clean the Probe: I can’t stress this enough! Wipe the probe clean with a soft cloth or paper towel before you insert it and immediately after you remove it. Residue or oxidation will skew your readings. Avoid abrasive materials like steel wool unless absolutely necessary and done gently, as they can damage the probe surface.
- Step 2: Choose Your Spot(s): Don’t just jab it anywhere. Avoid the very edge of the pot (can dry faster) and the exact center right after watering (can be wettest). Aim for a spot roughly midway between the stem and the pot edge.
- Step 3: Insert Gently and Appropriately Deep: Gently push the probe straight down into the soil, aiming for about halfway to two-thirds of the pot’s depth. Feel for resistance – if you hit a thick root or the corm, stop and try a slightly different spot. Never force it.
- Step 4: Wait for the Reading to Settle: Don’t pull it out immediately. Most meters need 30-60 seconds for the reading to stabilize. Always check the instructions for your specific meter.
- Step 5: Take Multiple Readings: Especially with chunky Alocasia mixes, air pockets can create false dry spots. I always take readings in 2-3 different locations around the pot to get a more reliable average sense of the overall moisture level before making a watering decision.
- Step 6: Interpret the Reading for Your Alocasia: This is key! Don’t just water when the meter says “Dry.” Learn your plant’s specific preference in its environment. For most of my Alocasias, I aim to water when the meter consistently reads in the lower end of the “Moist” range or is just tipping into “Dry” (often around a 3 or 4 on a common 1-10 scale). Watch your plant’s cues too – the meter is a valuable tool, not the sole arbiter.
- Step 7: Remove and Clean Again: Once you have your readings, remove the meter promptly. Don’t store it in the soil, as this can damage the probe (especially analog ones over time). Give it that final wipe-down before putting it away.
Identifying High-Performing Meter Characteristics: What Defines a Top Pick for Alocasias?
So, what elevates a moisture meter from simply functional to a “top pick” for our discerning Alocasias? Based on experience and common feedback in the plant community, here are the characteristics that truly matter:
- Proven Consistency: Look for meters, or types of meters (like well-regarded single-probe analog or specific digital models), that have a solid reputation among plant owners for giving consistent, believable readings in that crucial moist-to-approaching-dry zone. This is the heart of an accurate moisture reader for plants review.
- Appropriate & Durable Probe: It must have the right length for your typical pot sizes and sufficient sturdiness to withstand regular use in chunky aroid mixes without frequent bending or breaking.
- Clear, Unambiguous Display: The reading should be instantly understandable.
- Good Performance in Aroid Mixes: While user technique is vital (multiple readings!), some meters seem slightly less affected by the air pockets common in these mixes. Though not definitive, some find capacitance-based digital meters handle this slightly better, but a well-maintained and properly used analog meter remains effective.
- Focus on Moisture Accuracy: Prioritize devices known first and foremost for accurate moisture measurement. Avoid being swayed by extra features on multi-function devices if those features compromise the core moisture reading capability or are known to be unreliable.
Instead of recommending a single brand, which can vary, I strongly encourage you to seek out meters possessing these characteristics. Read user reviews, especially those from fellow tropical plant enthusiasts, focusing on long-term accuracy and probe durability.
Common Mistakes & Troubleshooting Your Meter Readings
Even with the best intentions and a seemingly great meter, a few common slip-ups can lead to inaccurate readings. Let’s ensure you avoid them:
- Mistake 1: Dirty Probe = Bad Readings: Yes, I’m saying it again! Clean it before and after, every single time. It’s the simplest way to maintain accuracy.
- Mistake 2: Leaving the Meter In the Soil: This practice accelerates corrosion on analog probes and isn’t recommended for digital longevity either. Remove it after getting your reading.
- Mistake 3: Probing Too Shallow or Hitting Air Pockets: Ensure you’re measuring the actual root zone moisture, not just the quickly drying top layer. If readings seem oddly dry in a specific spot, test another nearby location.
- Mistake 4: Trusting the Meter Blindly: Remember, it’s a fantastic tool, not a replacement for observation. Pay attention to your Alocasia’s leaves (drooping, yellowing), the weight of the pot, and the general time it takes for the soil to dry in your specific environment.
- Troubleshooting: Are the readings consistently weird?
- Digital Meter: First suspect is usually the batteries. Check or replace them.
- Analog Meter: Carefully examine the probe tip. Is it visibly corroded (greenish/darkened)? Is it bent or damaged? You can try a very gentle cleaning with fine-grade steel wool if it’s heavily oxidized, but know this can remove protective coatings and is a last resort.
- Basic Function Test: Stick the clean probe into a glass of water (should read maximum ‘Wet’). Let it air dry completely (should read minimum ‘Dry’). If it fails this simple test, the meter itself might be faulty or have reached the end of its lifespan.
Conclusion: Water Your Alocasias with Confidence!
Whew! We’ve journeyed through the world of soil moisture meters, specifically for our beloved Alocasias. Hopefully, you’re now feeling much more equipped and confident about choosing the right one and using it effectively. Finding the best moisture meter for Alocasia care truly is one of the most helpful, stress-reducing steps you can take.
By removing the guesswork from their tricky watering needs, you arm yourself against the dreaded root rot and create the consistent conditions these beautiful plants need to flourish. Remember the key takeaways: prioritize accuracy and consistency, choose an appropriate and durable probe, learn how to use it correctly (cleanliness is key!), and interpret the readings wisely alongside observing your plant.
Happy Alocasia parenting, and may your watering days be stress-free!