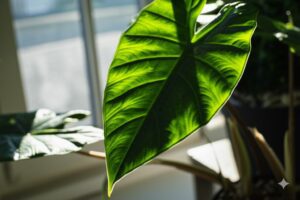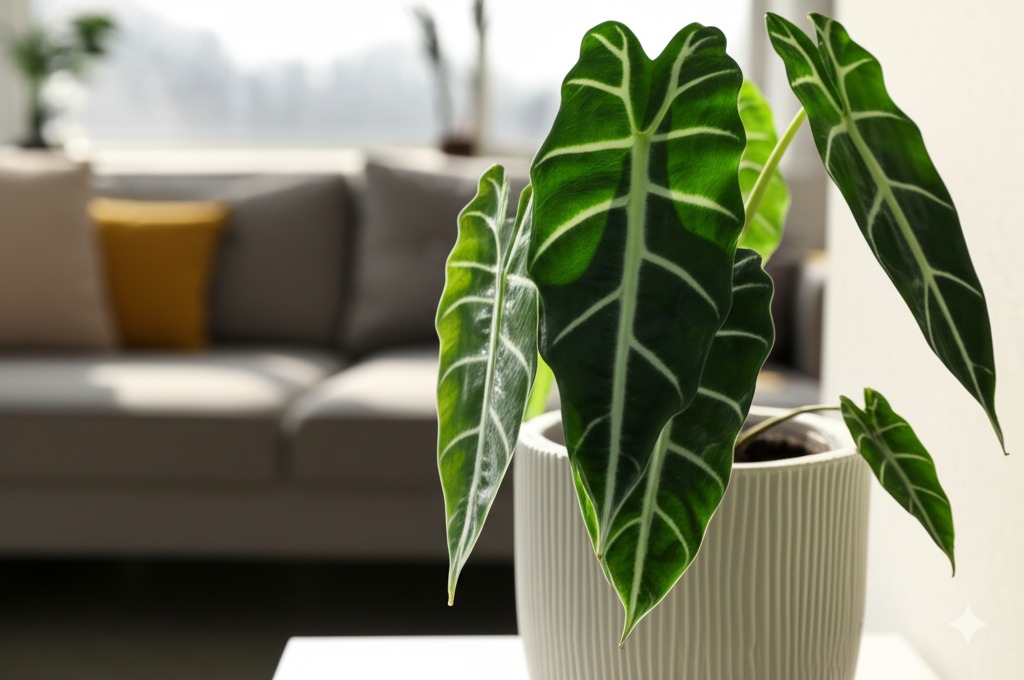
Hey there, fellow Alocasia enthusiasts! Ellie Green here. If you adore these stunning foliage plants as much as I do, you know they bring so much drama and beauty to our homes. But let’s be honest, when winter rolls around, caring for our beloved Alocasias – whether it’s a ‘Polly’, ‘Zebrina’, or a majestic ‘Sarian’ – can feel a bit tricky. Shorter days, drier air… it’s a whole different ball game!
Don’t worry, though. Winter care isn’t about complex secrets; it’s mostly about understanding why things change and making a few key adjustments. Think of it as helping your plant buddy settle in for a cozy (and maybe sleepy) season. Let’s break down how to adjust light, water, and feeding to keep your Alocasias happy (or healthily dormant) through the winter months.
Jump to Sections
ToggleWhy Winter Changes Everything for Your Precious Alocasia
First things first, why the special treatment? It all comes down to how Alocasias respond to their environment.
Decoding the Slowdown: Understanding Winter Rest and Dormancy
As the days get shorter and the sunlight less intense, your Alocasia naturally senses the shift. Its metabolism slows down, photosynthesis decreases, and growth often pauses or significantly reduces. This isn’t a sign you’re doing something wrong; it’s the plant conserving energy. For many Alocasias, this can lead to dormancy – a deep rest where they might even drop their leaves. They’re not dying! They’re cleverly storing energy in their underground corm (like a little battery pack) waiting for better conditions. Understanding this is key to successful alocasia winter care.
The Top 4 Winter Challenges for Indoor Alocasias
Indoors, winter brings a unique set of challenges we need to manage:
- Lower Light: Fewer daylight hours and weaker sun intensity.
- Watering Woes: Slowed growth means the plant uses much less water, increasing the risk of overwatering and dreaded root rot.
- Dry Air: Central heating cranks up, sucking moisture from the air – something tropical Alocasias generally dislike.
- Temperature Swings: Cold drafts near windows or hot blasts from heaters can stress your plant.
Let There Be (the Right Kind of) Light! Winter Illumination for Alocasias
Light is energy for plants, and in winter, we need to be smart about providing it.
Making the Most of Natural Light
Position your Alocasia where it can receive the brightest indirect light possible. In the Northern Hemisphere, an east-facing window offering gentle morning sun, or a spot near a south-facing window (but pulled back slightly to avoid direct midday rays, which can still scorch) is often ideal. Keep those windows clean – dirty glass significantly reduces light! And give your plant a quarter turn every week or so for even growth.
When Grow Lights Become Your Alocasia’s Best Friend
If your home doesn’t get much natural light, or you live in a region with very gloomy winters, a grow light is a fantastic investment. You’ll know you need one if your plant seems dull, isn’t growing at all (even slowly), or starts looking pale and leggy.
- What kind? Full-spectrum LED options, like bulbs you can screw into existing lamps or strip lights, are popular choices as they are energy-efficient and provide the necessary light spectrum.
- How long? Aim to provide supplemental light for about 10-12 hours a day. Using a simple outlet timer makes this effortless.
- How close? Follow the manufacturer’s instructions, but generally, position the light 6-18 inches above the plant. Keep an eye out for any signs of leaf scorching (brown, crispy spots) and adjust further away if needed.
Common Winter Light Mistakes to Avoid
The biggest pitfalls are providing too little light (leading to a weak plant) or accidentally placing it in harsh, direct sunlight, thinking you’re helping. Remember, bright indirect is the goal for most Alocasias!
Mastering Winter Watering: The Art of ‘Less is More’
This is probably the most critical adjustment for winter care. So, do alocasias need less water in winter? Absolutely, yes.
Why Your Thirsty Alocasia Suddenly Isn’t
With growth slowed right down, your Alocasia’s roots simply aren’t absorbing water like they do in spring and summer. Watering on the same schedule will quickly lead to soggy soil. Cold, wet soil is a recipe for disaster, creating the perfect conditions for fungal diseases and root rot, which can be fatal for Alocasias.
How to Check if It’s Really Time to Water
Ditch the calendar! Your finger is your best tool. Stick it into the soil about 1-2 inches deep. If it feels dry at that depth, it’s likely time to water. If it feels damp, wait! Many growers also find moisture meters helpful; wait until the meter reads ‘dry’ or is very low on the ‘moist’ scale before watering. Another simple trick? Get used to the weight of the pot. Lift it right after watering and then again when you think it might be dry. A significantly lighter pot usually means it’s thirsty. When in doubt, it’s almost always safer to wait another day or two.
The Golden Rule: Water Less Often, Not Less Volume
When you determine it’s time to water, water thoroughly until water runs freely out of the drainage holes. This ensures all the roots get access to moisture. BUT, you will do this far less frequently than in summer. The time between waterings will likely increase significantly – perhaps to every 2, 3, or even 4 weeks depending on your specific conditions (pot size, temperature, light levels). Always, always empty the saucer or cache pot after watering; never let your Alocasia sit in standing water. A pro tip: use room temperature water to avoid shocking the roots.
Spotting Overwatering (and Preventing Root Rot)
Keep an eye out for the tell-tale signs: lower leaves turning yellow and becoming soft (not crispy), the base of the stem feeling mushy or blackening, persistent fungus gnats hovering around the soil, or a generally unhappy, wilting appearance even when the soil is wet. Consistent checking before watering is the absolute best way for preventing alocasia root rot winter.
To Feed or Not to Feed? Navigating Winter Fertilizing
Should you be fertilizing alocasia in winter? For the vast majority of indoor Alocasias, the answer is a clear no.
Hold the Fertilizer: Why Most Alocasias Need a Winter Break
Since your plant isn’t actively growing, it can’t effectively utilize the extra nutrients from fertilizer. Adding fertilizer to dormant or slow-growing plants can lead to a buildup of mineral salts in the soil. This buildup can actually burn the sensitive roots, causing damage and stress rather than providing any benefit.
The Rare Exception: When a Tiny Snack Might Be Okay
The only scenario where you might consider fertilizing is if your Alocasia is situated under strong grow lights and is actively and visibly pushing out new leaves throughout the winter months. Even in this less common situation, extreme caution is needed. Use a balanced liquid fertilizer heavily diluted to 1/4 or even 1/8 of the recommended strength, and only apply it perhaps once mid-winter.
The Safest Bet: Wait Until Spring Growth Resumes
For almost all home growers, simply stop fertilizing in the fall/autumn and don’t start again until you see clear signs of vigorous new growth resuming in the spring. Your plant’s roots will thank you for the rest!
Beyond Light, Water & Food: Tackling Other Winter Hurdles
Successfully keeping alocasias alive in winter indoors often involves managing the ambient environment too.
Battling the Dry Spell: Boosting Winter Humidity
Alocasias are native to tropical environments and thrive in higher humidity. Unfortunately, winter heating systems often make indoor air extremely dry. While Alocasias can adapt, maintaining some extra humidity helps them stay healthier. Ideally, aim for 50-60% relative humidity around your plants if possible.
- Effective methods: Placing a humidifier nearby is the most efficient way. Grouping several plants together can also create a slightly more humid microclimate as they transpire. Using pebble trays (placing the pot on pebbles within a tray filled with water, ensuring the water level stays below the bottom of the pot) can offer localized humidity.
- A note on misting: While it might feel helpful, misting provides only very temporary humidity and, if overdone or if airflow is poor, can sometimes encourage fungal spots on leaves.
Winter Pest Patrol: Staying Vigilant
Dry, warm indoor conditions are unfortunately ideal for some common houseplant pests, especially spider mites. These tiny arachnids love Alocasias and can multiply quickly in dry air. Check your plants regularly, paying close attention to the undersides of leaves and where leaves join the stems – look for fine webbing, tiny moving dots, or a stippled, unhealthy appearance on the leaves. Mealybugs (small, white, cottony clusters) can also make an appearance.
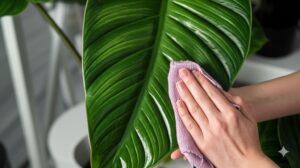
- Prevention is key: Gently wipe down leaves (both top and bottom) with a soft, damp cloth occasionally. This not only keeps them clean for better light absorption but also physically disrupts pests.
- Act fast: If you spot pests, isolate the affected plant immediately to prevent spreading. Treat promptly with an appropriate method like insecticidal soap or neem oil, carefully following the product’s instructions. Persistence is often needed to fully eradicate them.
Temperature Truths: Keeping Things Stable
Alocasias generally prefer stable room temperatures, common in most homes, ideally between 60-75°F (15-24°C). Sudden or extreme temperature fluctuations are more stressful than the exact number on the thermometer. Pay attention to:
- Cold Drafts: Keep plants away from poorly sealed windows, exterior doors, or any spot where they might be hit by blasts of cold air.
- Direct Heat: Avoid placing them directly in the path of heating vents or right next to radiators. The intense, dry heat can quickly scorch leaves and dehydrate the plant.
“Help! My Alocasia Looks Dead!” Navigating Winter Dormancy
Sometimes, even with perfect care adjustments, your Alocasia might decide it’s time for a long winter’s nap. This is alocasia dormancy winter behavior, and it’s often completely normal. Don’t panic and definitely don’t throw it out!
Is It Resting or Really Gone? Telling Dormancy from Distress
Dormancy typically manifests as a gradual yellowing and dropping of leaves, often starting with the oldest, outermost leaves, until perhaps only a bare stem remains, or even nothing is visible above the soil line. It can look quite dramatic! The crucial difference between a dormant Alocasia and one that has sadly perished lies underground in the corm. Gently probe the soil near the base or carefully tip the plant out just enough to see or feel the corm (the firm, bulb-like structure). If the corm is firm and solid (not mushy, smelly, or hollow), your plant is very likely just dormant and storing energy for spring.
Caring for Your Sleeping Beauty: Dormant Alocasia Care
Caring for a dormant Alocasia is surprisingly low-maintenance. You generally have two main options:
- Leave it in the pot: This is often the simplest approach. Keep the pot in its usual spot or move it somewhere slightly cooler and dimmer if convenient (but not essential). The most important thing is to drastically reduce watering. Only give it a tiny splash of water perhaps once a month or even less – just enough to prevent the corm from completely desiccating over winter. Do not water it like a growing plant!
- Store the corm: Some growers prefer to unpot the corm, gently clean off the soil, let it air dry for a day or so, and then store it in a paper bag or container with slightly damp peat moss or sphagnum moss in a cool, dark, dry place (like a closet or basement shelf) until spring.
The Spring Awakening: Waking Up Your Alocasia
As the days noticeably lengthen and temperatures reliably warm up in spring (or when you choose to bring a stored corm out of storage), it’s time for the wake-up call! If the corm was stored, pot it up in fresh, well-draining potting mix. Place the pot (whether left in place or newly potted) in a warm spot with bright, indirect light. Begin watering sparingly – just enough to make the soil lightly moist. Now, patience is key! It can take several weeks, sometimes longer, but eventually, you should be rewarded with a new shoot emerging from the soil. As this new growth appears and develops, you can gradually increase watering back towards a more regular schedule. Witnessing this reviving dormant alocasia after winter is one of the most rewarding moments for an Alocasia parent!
Your Alocasia Winter Care Cheat Sheet & Final Encouragement
Feeling ready to tackle winter with your Alocasias? Here’s a quick recap of the essential alocasia care tips winter edition:
Quick Recap: The Key Winter Adjustments
- Water: Significantly less often! Always check soil moisture first (top 1-2 inches dry).
- Light: Maximize bright, indirect natural light. Supplement with grow lights if needed (10-12 hours/day).
- Fertilizer: Stop feeding completely until spring brings active growth.
- Humidity: Combat dry indoor air using a humidifier, pebble trays, or grouping plants.
- Temperature: Maintain stable room temps; crucially, avoid cold drafts and direct heat blasts.
- Pests: Inspect regularly (especially under leaves) for spider mites and other pests. Wipe leaves periodically.
- Dormancy: Recognize it’s a normal rest period. Check corm firmness and reduce watering to almost nothing.
Trust Your Instincts & Observe Your Plant
While these guidelines are based on common best practices, remember that every home environment is unique, and even individual plants can have slightly different needs. The very best tool you have is observation. Pay close attention to your Alocasia. Learn its cues. Does it look content? Are the leaves (if present) holding their color and firmness? Adjusting your care based on what you see is the hallmark of a great plant parent.
Remember: Winter Survival is Success!
Finally, be kind to yourself and your plants during winter. This season is typically about maintenance and survival indoors, not about achieving explosive growth. If your Alocasia makes it through the winter looking reasonably healthy, or even if it goes fully dormant but the corm remains healthy, you’ve done a great job! Successfully keeping alocasias alive in winter indoors is a victory worth celebrating.
Happy winter growing, plant friends! Be patient, observe carefully, and enjoy the unique beauty your Alocasias bring, even during the quieter months. You’ve got this!