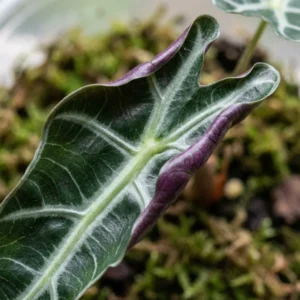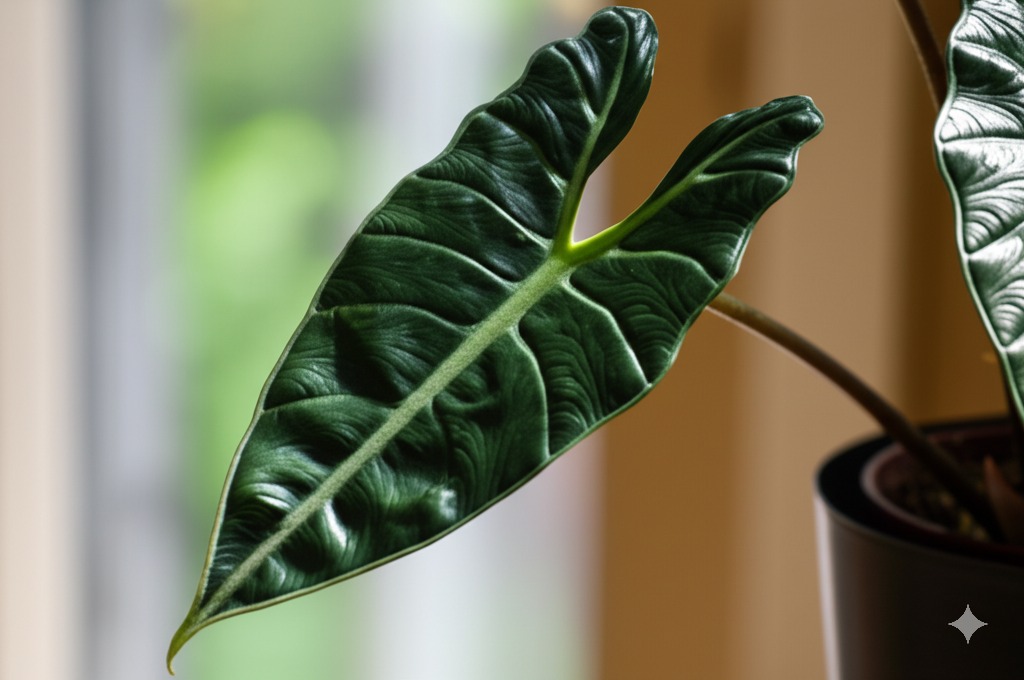
Hello fellow plant enthusiasts! Alex here, your friendly guide in the wonderful world of Alocasias. Today, we’re diving deep into the care of a truly special plant: the Alocasia Scalprum. Often called the “Sharp-Leaved Jewel,” this beauty captivates with its incredibly textured, deep green leaves that almost feel like dragon scales. If you’ve welcomed one into your collection or are dreaming of doing so, you’re in the right place! This guide will walk you through everything needed for successful Alocasia Scalprum care, helping your stunning jewel not just survive, but truly thrive.
Jump to Sections
ToggleGetting the Basics Right: Essential Alocasia Scalprum Care
Like many of its Alocasia cousins, Scalprum has specific preferences, but don’t let that intimidate you! Once you understand what makes it happy, caring for it becomes a rewarding rhythm. Getting these core elements right provides the foundation for a healthy, vibrant plant.
Finding the Sweet Spot: Light Requirements
Alocasia Scalprum loves light, but it must be the right kind of light. Think bright, but definitely indirect sunlight. Imagine the dappled light filtering through a lush rainforest canopy – that’s the sweet spot we’re aiming for! Direct sunlight, especially the harsh afternoon rays, will quickly scorch those gorgeous, thick leaves, leaving permanent brown patches.
- Ideal Placement: An east-facing window providing gentle morning sun is often perfect. Alternatively, position it a few feet back from a brighter south or west-facing window, ensuring it’s well out of the direct sunbeams. According to standard practices for tropical understory plants, this mimics their natural lighting conditions.
- Reading the Signs: If your plant isn’t getting enough light, it might become ‘leggy,’ stretching towards the light source, and its rich green color could fade. See scorched spots? That’s a clear sign of too much direct sun.
The Watering Dance: How Often to Water Your Scalprum
Mastering watering is crucial for almost all Alocasias, and Scalprum is no exception. The key principle: keep the soil consistently moist but never soggy or waterlogged. Alocasias notoriously dislike sitting in water – “wet feet” is the fastest path to root rot, a very common issue many plant owners encounter.
- The Finger Test: Before reaching for the watering can, stick your finger about 1-2 inches deep into the soil. If it feels dry at that depth, it’s likely time for a drink. If it still feels damp, it’s wise to wait another day or two and check again. A simple moisture meter can also be a helpful tool here.
- Thorough Hydration: When you water, do so thoroughly. Pour water evenly over the soil surface until it begins to drain freely from the pot’s bottom drainage holes. This ensures the entire root system gets access to moisture. And critically, always empty any excess water that collects in the saucer or cache pot after 15-20 minutes. Don’t let the pot sit in standing water.
- Observe and Adapt: Get familiar with your plant and its specific environment. Light levels, temperature, humidity, pot type, and the soil mix itself all influence how quickly the soil dries out. Watering should be based on the plant’s needs, not a strict calendar schedule. Consistent checking is key.
- Seasonal Slowdown: During the cooler fall and winter months, or if your Alocasia enters dormancy (we’ll cover that soon), its growth and water requirements will naturally decrease. Reduce your watering frequency accordingly.
Perfect Potting Mix: The Best Soil for Alocasia Scalprum
Standard houseplant potting soil straight from the bag is typically too dense and retains too much moisture for Alocasia Scalprum’s liking. Remember, these plants need airflow around their roots just as much as they need water! The ideal alocasia scalprum soil mix must offer excellent drainage and aeration.
- DIY Blend: Think chunky and breathable! Creating your own mix is often best, and many growers find success with this approach. A good starting point involves combining quality indoor potting soil with generous amounts of amendments like perlite (boosts aeration), orchid bark (adds chunkiness and aids drainage), and perhaps some coco coir (helps retain slight moisture while staying airy) or horticultural charcoal. While exact ratios can vary based on your environment, aim for a mix that feels significantly lighter and chunkier than regular potting soil.
- Convenient Option: If mixing isn’t your preference, look for commercially available “Aroid Mixes.” These are specifically formulated for plants like Alocasias and usually provide the excellent drainage they require, taking the guesswork out.
- Pot Matters: Regardless of your soil choice, ensure the pot has adequate drainage holes! This is absolutely essential. Terracotta pots are porous and help wick away moisture (beneficial if you tend to overwater, but they dry out faster), while plastic pots retain moisture longer. Choose based on your watering habits and environment.
Keeping it Cozy: Temperature Needs
Originating from tropical climates like the Philippines, Alocasia Scalprum prefers warm, stable temperatures. Fortunately, the conditions found in most homes are generally suitable.
- Comfort Zone: Aim to keep your Scalprum in an environment ranging between 65-80°F (18-27°C). Field experts suggest avoiding temperatures below 60°F (15°C) for extended periods.
- Watch Outs: Protect your plant from sudden temperature fluctuations, cold drafts from windows or doors (especially in winter), and direct blasts from heating or air conditioning vents. These can cause stress. Consistency is valued.
Feeding Your Jewel: Fertilizer Tips
Alocasias can be quite responsive to feeding during their active growing season, which is typically spring and summer. Providing appropriate nutrients supports the development of those stunning leaves.
- Timing is Key: Concentrate feeding efforts during periods when you see active growth – new leaves unfurling are a good sign.
- Fertilizer Choice: A balanced liquid houseplant fertilizer generally works well. Look for one where the N-P-K (Nitrogen-Phosphorus-Potassium) numbers are relatively equal.
- Application: Always dilute the fertilizer! Following the package instructions is a start, but many experienced growers find diluting to half or even quarter strength is safer and still effective for Alocasias. Feed your alocasia scalprum every 2-4 weeks while it’s actively growing. Remember the golden rule: it’s usually safer to slightly under-fertilize than to over-fertilize, as excess fertilizer salts can burn sensitive roots. (Keyword: alocasia scalprum fertilizer)
- Winter Break: Cease fertilizing completely during the fall and winter months when growth naturally slows or the plant enters dormancy.
Humidity Heaven: Mastering Alocasia Scalprum Humidity Needs
Alright, let’s focus on a crucial factor: humidity! If there’s one ‘secret weapon’ for happy Alocasias, especially jewel varieties like Scalprum, it’s providing sufficient ambient moisture. These plants evolved in humid tropical forests, and mimicking that aspect of their natural habitat is key. Alocasia Scalprum humidity needs are significant.
- The Ideal Range: While they might tolerate average household humidity for a while, they truly thrive when levels are consistently above 50%. Aiming for 60% or higher is the gold standard for lush growth and healthy leaves.
- Low Humidity Symptoms: Dry air often manifests first on the leaves. Keep an eye out for crispy brown leaf edges or tips, new leaves struggling to unfurl correctly, or just a general lack of vigor. Persistently low humidity also makes the plant more vulnerable to pests, particularly spider mites.
Practical Humidity Hacks (Tried-and-True Methods):
- Plant Grouping Power: Cluster your Alocasia with other houseplants. Through transpiration (releasing water vapor), they naturally increase the humidity in their immediate microclimate. It’s a simple, effective strategy many find helpful!
- The Pebble Tray Method: Place the plant pot on a tray filled with pebbles and water. Crucially, ensure the bottom of the pot sits above the water level (resting on the pebbles) to prevent waterlogging the roots. As the water evaporates, it humidifies the air directly around the plant.
- Humidifier Hero: Often the most reliable and consistent solution, particularly in dry climates or homes where heating or air conditioning runs frequently. A small humidifier operating near your Scalprum can make a dramatic difference in maintaining those ideal levels.
- Location Scouting: Bathrooms and kitchens often boast higher natural humidity. If you have a spot in one of these areas that receives adequate bright, indirect light, your Scalprum might flourish there.
- A Note on Misting: While misting provides a brief burst of moisture, the effect evaporates very quickly. Furthermore, frequent misting without good air circulation can sometimes encourage fungal issues on the leaves. It’s generally better to focus on methods providing more sustained, ambient humidity.
Solving Common Alocasia Scalprum Problems
Even the most attentive plant parent might encounter a few bumps in the road. Don’t worry, it’s part of the learning process! Here’s a guide to troubleshooting some common alocasia scalprum problems:
Decoding Yellow Leaves
Seeing alocasia scalprum yellow leaves can be concerning, but it’s usually the plant’s way of signaling an issue.
- Likely Causes:
- Overwatering: This is the most frequent reason. Soggy soil deprives roots of oxygen, leading to rot and yellowing leaves (often starting with the lower, older ones).
- Underwatering: Conversely, allowing the soil to become completely dry too often can stress the plant, causing leaves to yellow and potentially drop.
- Nutrient Needs: If older leaves are yellowing uniformly and you haven’t fertilized during the growing season, it might be asking for nutrients.
- Environmental Stress: Sudden cold drafts or temperature shocks can trigger yellowing.
- Acclimation: It’s quite normal for a plant to shed a leaf or two as it adjusts to a new environment after purchase or repotting. Give it time.
- Troubleshooting: Start by checking the soil moisture. Is it overly wet or excessively dry? Adjust your watering practices immediately. If the soil is soggy, it’s wise to gently inspect the roots for any brown, mushy sections (healthy roots are typically firm and whitish or light tan). Ensure the plant isn’t located in a cold draft. Allow time for adjustment if it was recently moved. Also note: It’s perfectly natural for the very oldest, lowest leaf to occasionally yellow and fade as the plant channels energy into new growth.
Banishing Brown Tips and Edges
Those frustrating crispy alocasia scalprum brown tips or leaf margins are very often linked directly to the surrounding air.
- Primary Culprit: Low humidity is the most common cause for brown tipping on tropical foliage plants like Scalprum.
- Other Possibilities: Inconsistent watering habits (cycles of very dry followed by soaking), potential fertilizer burn from applying too much or too strong a solution, or sometimes mineral accumulation from hard tap water. (Using filtered, distilled, or rainwater can help if you suspect water quality issues).
- The Fix: Revisit the humidity section – boosting ambient moisture levels is usually the most effective solution. Ensure your watering is consistent, avoiding extremes. If fertilizer burn seems likely, flush the soil thoroughly with plain water during the next watering session.
Pesky Pests: Identification and Control
Alocasias, especially when slightly stressed (often by low humidity), can become targets for certain houseplant pests. Regular inspections are your best line of defense!
- Common Intruders: Stay vigilant for alocasia scalprum pests such as:
- Spider Mites: These tiny arachnids thrive in dry conditions. Look closely for fine, silky webbing, particularly between leaves and stems, and tiny yellow or bronze dots (stippling) on the leaf surfaces where they feed. They can multiply quickly if conditions are right.
- Mealybugs: Small, white insects that look like tiny cotton balls, often found hiding in leaf axils (where the leaf meets the stem) or along stems.
- Battle Plan:
- Quarantine! If you confirm pests, immediately isolate the affected plant from your other houseplants to prevent the infestation from spreading.
- Manual Removal: Use a soft, damp cloth to thoroughly wipe down all leaf surfaces (top and bottom) and stems. This physically removes many pests. For mealybugs, a cotton swab dipped in rubbing alcohol can be effective for spot treatment.
- Spray Solutions: Apply insecticidal soap or neem oil spray according to the product label directions. Thorough coverage is essential, paying close attention to leaf undersides and crevices. Repeat treatments every 5-7 days for a few weeks are often necessary to break the pest life cycle, as recommended by horticultural resources.
- Prevention is Key: Maintaining higher humidity levels and ensuring good air circulation can make your plant less attractive to spider mites. Frequent inspection allows early detection when pests are much easier to eradicate.
Understanding Alocasia Dormancy
Don’t be alarmed if, especially during the shorter days and cooler temperatures of fall and winter, your Alocasia Scalprum seems to slow down its growth or even stop producing new leaves entirely. It might even drop some or all of its existing leaves. This could simply be dormancy!
- What It Means: Dormancy is a natural rest phase for Alocasias, often triggered by changes in light and temperature. The plant effectively goes to sleep, conserving energy within its underground corm (a bulb-like storage organ). It’s a survival mechanism, not a sign of failure!
- Dormancy Care: If you suspect your plant is dormant, significantly reduce watering – just provide enough moisture to prevent the soil from becoming completely bone dry. Stop all fertilizing. Keep the pot in a location that remains reasonably warm (ideally above 60°F / 15°C). Be patient! As warmth and light increase in the spring, new growth should emerge from the soil. Check the corm occasionally; if it’s firm, the plant is likely just resting healthily.
Spot the Difference: Alocasia Scalprum vs Samar Lance
It’s quite common for plant lovers to confuse Alocasia Scalprum with a similar-looking relative, Alocasia Samar Lance. Both originate from the Philippines and share similar care requirements, which contributes to the potential mix-up. Let’s clarify the distinctions between alocasia scalprum vs samar lance:
- Shared Traits: Both are prized ‘jewel’ Alocasias, feature striking arrowhead or lance-shaped leaves, and demand high humidity, bright indirect light, and a fast-draining potting mix.
- Key Distinctions:
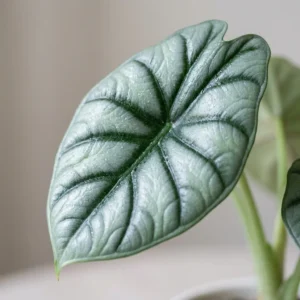
- Leaf Texture: This is often the clearest giveaway. Scalprum possesses that distinctive, thick, leathery, highly textured surface – some describe it as almost reptilian or embossed. Samar Lance, while still having a substantial leaf, generally presents a much smoother surface texture. Feeling the leaves (gently!) is often definitive.
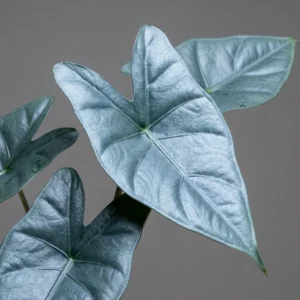
- Leaf Shape & Form: Scalprum leaves tend to appear somewhat broader, are held more rigidly, and often have a more pronounced triangular-arrowhead silhouette. Samar Lance leaves are typically narrower, more elongated, fitting the ‘lance’ description (like a spearhead), and may seem slightly ‘flatter’ in comparison.
- Color & Sheen: Both display beautiful deep green hues, though Scalprum can sometimes appear even darker or richer. Owing to its texture, Scalprum often exhibits a unique matte or subtle satin sheen, whereas Samar Lance might look marginally glossier.
- Care Implications: Their day-to-day care is virtually identical. Some anecdotal reports suggest Scalprum’s thicker leaves might make it slightly less prone to immediately showing stress from brief humidity drops compared to Samar Lance, but fundamentally, both require consistently high humidity to truly flourish.
Extra Tips for a Thriving Alocasia Scalprum
- Promote Airflow: Ensure good air circulation around your plant. Avoid overcrowding it tightly amongst other plants, as airflow helps prevent fungal problems and can discourage certain pests. A small fan in the room on a low setting can sometimes help if air feels stagnant.
- Keep Leaves Dust-Free: Gently wipe the leaves (top and bottom) with a soft, damp cloth every few weeks. This removes accumulated dust, which allows the plant to photosynthesize more effectively and also gives you a regular opportunity to inspect closely for any early signs of pests.
- Simple Propagation: Curious about making more Scalprum plants? For beginners, the most straightforward method is division during repotting (typically needed every 1-2 years or when the plant becomes rootbound). You may find small ‘pups’ or offsets growing alongside the main plant. If these offsets have developed their own root systems, they can be gently separated and potted into their own containers. It’s a rewarding way to share this jewel! Propagating from the small corms you might find in the soil is also feasible but generally requires more patience. (Keyword: alocasia scalprum propagation)
- A Gentle Warning: Remember, like all plants in the Alocasia genus, Scalprum contains calcium oxalate crystals. These can cause irritation if ingested, so it’s important based on widely available plant toxicity information to keep the plant out of reach of curious pets (cats, dogs) and young children.
Final Thoughts: Enjoy Your Sharp-Leaved Jewel!
Alocasia Scalprum truly earns its “Sharp-Leaved Jewel” moniker. It’s a plant brimming with unique character and sophisticated beauty. While it might ask for a little more attention compared to some common houseplants, particularly regarding its humidity preferences, the reward of watching those incredible, textured leaves unfurl is deeply satisfying for any plant lover.
Be patient with yourself and your plant as you learn its specific needs in your home environment. Pay close attention to its cues – it will often signal what it requires. Celebrate each new leaf and enjoy the journey of successful Alocasia parenting! Happy growing!