Hello fellow plant lovers! If you’re reading this, chances are you’re feeling a bit worried about your gorgeous Alocasia. Maybe your stunning Alocasia ‘Polly’ isn’t looking quite so perky, or your dramatic ‘Black Velvet’ seems undeniably down. Seeing these ‘jewel’ plants struggle can really cause that sinking feeling, can’t it? One of the most common, and often feared, culprits behind a sad Alocasia is the dreaded alocasia root rot.
I know, even the name sounds alarming! I remember the first time I suspected it on one of my own prized Alocasias – the panic is real! But here’s the genuinely good news: while root rot is serious business for our plants, it’s often treatable, especially if you catch it early. Think of this guide as a friendly hand to hold through the process. We’ll walk through exactly how to spot the crucial signs of root rot in alocasia, the clear step-by-step process for how to save alocasia from root rot, and most importantly, how to prevent this pesky problem from returning or ever starting. So, don’t panic – take a deep breath. With a little know-how and timely action, you absolutely can often bring your precious Alocasia back from the brink!
Jump to Sections
ToggleSpotting the Enemy: Key Signs of Root Rot in Alocasia
Alocasias can sometimes be a bit dramatic (it’s part of their charm!), so how do you distinguish between a temporary mood swing and something more serious like root rot? You need to become a plant detective and look closely for these tell-tale signs:
Clues Above the Soil
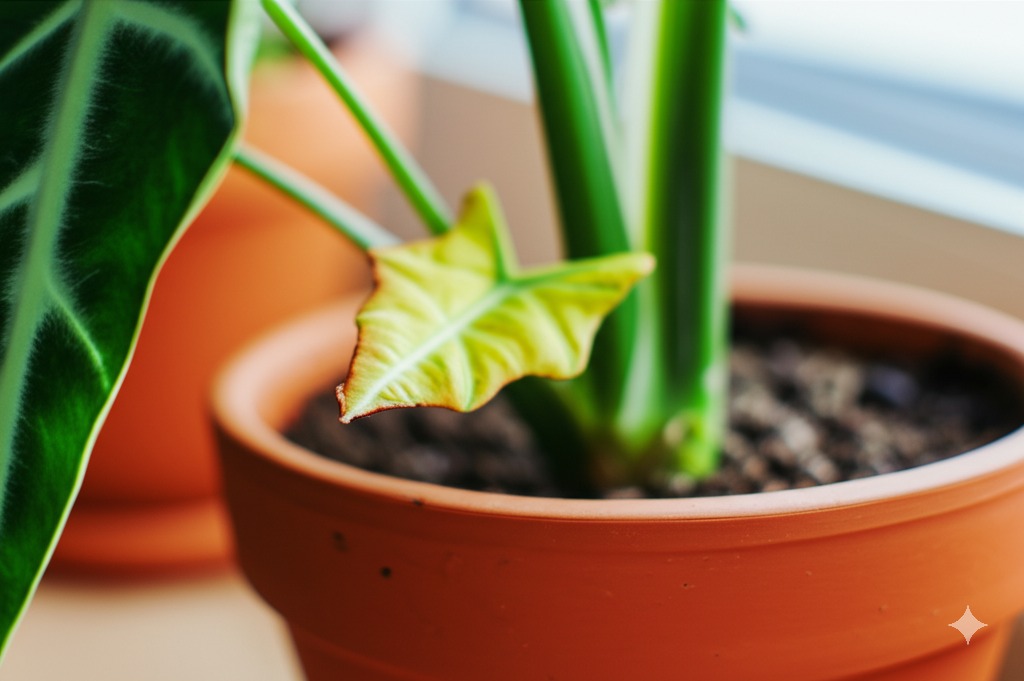
- Yellowing Lower Leaves: This is often the first visible sign. Are the bottom-most leaves turning yellow and eventually dropping off, perhaps more than one at a time? While losing an occasional single old leaf is perfectly normal, progressive yellowing starting from the base upwards is a classic alocasia yellow leaves root rot signal.
- Drooping or Wilting: Does your Alocasia look thirsty and sad, even though you know the soil is moist when you check it? This confusing situation happens because damaged, rotting roots can’t effectively absorb water to hydrate the plant. It’s a major red flag pointing towards root issues. Keep an eye out for alocasia drooping leaves root rot.
- Stunted Growth: Has your plant seemingly stopped putting out those beautiful new leaves it used to unfurl? Or are any new leaves that do appear much smaller than usual, perhaps even a bit deformed? Root rot severely hampers the plant’s ability to grow and thrive.
- Mushy Stem Base: Gently feel the base of the leaf stalks (petioles) or the main central stem right where it meets the soil line. Does it feel soft, squishy, or even slightly slimy to the touch? You might also notice some brown or black discoloration in this area. A mushy stem alocasia is a strong indicator that rot might be present and potentially advancing.
Clues in the Pot
- A Foul Odor: Healthy soil has a pleasant, clean, earthy scent. If you get a whiff of something sour, swampy, distinctly unpleasant, or generally ‘rotten’ coming directly from the pot, trust your nose! According to standard horticultural practices, that’s often the unmistakable smell of decay associated with root rot.
- Soil Stays Wet Too Long: Have you noticed the potting mix is taking significantly longer to dry out between waterings compared to how it used to? This could mean the roots aren’t functioning properly to absorb water, or the soil has poor drainage – both prime conditions that encourage root rot.
The Moment of Truth: Checking the Roots
While the signs above are strong clues, the only way to be 100% certain you’re dealing with root rot is to gently slide the plant out of its pot and have a direct look at the roots. I know, it can feel a bit daunting the first time, but it’s absolutely essential for accurate diagnosis and treatment! Here’s how to check alocasia roots effectively:
- Healthy Roots: Healthy Alocasia roots should look plump, often slightly fuzzy, and feel firm when gently squeezed. Their colour is typically a creamy white or light tan.
- Rotten Roots: This is what you’re inspecting for. Rotted roots will appear brown or black. Instead of firm, they’ll feel soft, mushy, and possibly even slimy. They might fall apart easily with just a gentle touch, or sometimes the outer sheath pulls away easily, leaving just a stringy inner core. They often carry that distinct, unpleasant rotten smell too. Finding alocasia roots brown and mushy confirms your suspicion.
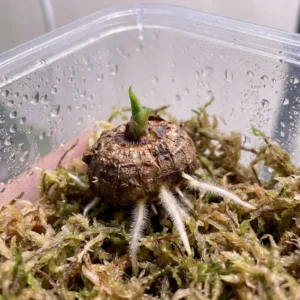
- Check the Rhizome/Tuber: Alocasias grow from an underground structure called a rhizome or tuber (think of a small, firm potato). Gently feel this structure as well. It should be solid and firm all over. If you find parts that are soft, discoloured (often brownish or blackish), or obviously mushy, the rot has unfortunately spread to this vital part of the plant.
Unmasking the Culprits: Common Causes of Alocasia Root Rot
Okay, diagnosis confirmed. It’s root rot. But the crucial question is why did it happen? Understanding the common causes is not just about blame; it’s the foundation for preventing it from ever happening again:
The Usual Suspect: Overwatering
This is, without a doubt, the most frequent trigger for root rot in Alocasias and many houseplants. This doesn’t just mean watering too much at once, but more often watering too frequently, not allowing the top portion of the soil to dry out between waterings, or letting the pot sit indefinitely in a saucer full of drainage water. This creates constantly soggy conditions. Plant roots need oxygen to function and survive (they ‘breathe’!), and waterlogged soil essentially suffocates them, making them weak and highly susceptible to decay. Remember those overwatered alocasia signs like yellowing leaves and wilting? They very often trace back to this core issue.
Drainage Disasters
If water doesn’t have an easy way to escape the pot after watering, it creates the swampy conditions root rot loves. Key drainage issues include:
- Pots Without Drainage Holes: Using a beautiful decorative pot that lacks drainage holes is almost guaranteed to lead to problems eventually. Always use a nursery pot with holes inside a decorative cachepot, or ensure the main pot has drainage.
- Poor Soil Mix: Using a heavy, dense potting soil that retains too much moisture and lacks air pockets is a major contributing factor. Standard indoor potting mixes often need to be amended with things like perlite or bark to make them suitable for Alocasias.
- Blocked Drainage Holes: Occasionally, the holes can become clogged with soil or roots. Always check that water can flow freely out the bottom when you water. (And that old advice about putting gravel at the bottom? Most experts now agree it actually hinders drainage rather than helping.)
Potting Problems
- Pot Too Large: Planting an Alocasia (especially a small one) in a pot that’s significantly too large for its current root system is a common mistake. The excess soil volume holds moisture for too long, staying wet around the roots that can’t absorb it quickly enough.
The Invisible Invaders: Pathogens
While the poor conditions (lack of oxygen, excess moisture) are the primary cause that weakens the roots, fungal and bacterial pathogens are often the opportunistic agents that actually cause the rapid decay. Microscopic organisms (common culprits include species of Pythium, Phytophthora, Rhizoctonia, or Fusarium fungi) thrive in these anaerobic (low-oxygen) soil environments. They attack the already stressed and weakened roots, dramatically speeding up the rotting process. This is the actual fungal infection alocasia roots can suffer from, even if it started with just waterlogging.
Plant Stress
Keep in mind that a plant already weakened by other factors – perhaps an ongoing pest infestation, insufficient light, or recovery from temperature shock – will generally be less resilient and more susceptible to developing root rot if its soil conditions become unfavourable.
The Rescue Mission: How to Save Your Alocasia from Root Rot
Alright, take another deep breath! It’s time for the rescue operation. If you’ve caught the root rot reasonably early, there’s genuinely a good chance you can save your beloved Alocasia. Follow these steps methodically and carefully – this is how to save alocasia from root rot:
Step 1: Gently Remove and Clean
Carefully slide your Alocasia out of its current pot. Try to support the base of the plant near the soil line as you ease it out. Gently shake off as much of the old, potentially contaminated soil as possible. To get a really clear view of the roots, it’s often helpful to rinse them gently under lukewarm tap water (avoid extremes – not icy cold or steaming hot). Be gentle throughout this process – the goal is to inspect, not inflict more damage on any remaining healthy roots.
Step 2: Assess the Damage & Gather Your Tools
Now, with the roots cleaned, take a good, hard look. Identify all the roots that are brown, black, mushy, or smelly. Also, check the rhizome carefully for any soft spots. Before you make any cuts, gather your tools: you need clean, sharp scissors or pruning shears. Sterilization is absolutely crucial to avoid spreading pathogens further. Wipe the blades thoroughly with rubbing alcohol (isopropyl alcohol works great) or dip them briefly in a diluted bleach solution (about 1 part household bleach to 9 parts water is a standard recommendation). Plan to re-sterilize between cuts if you’re dealing with significant rot or cutting into the rhizome.
Step 3: Prune Away the Rot (Be Brave!)
This is arguably the most critical step in the treatment process. You need to be thorough. Systematically cut off every single piece of affected root. Don’t just snip the end; trace it back and make your cut slightly above the rotted section, ensuring you are cutting into healthy, firm tissue (healthy root tissue usually looks white or light tan inside). It might feel alarming to remove a lot of roots, especially if the rot is extensive, but trust me, it’s far better to remove a bit of healthy tissue along with the bad than to leave any rot behind. If you leave rot, it will almost certainly continue to spread. If the rhizome itself has soft, dark areas, you must carefully try to scrape or cut away these rotted parts too, until you expose only firm, healthy-looking tissue. Yes, this feels drastic, but it’s necessary surgery for your plant’s survival. Remember to keep sterilizing that cutting tool!
Step 4: Treat the Remaining Roots (Optional but Highly Recommended)
After you’ve meticulously pruned away all the visible rot, treating the remaining healthy roots is a good insurance policy against any microscopic pathogens still lurking. This step can help prevent the infection from flaring up again. Here are two common approaches based on general houseplant care practices:
- Hydrogen Peroxide Solution: This is a popular and readily available option. Use standard 3% hydrogen peroxide from the drugstore. Many growers find success mixing approximately 1 part hydrogen peroxide with 2 to 3 parts water. You can then either briefly dip the entire healthy root system into this solution for just a few minutes (no long soaking needed) or put it in a spray bottle and thoroughly mist the roots. The alocasia root rot hydrogen peroxide treatment is favoured by many because the bubbling action is thought to help introduce oxygen around the roots.
- Commercial Fungicide: Especially if the root rot was quite severe, or if you want a more targeted approach against fungal pathogens, you could consider using a commercial houseplant fungicide that is specifically labeled for treating root rot or soilborne fungal diseases. It’s essential to follow the product’s label instructions precisely – application methods vary (powders, dips, drenches). Always handle these products with appropriate care as directed on the packaging.
Step 5: Repotting Your Patient
Now it’s time to give your recovering Alocasia a fresh, clean home. This step is crucial for preventing a relapse during repotting alocasia after root rot.
- Use a Clean Pot: Absolutely do NOT reuse the old pot unless you have first scrubbed it thoroughly with hot, soapy water and then sterilized it (using your diluted bleach solution or rubbing alcohol, followed by a good rinse). Using a completely new pot is often the easiest and safest option to prevent reinfection.
- Choose the Right Size: Select a pot that is just slightly larger than the remaining healthy root mass. Putting a plant with a significantly reduced root system back into a large pot will recreate the overwatering risk very quickly. And, it bears repeating: make absolutely sure the pot has adequate drainage holes!
- Fresh, Airy Soil Mix: This is non-negotiable. You must use a brand new, well-draining potting mix. Never reuse the old soil, as it’s likely contaminated with the pathogens that caused the rot. The best soil mix for alocasia to prevent root rot is typically chunky and allows for good airflow. A great DIY recipe often includes quality indoor potting soil blended generously with perlite (those little white volcanic rocks) and some orchid bark or coco chips for structure and drainage.
- Potting Up Carefully: Position the Alocasia in the new pot so that the base of the plant sits at roughly the same depth it was originally planted. Gently fill in around the roots with your fresh mix. Lightly firm the soil to remove major air pockets and provide support, but do not pack it down tightly – you want to maintain that crucial airiness around the roots.
Step 6: Post-Op Recovery Care
Your Alocasia has undergone major surgery! Its aftercare is vital for successful recovery:
- Water VERY Sparingly at First: Immediately after repotting, water lightly – just enough to moisten the new soil and settle it around the roots. Remember, the plant now has far fewer roots, so its water needs are drastically reduced. Going forward, wait until the top 1-2 inches of the soil feel completely dry to the touch before watering again. When you do water, apply water thoroughly until it drains, but then be absolutely sure to empty the saucer. Overwatering now is the quickest way to undo all your hard work.
- Provide Bright, Indirect Light: Place your recovering patient in a spot with plenty of bright light, but shield it from harsh, direct sunlight, which can scorch the leaves and add unnecessary stress during this sensitive period.
- Maintain Humidity: Alocasias generally appreciate higher humidity levels. Maintaining good ambient humidity around the plant (perhaps using a humidifier nearby, a pebble tray with water under the pot – ensuring the pot isn’t sitting in water, or grouping it with other plants) can help reduce water loss from the leaves and ease the plant’s stress as it focuses on root regrowth.
- Hold Off on Fertilizer: Do not fertilize your Alocasia for at least a month, and likely longer (many recommend waiting 6-8 weeks or until you see clear signs of active new growth). The plant needs to pour all its energy into regenerating its root system right now. Adding fertilizer encourages top growth, which can divert energy from the crucial root recovery process.
- Be Patient and Observe: Recovery from root rot isn’t an overnight miracle. It takes time and patience. Don’t be discouraged if your Alocasia looks a bit sad or doesn’t seem to do much for several weeks. Keep a close eye on it, monitor the soil moisture carefully, and watch hopefully for the emergence of new leaves – that’s the best signal that your rescue mission was successful and new healthy roots are forming beneath the surface!
Prevention is Key: Keeping Your Alocasia Root-Rot Free
While successfully saving dying alocasia from root rot feels like a major victory (and it truly is!), wouldn’t it be much nicer to avoid the stress and drama altogether? Absolutely! Focusing on robust prevention is the best long-term strategy for happy plants. Here’s how you prevent alocasia root rot and keep those precious roots thriving:
Master the Art of Watering (The Golden Rule)
Ditch rigid watering schedules like “water every Saturday.” They simply don’t account for changes in environmental conditions (light, temperature, humidity) or your plant’s individual needs. The only reliable way to know when your Alocasia needs water is to physically check the soil moisture first. Gently stick your finger about 1 to 2 inches deep into the potting mix. If it feels dry at that depth, it’s likely time to water. If it still feels noticeably moist, wait and check again in another day or two. When you determine it’s time to water, apply water thoroughly, allowing it to soak the entire root ball and flow freely out the drainage holes. Critically, ALWAYS empty the cachepot or drainage saucer after about 15-20 minutes. Never, ever let your Alocasia sit with its roots submerged in standing water. The Alocasia mantra is worth repeating: aim for consistently moist soil, but never soggy or waterlogged.
The Right Foundation: Pot and Soil Mix
- Drainage Holes are Non-Negotiable: I simply cannot stress this enough. Always use pots that have adequate drainage holes at the bottom. This is fundamental to meeting alocasia drainage requirements. If you fall in love with a beautiful decorative pot that lacks holes, use it only as a cachepot – keep the Alocasia in its plastic nursery pot (with holes!) that fits inside the decorative one, making sure to remove the inner pot for watering and draining.
- Airy, Chunky Soil is Best: Use that well-draining, chunky potting mix we discussed earlier. A blend using quality potting soil heavily amended with perlite, orchid bark, coco chips, or even horticultural charcoal provides the aeration and fast drainage that Alocasia roots need to stay healthy. Avoid using dense, water-retentive bagged mixes straight from the bag without amendments, and never use soil taken directly from your garden.
Pot Size Matters
Resist the common temptation to “pot up” your Alocasia into a much larger pot thinking it will encourage faster growth. This frequently backfires by creating a large volume of soil that stays wet for too long around a smaller root system. When repotting is genuinely needed (usually when the plant becomes rootbound), choose a new pot that is only about 1-2 inches larger in diameter than the previous one.
Let it Breathe: Ensure Good Air Circulation
Good airflow around your plant not only helps the soil surface dry out more evenly between waterings but also generally discourages the stagnant, overly humid conditions where fungal diseases can more easily take hold. Avoid cramming your plants too tightly together, allowing some space between them if possible. In very still indoor environments, even a small fan set on low in the room can improve air circulation significantly.
Quarantine Newcomers
Whenever you bring a new plant (Alocasia or otherwise) into your home or collection, it’s an excellent preventative habit to keep it isolated from your existing plants for at least a few weeks (many growers recommend 3-4 weeks). This “quarantine” period allows you to carefully observe the new arrival daily for any hidden signs of pests or diseases (including early symptoms of root rot!) before they have a chance to potentially spread to your established and healthy green family.
A Word of Encouragement (You’ve Got This!)
Listen, discovering root rot on a beloved plant can feel like a major plant-parenting setback. Please don’t beat yourself up about it! Honestly, it happens to many of us, even those who’ve been growing plants for years (I’ve certainly learned some lessons the hard way!). The crucial thing is that you’ve now learned how to recognize the signs, understand the common causes, and crucially, you now know exactly how to take decisive action.
Recovery requires patience. Your Alocasia might look a little worse for wear for a while after its treatment, but remember that these plants possess a surprising resilience. Provide the right, careful conditions we’ve discussed, resist the urge to over-love it (especially with water!) during recovery, and watch patiently for those hopeful signs of new growth. Seeing a plant that you rescued start to push out a fresh, healthy leaf is one of the most satisfying and rewarding experiences in plant care. So, can alocasia recover from root rot? With your informed care, careful attention, and a bit of plant magic, the answer is very often yes! You’re doing a great job just by learning how to tackle this challenge. Keep nurturing your green jewel!
Conclusion: Here’s to Healthy Roots and Happy Alocasias!
So there you have it – your comprehensive survival guide to diagnosing, treating, and preventing the dreaded alocasia root rot. Let’s quickly recap the absolute key takeaways to remember:
- Recognize Early: Learn to spot the subtle signs of root rot in alocasia – persistent yellowing lower leaves, wilting despite moist soil, a mushy stem base, or a foul smell from the pot. Early detection significantly increases the chances of success!
- Treat Decisively: If root rot is confirmed, act fast. Remove the plant from its pot, meticulously trim away all the brown, mushy roots using sterile tools, consider treating the remaining roots (e.g., with diluted hydrogen peroxide as a common first step), and repot into fresh, airy soil in an appropriately sized, clean pot with excellent drainage.
- Prevent Proactively: Remember, the best cure is always prevention! Master the art of watering by always checking soil moisture before you water, use a chunky, well-draining soil mix specifically suited for Alocasias, ensure your pots always have drainage holes, avoid over-potting, promote good air circulation, and make it a habit to quarantine new plants.
Caring for Alocasias can sometimes feel like navigating a beautiful but occasionally tricky path, but understanding how to effectively handle common challenges like root rot makes the journey far less daunting and infinitely more rewarding. With the knowledge and steps outlined in this guide, you’re now well-equipped to keep those vital roots healthy and enjoy the unique, stunning beauty of your Alocasia for a long time to come. Happy growing, fellow Alocasia aficionado!