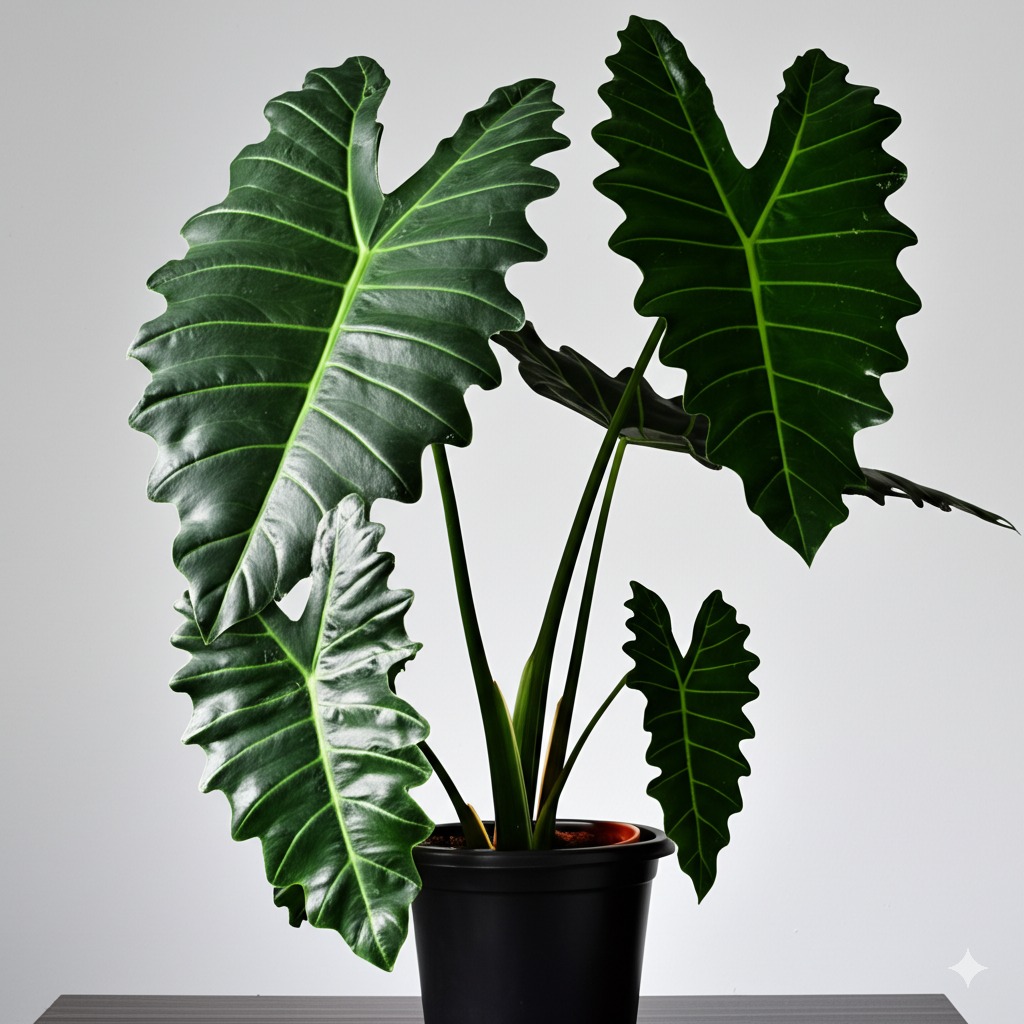
Hello fellow plant enthusiasts! Are you captivated by the dramatic, sculptural beauty of the Alocasia Portodora? With its impressive stature and beautifully textured leaves reaching for the sky, it’s easy to see why this plant, affectionately known as the “Upright Elephant Ear,” steals the show in any plant collection. It brings such a wonderful tropical vibe indoors!
While Alocasias sometimes have a reputation for being a tad dramatic (and let’s be honest, we’ve probably all experienced a diva moment with one!), caring for the magnificent Portodora doesn’t have to be intimidating. I’m here to share practical, easy-to-follow tips gleaned from plenty of experience, helping you understand exactly what this green giant needs to thrive. Let’s demystify Alocasia Portodora care together!
Jump to Sections
ToggleMeet the Majestic Alocasia Portodora (The Upright Elephant Ear!)
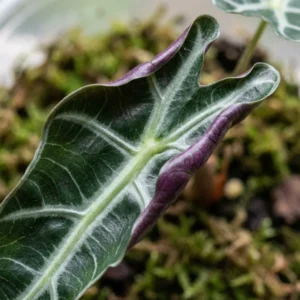
So, what makes the Alocasia Portodora so special? It’s primarily known for its striking structure. Unlike some of its sprawling cousins, the Portodora features thick, sturdy petioles (those are the leaf stalks!) that hold its large, arrow-shaped leaves in a distinct, upward-reaching V-shape. The leaves themselves often have beautiful wavy or ruffled edges, adding to its unique texture. It’s this vertical growth habit that earns it the perfect nickname: Upright Elephant Ear. Believed to be a hybrid, possibly involving Alocasia odora, it was cultivated for this very architectural appeal, making it a fantastic statement plant.
Decoding the Look: Alocasia Portodora vs. Portii
Now, you might have heard the name ‘Alocasia Portii’ thrown around, sometimes used interchangeably with Portodora. This can be a little confusing! Truthfully, in the plant world, these two are often considered synonyms or extremely closely related, and telling them apart can be tricky, even for seasoned growers.
Generally speaking, the plant most commonly sold and identified as Alocasia Portodora is the one celebrated for those noticeably wavy or ruffled leaf margins and a strongly upright growth habit. Some suggest Alocasia Portii might have slightly smoother edges, but these differences can be subtle and vary greatly depending on the individual plant and its growing conditions.
My best advice? Don’t get too hung up on the name! The care requirements for both are essentially identical. Focus on providing the best conditions for the beautiful Alocasia you have, whether it’s labeled Portodora or Portii. For this guide, we’ll focus on the characteristics typically associated with the stunning Portodora.
Essential Alocasia Portodora Care: Nailing the Basics
Ready to help your Portodora flourish? It really boils down to understanding and providing a few key things consistently. Let’s break it down:
Finding the Sweet Spot: Light Requirements
Alocasia Portodora craves bright, indirect light. Think of the dappled sunlight filtering through a rainforest canopy. An east-facing window offering gentle morning sun is often perfect. A spot a few feet back from a brighter south or west-facing window, perhaps filtered by sheer curtains, also works well.
What you absolutely want to avoid is prolonged, harsh direct afternoon sunlight. This will scorch those gorgeous leaves, leaving behind unsightly brown patches. Trust me, it happens faster than you think! On the flip side, too little light will cause your Portodora to become ‘leggy’ – stretching out its petioles with smaller leaves, desperately reaching for more light. It will also slow down growth considerably.
Pro Tip: Rotate your plant about a quarter turn each week. This encourages even growth and prevents it from leaning too heavily towards the light source – a common tendency for these upright growers.
Quenching Its Thirst: Watering Wisdom
This is where many new Alocasia parents stumble, but it’s simpler than you think! The mantra is: consistently moist, but never soggy or waterlogged. Allow the top 1-2 inches of the soil to dry out before giving it a good drink. When you water, do it thoroughly until water flows freely from the drainage holes at the bottom of the pot. This ensures the entire root ball gets hydrated.
Crucially, don’t let the pot sit in a saucer full of excess water. Empty the saucer after about 15-20 minutes. Soggy soil is the fast track to root rot, one of the biggest threats to Alocasias. We’ve all been tempted to overwater our favorites, but resist the urge!
During the cooler fall and winter months, especially if your plant shows signs of slowing down (dormancy), you’ll need to reduce watering frequency significantly. Let the soil dry out a bit more between waterings.
A Note on Water Quality: Alocasias can sometimes be sensitive to the chlorine, fluoride, and minerals found in tap water, which can contribute to brown leaf tips. If you notice this becoming a persistent issue despite good humidity, switching to filtered water, distilled water, or collected rainwater can often make a noticeable difference.
The Perfect Foundation: Soil Mix Secrets
Forget standard, heavy potting soil straight from the bag! Alocasia Portodora needs a chunky, airy, extremely well-draining potting mix. Remember, they grow from corms/rhizomes that absolutely detest sitting in dense, wet soil. Good drainage and aeration are non-negotiable for healthy roots.
You can buy pre-made ‘aroid mixes’, which are specifically designed for plants like Alocasias, or easily create your own. A great starting point involves mixing ingredients like:
- Regular potting soil (as a base, maybe 30-40%)
- Perlite (for drainage and aeration – use generously, maybe 30%)
- Orchid bark (adds chunkiness and air pockets – maybe 20%)
- Coco coir or coco chunks (helps retain some moisture without compaction – maybe 10-20%)
- A little horticultural charcoal (optional, thought to help ‘sweeten’ the soil and absorb impurities)
The exact percentages aren’t set in stone; the goal is a light, chunky mix that water flows through easily, doesn’t get compacted, and allows vital air to reach the roots. And of course, always, always use a pot with drainage holes!
Creating a Humid Haven: Humidity Needs
Your Alocasia Portodora dreams of the tropics! It thrives in high humidity, ideally 60% or more. Unfortunately, most of our homes, especially with central heating or air conditioning running, are much drier than this. Low humidity is the primary culprit behind those frustrating crispy brown leaf edges.
How can you effectively boost humidity around your plant?
- Humidifier: Placing a small humidifier nearby is arguably the most consistent and effective solution for raising ambient humidity.
- Pebble Tray: Set the plant’s pot on a tray filled with pebbles and water. Make sure the bottom of the pot sits on the pebbles, above the water line. The evaporation will increase humidity right around the plant.
- Grouping Plants: Cluster your houseplants together. As they release moisture through transpiration, they collectively create a more humid microclimate.
- Location Choice: Rooms like bathrooms or kitchens can be naturally more humid, provided they offer adequate bright, indirect light.
While misting your plant might feel helpful, the effect on humidity is very short-lived and generally not sufficient as a primary strategy. Focus on methods that provide more consistent ambient moisture.
Keeping it Cozy: Temperature Preferences
Portodoras like it warm, generally preferring temperatures similar to what humans find comfortable indoors. Aim for a consistent range between 65-80°F (18-27°C). It’s important to protect your plant from sudden temperature drops and chilly drafts, often found near windows in winter, doors, or air conditioning vents. Temperatures dipping below 60°F (15°C) can stress the plant, significantly slow its growth, or even trigger dormancy.
Feeding Your Giant: Fertilizing Tips
During the active growing season (typically spring and summer), your Alocasia Portodora can be quite a hungry plant, needing nutrients to fuel that impressive foliage production. Feed it regularly using a balanced liquid houseplant fertilizer. Look for one where the N-P-K numbers (Nitrogen-Phosphorus-Potassium) are roughly equal, such as a 10-10-10 or 20-20-20 formula.
Important: Always dilute the fertilizer to half or even quarter strength of what’s recommended on the product label. Alocasias can be sensitive to fertilizer burn. It’s far better to under-fertilize than over-fertilize. Feed your Portodora roughly every 2-4 weeks only while it’s actively putting out new growth.
As growth naturally slows down in the fall and winter, stop fertilizing completely. The plant isn’t actively using the nutrients then, and feeding can actually harm dormant roots. Many experienced growers also recommend occasionally flushing the soil with plain water (by watering thoroughly until it drains freely) to help wash out any accumulated fertilizer salts.
Growing Alocasia Portodora Indoors: Tips for Houseplant Success
Bringing this magnificent specimen indoors is entirely achievable and incredibly rewarding! Here are a few extra pointers specifically for indoor growing:
Choosing the Right Spot & Pot
Think ahead about placement! This plant has the potential to get quite large, demanding both vertical and horizontal space as it matures. Choose a location where it has room to spread its leaves without being constantly brushed against or crowded. Remember that critical bright, indirect light requirement – typically near a suitable window, but shielded from harsh, direct sunbeams.
When potting, select a container that’s only about 1-2 inches wider in diameter than the current root ball. Using a pot that’s too large means excess soil stays wet for too long, significantly increasing the risk of root rot. Terracotta pots are porous and help the soil dry out faster (a good option if you’re prone to overwatering), while plastic pots retain moisture longer. Whichever material you choose, sufficient drainage holes are absolutely essential. You’ll likely need to repot your Portodora every 1-2 years, or when you notice roots significantly filling the pot or emerging from the drainage holes – spring is generally the best time for this task.
Adapting Care for Indoor Environments
As mentioned, the biggest hurdle indoors is often maintaining adequate humidity. Be consistent with your humidifier, pebble tray, or grouping strategies. It’s also normal for growth to be somewhat slower indoors compared to plants grown in optimal greenhouse or outdoor conditions. That’s okay! Finally, because pests can sometimes establish themselves more easily in stable indoor conditions, make it a regular habit (perhaps weekly) to inspect your plant carefully – paying close attention to the undersides of leaves and where petioles join the main stem – for any early signs of unwanted visitors.
Troubleshooting Common Alocasia Portodora Problems
Don’t panic if you spot a yellow leaf or a brown tip! These are common occurrences in houseplant care, and often easily remedied. Here’s a quick guide to diagnosing common issues:
Decoding Yellow Leaves
Yellowing leaves are often the plant’s way of signaling some kind of stress. The most frequent culprit for Alocasias is overwatering. Carefully check the soil moisture deep in the pot – is it constantly damp or wet? If you suspect overwatering, gently check the roots during repotting – healthy roots are firm and white/cream, while rotten roots are brown/black and mushy. Other potential causes include:
- Underwatering: Is the soil completely dry and pulling away from the sides of the pot?
- Nutrient Deficiency: If it’s been a long time since you last fertilized during the active growing season, yellowing can occur.
- Incorrect Light: Is it receiving scorching direct sun, or conversely, is it languishing in a very dim corner?
- Natural Leaf Senescence: It’s perfectly normal for the oldest, lowest leaf on an Alocasia to gradually yellow and die off as the plant matures and directs energy towards new growth. If it’s just one bottom leaf fading gracefully and the rest of the plant looks healthy and vigorous, it’s likely just part of the natural cycle.
Dealing with Crispy Brown Edges or Spots
- Crispy Edges/Tips: This is almost always a tell-tale sign of low humidity. Review and enhance your humidity-boosting efforts. Less commonly, it can also be linked to very inconsistent watering (letting it get bone dry then flooding it) or sensitivity to minerals or chemicals in your tap water.
- Brown Spots: If the spots are dry, brittle, and perhaps located where intense sun hits the leaf, it could be sunburn. If the spots are soft, mushy, expanding, or have a yellowish halo, it might indicate a fungal or bacterial issue, often exacerbated by overwatering, poor air circulation, or water sitting on the leaves for extended periods. Improve air circulation if possible and try to water the soil directly, avoiding wetting the foliage.
Pesky Invaders: Identifying and Treating Common Pests
Alocasias, unfortunately, seem to be particularly attractive to spider mites. These tiny arachnids (not insects!) thrive in the warm, dry conditions often found indoors. Look very closely for:
- Fine, silk-like webbing, especially in leaf axils (where leaves meet stems) and on the undersides of leaves.
- Tiny pale dots or stippling covering the leaf surface, causing a dull or bronzed appearance as they suck sap.
- The mites themselves are minuscule, but you might see tiny moving dots, especially on the undersides of leaves (a magnifying glass helps!).
Treatment: Act quickly as populations can explode. Regularly wipe down all leaf surfaces (tops and especially undersides) with a damp cloth or paper towel to physically remove mites and disrupt their lifecycle. Spray thoroughly with an insecticidal soap or neem oil solution, following product instructions carefully and ensuring complete coverage. Repeat treatments every few days for a couple of weeks to catch hatching eggs. Always isolate an infested plant immediately to prevent the mites from spreading to your other houseplants. Keep an eye out for other potential pests too, like mealybugs (small, fuzzy white cotton-like spots) or thrips (tiny, slender insects that cause silvery damage).
Understanding Dormancy: Is My Plant Dying?
Sometimes, particularly when temperatures cool down significantly or light levels decrease substantially in fall or winter, your Alocasia Portodora might enter a period of dormancy. This is a natural survival mechanism, a rest period. Signs include:
- Growth slowing dramatically or stopping altogether.
- Some, or even all, of the existing leaves may yellow, wither, and die back to the soil level.
Don’t assume the worst and discard the plant! It’s very likely just sleeping. During dormancy:
- Reduce watering drastically. Water only very sparingly, perhaps just enough to prevent the underground corm from completely desiccating. The soil should be mostly dry.
- Stop all fertilizing. Dormant plants aren’t taking up nutrients.
- Keep the pot in a location that still receives some ambient light, even if it’s less than its active growing spot. Avoid complete darkness.
Growth should naturally resume in the spring as temperatures warm up and daylight hours increase. You can always gently check the corm (the firm, bulb-like structure beneath the soil surface) – if it feels firm and solid, the plant is alive and well, just resting.
Expanding Your Collection: Alocasia Portodora Propagation
Fallen completely in love with your Portodora and wish you had more? Good news – propagating them is quite feasible!
Propagating via Offsets (Pups)
As your mother plant matures and becomes well-established, it will likely begin producing small baby plants, known as offsets or pups, right around its base, emerging from the soil. The easiest time to separate these is when you are repotting the main plant (ideally in spring). Carefully work the soil away from the base and gently tease or cut the pup away from the mother plant, trying your best to ensure the pup has some of its own roots attached. Pot this newly independent pup into its own small container filled with that same excellent well-draining potting mix.
Growing from Corms
Another common propagation method involves the corms. When you repot your Alocasia, you might discover several small, round or oblong, firm, bulb-like structures mixed in the soil near the roots – these are the corms. You can absolutely grow new plants from these! Clean them off gently, removing any loose soil. Place them (pointy end up, if you can tell, otherwise don’t worry too much) partially buried in a container filled with a consistently moist but not wet medium, such as sphagnum moss, perlite, or even just seed-starting mix. Covering the container with a clear plastic lid or bag can help maintain the high humidity and warmth they need to sprout. Place it in a warm, bright spot (but out of direct sun). With patience (it can take weeks or even months), you should see roots emerge, followed eventually by the first tiny leaf.
A Note on Toxicity
It’s crucial to be aware that, like all plants in the Alocasia genus, the Alocasia Portodora is toxic if ingested by humans or animals. All parts of the plant contain insoluble calcium oxalate crystals. If chewed or swallowed, these sharp crystals cause immediate and unpleasant irritation, pain, and swelling of the mouth, tongue, throat, and digestive tract. Be sure to place your beautiful Portodora well out of reach of curious children and pets (especially cats and dogs) who might be tempted to nibble on its attractive leaves or stems.
Your Alocasia Portodora Care Journey: Final Encouragement
Growing an Alocasia Portodora truly is a rewarding venture for any houseplant enthusiast. There’s nothing quite like the thrill of watching those magnificent, architectural leaves unfurl! Just remember the cornerstones of its happiness: provide abundant bright, indirect light; maintain consistently moist (but never soggy!) soil with excellent drainage; boost that humidity as much as possible; use a super airy, chunky potting mix; and offer diluted fertilizer during the active growing season.
Don’t be discouraged by the occasional yellow leaf or pest scare – learning the specific nuances of your plant’s needs within your unique home environment is all part of the satisfying journey of plant parenthood. With a little consistent attention and understanding, you’ll be rewarded with a stunning Upright Elephant Ear that brings dramatic flair and tropical vibes to your space for years to come. Happy growing!