Hello fellow plant enthusiasts! Alex here, your guide to the wonderful world of Alocasias. Today, we’re diving into a truly special one: the magnificent Alocasia Odora. If you’ve been captivated by its impressive leaves and perhaps heard whispers of its magical nighttime scent, you’re in the right place. Sometimes called the Night-Scented Lily or Giant Upright Elephant Ear, this plant is a real showstopper, but please don’t let its grandeur intimidate you! With a little understanding, you can absolutely help your Alocasia Odora thrive in your home.
Jump to Sections
ToggleMeet the Alocasia Odora: A Fragrant Giant for Your Home
So, what makes this Alocasia stand out from the crowd? While its large, lush, often upward-pointing leaves are certainly striking, the real magic happens when it decides to bloom.
What Makes Alocasia Odora Special? The Magic of Night Fragrance
The Odora part of its name means fragrant, and it truly lives up to it! This Alocasia produces unique flowers (a spadix surrounded by a spathe, typical of aroids) that release a sweet, pleasant perfume, most noticeably in the evening and overnight. It’s a genuinely delightful surprise when you catch that scent drifting through your home! Do keep in mind, flowering usually happens when the plant is mature and receiving excellent, consistent care – so patience and good habits are your best friends here. Many experienced growers find consistent conditions are key to encouraging blooms.
Quick Look: Is it an Elephant Ear?
Yes, it often gets grouped under the “Elephant Ear” umbrella because of those impressive leaves that can get quite large, especially outdoors. It definitely brings a touch of the tropics wherever it grows! It’s just one fascinating member of the diverse Alocasia genus, a family celebrated for stunning foliage.
Mastering Alocasia Odora Care: Your Essential Checklist
Alright, let’s get down to the nitty-gritty of Alocasia Odora care. It might seem demanding at first glance, but think of it like understanding a friend’s preferences – once you know what makes them happy, it becomes so much easier! Let’s break it down simply.
Finding the Sweet Spot: Alocasia Odora Light Requirements
These beauties crave bright, indirect light. Try to imagine the dappled sunlight filtering through a rainforest canopy – that’s the ideal environment we aim to mimic. An east-facing window offering gentle morning sun is often perfect. A spot a few feet back from a brighter south or west-facing window usually works well too. Direct, harsh sunlight is a definite no-no; it will scorch those gorgeous leaves, leaving unsightly brown patches. While it can survive in lower light conditions, growth will noticeably slow, and the plant might stretch out trying to reach for more light (becoming ‘leggy’). Remember, good light is also a contributing factor in encouraging those fragrant blooms!
The Watering Wisdom: Keeping Your Odora Hydrated (Not Drenched!)
Watering Alocasias can feel like a balancing act, but I promise you’ll get the hang of it! Alocasia Odora likes its soil to be consistently moist, but absolutely dislikes sitting in soggy conditions. That’s often a fast track to root rot, a common ailment for these plants according to standard plant care practices. The best approach? Use your finger! When the top 1-2 inches of soil feel dry to the touch, it’s time to water thoroughly. Let the water run all the way through the pot and out the drainage holes (these are essential!). Then, be sure to discard any excess water sitting in the saucer – never let the pot stand in water. If the leaves start drooping dramatically, it could be thirsty, but always check the soil first, as overwatering can confusingly cause similar symptoms. During the fall and winter, especially if your plant shows signs of dormancy, you’ll need to reduce watering frequency significantly.
The Perfect Potting Mix: Soil for Happy Alocasia Odora Roots
Forget dense, heavy standard potting soil. Alocasia roots need oxygen to thrive, which is why aeration is key. A chunky, well-aerating, and fast-draining soil mix is vital to prevent waterlogging and promote healthy root growth. You can often buy pre-made “aroid mixes,” or easily create your own. A great starting point involves blending roughly equal parts peat moss or coco coir (for some moisture retention), perlite or pumice (for essential aeration), and orchid bark (for chunkiness and improved drainage). This type of mix holds enough moisture for the plant’s needs but crucially allows excess water to flow away freely, preventing those dreaded ‘wet feet’ that can lead to root issues.
Creating a Tropical Haven: Temperature and Humidity Needs
Always remember, Alocasia Odora originates from tropical regions. It thrives in warm, humid conditions. Aim to keep your plant in temperatures generally between 65°F and 80°F (18°C – 27°C). It’s important to avoid placing it near drafty windows, heating or cooling vents, or anywhere it might experience sudden, drastic temperature fluctuations. Frost is absolutely intolerable for this plant.
Humidity is arguably the most critical factor for success when growing Alocasia Odora indoors, especially in homes with dry air from heating or AC. These plants adore high humidity – think 60% or even higher if you can achieve it! Low humidity is very often the culprit behind those frustrating crispy brown leaf edges or tips. How can you boost humidity effectively?
- Humidifier: This is usually the most effective and consistent method. Place one near your Odora.
- Pebble Tray: A simple DIY solution. Place the pot on a tray filled with pebbles and water, making sure the bottom of the pot sits above the waterline. Evaporation adds moisture to the immediate air.
- Grouping Plants: Cluster your houseplants together. Through transpiration, they naturally create a slightly more humid microclimate. Many growers find this helps – I certainly notice a difference with mine grouped together!
- Misting: While it feels proactive, misting provides only a very temporary humidity boost and doesn’t replace other methods. It can be a nice supplementary touch, but won’t solve a chronic low-humidity problem on its own.
Feeding Your Green Giant: Fertilizer Facts for Alocasia Odora
During the active growing season – typically spring and summer – your Alocasia Odora will appreciate some extra nutrients to fuel its growth. Use a balanced liquid houseplant fertilizer, but it’s crucial to dilute it to half or even quarter strength, following product instructions. Alocasias can be sensitive to over-fertilizing, which can burn their roots. Feed every 2 to 4 weeks only while it’s actively putting out new leaves. It’s also a good practice to occasionally flush the soil with plain water (by watering thoroughly until it drains freely) to help prevent fertilizer salts from building up. Once fall arrives and growth naturally slows, stop fertilizing. Your plant needs this rest period.
Size Matters: How Big Does Alocasia Odora Get?
This is often a key question for potential Odora parents – and for good reason! It can become quite large and impressive.
Alocasia Odora Size Indoors: A Manageable Giant
Inside your home, provided with good care and an appropriately sized pot, you can typically expect your Alocasia Odora to reach a respectable height of 4 to 6 feet (1.2 – 1.8 meters). The beautiful leaves themselves can easily span 1-2 feet long. Its ultimate indoor size heavily depends on the quality of light, consistent watering, nutrients, and the pot space you provide.
Unleashing its Potential: Alocasia Odora Size Outdoors
Now, if you are fortunate enough to live in a suitable climate – generally considered USDA Hardiness Zones 9 through 11 (perhaps a very protected spot in zone 8b, check local guidance) – you can witness the true majestic potential of Alocasia Odora size outdoors. Planted in the ground with ample space, warmth, and moisture, these plants can soar to impressive heights of 6-8 feet (1.8 – 2.5 meters), sometimes even taller, with massive leaves potentially reaching up to 3 feet in length! When grown outdoors, they still prefer partial shade (gentle morning sun is often tolerated, but shield them from harsh afternoon rays), consistently moist, organically rich soil, and some protection from strong winds which can easily tatter the large leaves.
What Influences How Big Your Odora Grows?
Ultimately, whether it’s growing indoors or out, the final size your Alocasia Odora achieves boils down to providing the optimal conditions it craves: adequate bright, indirect light; consistent and appropriate moisture levels; sufficient nutrients during growth periods; enough room for its roots to expand (either in a large container or in the ground); and the warm, humid environment reminiscent of its native habitat.
Spot the Difference: Alocasia Odora vs Macrorrhizos
It’s quite common for plant lovers to get Alocasia Odora confused with its close relative, Alocasia macrorrhizos (often called Giant Taro or Upright Elephant Ear too). They certainly look similar! Here’s a quick guide on how to tell them apart – this really helps manage expectations, especially regarding that lovely potential fragrance.
Key Distinctions You Can See (and Smell!)
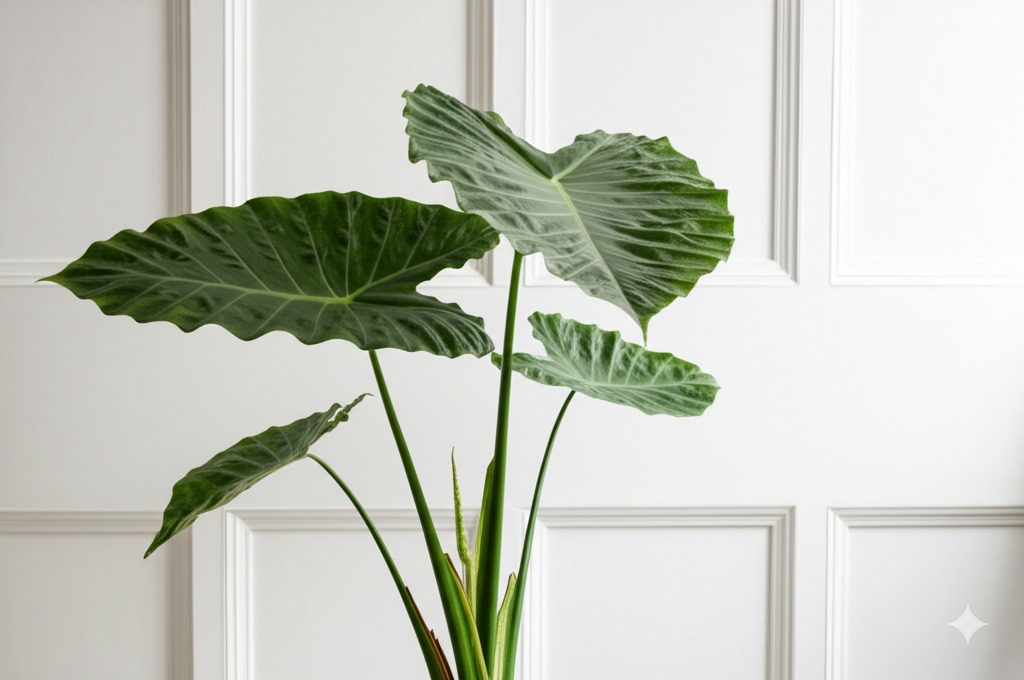
- Leaf Angle (Orientation): This is often a helpful visual clue. Odora leaves tend to point more distinctly upwards, held fairly erect on their stems. Macrorrhizos leaves frequently angle more outwards or even slightly downwards.
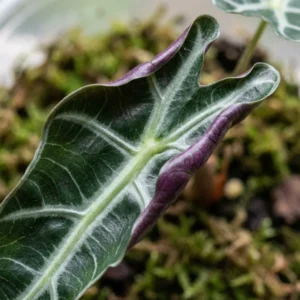
- Leaf Texture & Hue: Odora leaves often feel slightly thicker and more leathery to the touch, sometimes possessing a subtle blue-green cast. Macrorrhizos leaves are typically a more standard green and might feel a bit thinner.
- The Fragrance Factor: This is the most definitive test! Mature, well-cared-for Alocasia Odora flowers emit that characteristic sweet fragrance, primarily noticeable at night. Alocasia macrorrhizos flowers generally lack this strong, distinct scent, according to botanical descriptions.
- Overall Size Potential: While both varieties get very large, Macrorrhizos arguably has the potential to become even more massive overall, particularly in leaf size, when grown under absolutely optimal conditions.
Why Does Knowing the Difference Help?
Mainly, it helps you know whether or not you should anticipate enjoying that lovely night fragrance! While their fundamental care requirements are very similar, correctly identifying your Alocasia helps you better understand its specific characteristics and growth potential.
Troubleshooting Common Alocasia Odora Problems
Even with the most diligent care, you might encounter a little bump in the road now and then. Don’t worry, it truly happens to all of us plant parents! Here’s a practical guide to tackling common Alocasia Odora problems.
Help! Why Are My Alocasia Odora Leaves Turning Yellow?
Yellow leaves are like a plant’s way of signaling something isn’t quite right, but the cause can vary. Let’s put on our detective hats:
- Could it be Overwatering? (A very common issue!) Does the soil feel constantly damp or wet deep down? Are the lower, older leaves yellowing first? This is a strong indicator. Allow the soil to dry out more thoroughly between waterings. Ensure the pot has drainage and isn’t sitting in water. If leaves feel mushy, check roots for rot (dark, soft).
- Or Underwatering? Is the soil completely dry and pulling away from the pot sides? Did the leaves droop significantly beforehand? Your plant is likely thirsty. Give it a good, thorough drink, letting excess water drain away.
- Nutrient Deficiency? Is it currently the growing season (spring/summer)? Have you fertilized recently? If older leaves are yellowing uniformly, it might signal a need for nutrients like nitrogen. Feed with diluted fertilizer if appropriate for the season.
- Light Problems? Is it suddenly getting harsh, direct sun (check for scorched spots that then yellow)? Or is it stuck in a very dim corner (leading to a general pale yellowing)? Adjust its position to provide bright, indirect light.
- Pesky Pests? Carefully inspect the undersides of leaves and stems. Look for tiny dots, webbing, or sticky residue.
- Natural Dormancy Cycle? Is it fall or winter? Have temperatures dropped? Growth may slow, and some leaf yellowing is normal as it prepares to rest (more on this below).
Battling Unwanted Guests: Dealing with Pests (Especially Spider Mites!)
Alocasias, unfortunately, can be quite susceptible to spider mites, particularly when indoor air is dry. These minuscule pests feed on plant sap, causing characteristic stippling (tiny yellow or pale dots) on the leaves, which can eventually lead to widespread yellowing, leaf drop, and overall plant decline. Look very closely for fine, subtle webbing, often where the leaf meets the petiole (stem), and tiny moving dots, especially on the undersides of the leaves.
- Boost Humidity: This is your first line of defense! Spider mites thrive in dry conditions and dislike humidity.
- Physical Removal: Regularly and gently wipe both the top and underside of each leaf with a soft, damp cloth or paper towel. This physically removes many adults and eggs.
- Treatment Sprays: Use a store-bought insecticidal soap or horticultural oil spray (like neem oil solution). Follow label directions carefully, ensuring you achieve thorough coverage, paying extra attention to leaf undersides and crevices. Many experts suggest repeat treatments every 5-7 days for several weeks to break their life cycle and catch newly hatched mites. Persistence is absolutely key!
Is it Sleeping or Sick? Understanding Dormancy
Don’t panic if your beloved Alocasia Odora starts to slow down its growth and even begins losing some leaves as the days get shorter and temperatures cool down in the fall or winter. It might simply be entering dormancy, which is a perfectly natural rest period for tuberous plants like Alocasias. Signs typically include slowed or completely stopped new growth, along with gradual yellowing and dying back of existing leaves.
- Dormancy Care: The main adjustment is to reduce watering significantly. You only need to provide enough moisture to keep the soil barely damp and prevent the underground rhizome (tuber) from completely drying out. Letting it sit in wet soil during dormancy is risky. You can move it to a slightly cooler location with lower light if you wish, though it’s not always necessary indoors.
- The Comeback: Be patient! As temperatures naturally begin to warm up and daylight hours increase in the spring, you should start to see signs of new growth emerging from the soil. This is your signal to gradually increase watering back to its normal frequency and resume your feeding schedule. It’s worth noting that some Odoras kept in consistently warm, bright indoor conditions year-round may skip full dormancy.
Extra Care Tips for a Thriving Alocasia Odora
Here are just a few more pointers to help your gorgeous giant truly flourish:
Time for a New Home: Repotting Your Growing Odora
As your Odora establishes and grows, it will eventually need a slightly larger pot to accommodate its expanding root system. Clear signs it’s time for repotting include roots visibly circling the bottom of the pot, roots emerging significantly from the drainage holes, or noticing that the plant is drying out much more quickly between waterings than it used to. This usually becomes necessary every 1-2 years for a healthy, growing plant.
- Best Timing: Spring, just as active growth resumes, is the ideal time to minimize stress.
- The Process: Select a new pot that’s only about 1-2 inches wider in diameter than the current one. Going too large can lead to excess soil staying wet for too long. Gently remove the plant from its old pot. You can carefully loosen any tightly bound roots and trim away any that look dead, brown, or mushy. Place it in the new pot at the same soil level, filling in around it with fresh, well-draining aroid mix. Water lightly to settle the soil.
Sharing the Joy: A Quick Note on Propagation
Want to create more Alocasia Odora plants to keep or share? The most straightforward method is propagation through division, a common practice for rhizomatous plants. When you’re repotting your plant, you might notice smaller baby plants, often called offsets or “pups,” growing from the base of the main rhizome. If these offsets have developed their own roots, you can carefully separate them from the parent plant using a clean knife or shears. Pot these up individually in appropriate soil. If the main rhizome itself is large and healthy, it can sometimes be carefully divided into sections, ensuring each piece has at least one visible growth point (an “eye”) and some healthy roots attached.
Important Safety Reminder: Alocasia Odora Toxicity
This is a vital piece of information, especially for households with young children or pets that might explore plants by chewing. It’s important to know that all parts of the Alocasia Odora plant contain insoluble calcium oxalate crystals, a common defense mechanism in aroids. Reputable sources like the ASPCA confirm its toxicity. If any part of the plant is chewed or ingested, these microscopic, needle-sharp crystals cause immediate and unpleasant irritation, pain, and swelling in the mouth, lips, and tongue. Symptoms can include excessive drooling, difficulty swallowing, and sometimes vomiting. Therefore, it is crucial to keep this plant well out of reach of children and pets (including cats, dogs, and other animals) who might be tempted to nibble. Additionally, the sap can cause skin irritation or dermatitis in some sensitive individuals, so wearing gloves when handling the plant for pruning or repotting is often a sensible precaution.
You Can Grow a Stunning (and Sweet-Smelling) Alocasia Odora!
Successfully growing an Alocasia Odora is such a wonderfully rewarding experience for any plant lover. From the sheer architectural beauty of watching those impressive leaves unfurl to the potential delight of catching that elusive, sweet nighttime fragrance, it’s a plant that truly makes a statement and brings a piece of the exotic indoors. Yes, it has some specific preferences, particularly regarding humidity levels and careful watering, but armed with the knowledge and tips shared here, you are absolutely well-equipped for success. The key is always to observe your own plant, learn its cues, adjust your care based on your specific home environment, and please don’t be discouraged by the occasional challenge like a yellow leaf – it’s all part of the fascinating journey of plant parenting! Happy growing! You’ve definitely got this!