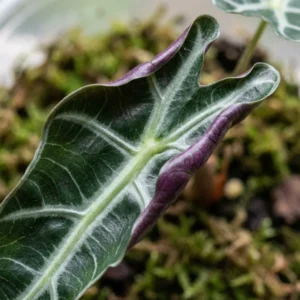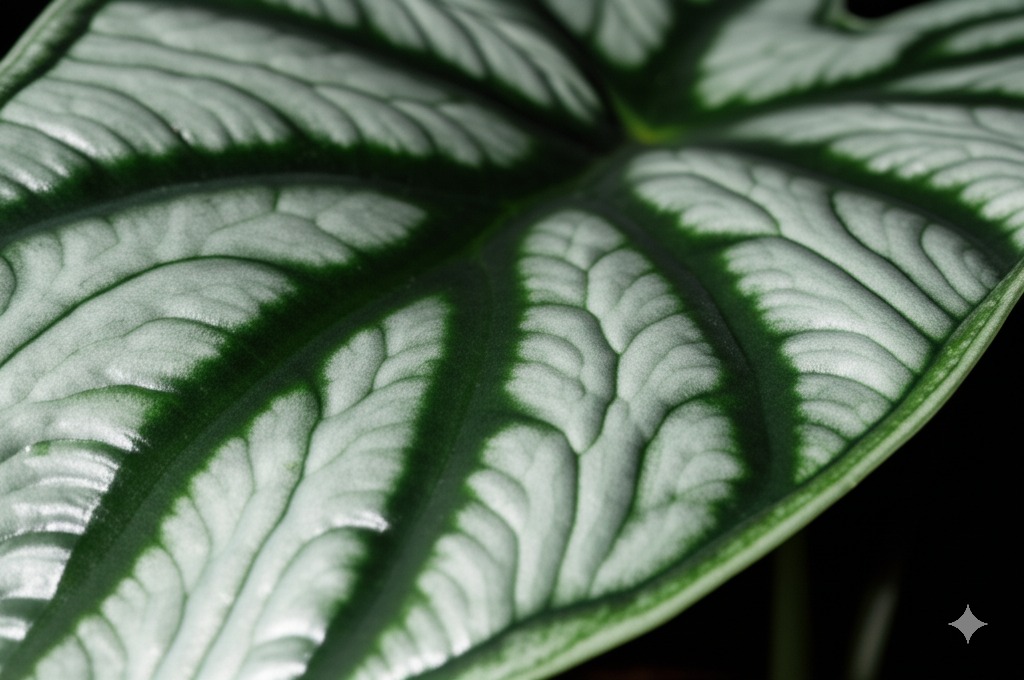
Hey there, fellow plant enthusiasts! Are you captivated by the otherworldly beauty of the Alocasia Nebula? It’s easy to see why! With its thick, silvery-green leaves etched with dramatic dark veins, the Nebula truly lives up to its name – it’s like holding a little piece of a celestial cloud right in your home.
As a ‘Jewel’ Alocasia, the Nebula is undeniably special. These types of Alocasias are prized for their unique, often textured foliage and compact size, making them stunning collector’s items. Now, ‘Jewel’ sometimes implies ‘diva,’ and while the Nebula does appreciate specific conditions, think of it more as a rewarding relationship than a difficult task! It hails from the warm, humid rainforests of Borneo, and understanding that helps us give it the care it deserves. Ready to help your Alocasia Nebula thrive? Let’s dive in!
Jump to Sections
ToggleMastering Alocasia Nebula Care: The Essential Elements
Getting these core conditions right is about 90% of the journey to a happy, healthy Nebula. Consistency is your friend here!
Finding the Perfect Glow: Alocasia Nebula Light Requirements
Alocasia Nebula loves bright, indirect light. Think of the dappled sunlight filtering through a rainforest canopy – that’s the vibe we’re aiming for.
- Ideal Spot: Near an east-facing window where it gets gentle morning sun is fantastic. A spot a few feet back from a south or west-facing window, perhaps shielded by a sheer curtain, also works well. Avoid direct, harsh afternoon sun at all costs – it will scorch those gorgeous leaves, leaving brown patches.
- Grow Lights: If natural light is limited, LED grow lights are a great alternative. Position the light source appropriately so it’s bright but not intense enough to burn.
- Warning Signs: Seeing brown, crispy spots? Likely too much direct sun. Is your Nebula stretching out with long stems (leggy) and looking a bit pale? It’s probably asking for more light.
Watering Wisdom: Keep it Moist, Not Soggy!
This is often where new Nebula parents stumble, but you can absolutely master it! The golden rule is: avoid overwatering like the plague. Alocasias, especially Jewels like Nebula, are prone to root rot if their feet stay constantly wet.
- How to Check: Forget rigid watering schedules! The best way is to physically check the potting mix. Stick your finger about 1-2 inches deep. If it feels dry at that depth, it’s time to water. If it’s still moist, wait a bit longer.
- Watering Technique: When you do water, do it thoroughly. Let water run through the pot until it freely drains from the bottom holes. Then, discard any excess water sitting in the saucer – never let the pot sit in water.
- Water Quality Matters: Nebulas can be sensitive to the minerals (like chlorine and fluoride often found) in tap water. If you notice brown tips or edges despite good humidity, your tap water might be the culprit. Rainwater, distilled water, or filtered water are much preferred.
- Seasonal Changes: Your Nebula will naturally drink less during the cooler, darker months of fall and winter, especially if it enters dormancy (more on that later!). Adjust your watering frequency accordingly – check the soil mix even more diligently.
The Right Foundation: Best Soil for Alocasia Nebula (Imperialis Included!)
Let’s talk potting mix. This is critical for successful alocasia nebula care. You might see tags mentioning alocasia nebula imperialis soil – don’t stress! ‘Imperialis’ is often used for the standard, popular Nebula variety, and its soil needs are exactly the same. What they absolutely require is superb drainage.
- Why Drainage is King: Dense, standard potting soil holds way too much moisture for way too long, leading straight to root rot. We need something airy and chunky. Standard aroid care practices emphasize this heavily.
- Avoid: Bagged indoor potting mix straight from the store is generally a no-go unless heavily amended.
- Create Your Own Aroid Mix: This is often the best route! Combine ingredients that allow for excellent aeration and drainage while holding just enough moisture. Think:
- Orchid Bark (chunks for air pockets)
- Perlite (lightness and drainage)
- Coco Coir (holds some moisture, good peat alternative)
- Horticultural Charcoal (improves drainage, keeps mix ‘sweet’)
- Worm Castings (adds gentle nutrients and beneficial microbes)
- Simple Recipe Idea: Many experienced growers find success with roughly equal parts orchid bark, perlite, and coco coir, then adding a smaller handful of charcoal and worm castings. The key is chunky and airy!
- Pot Choice: Always, always use a pot with drainage holes! Terracotta pots breathe and dry out faster (good if you tend to overwater), while plastic pots retain moisture longer (might be better in very dry environments).
Humidity Heaven: Creating a Rainforest Feel
Remember its Borneo origins? Your Alocasia Nebula craves high humidity! This is pretty much non-negotiable for keeping those stunning leaves looking their best and preventing issues. Aim for 60% humidity or higher, with 70%+ being even better.
- Why It’s Crucial: Low humidity leads to sad, crispy brown leaf edges and tips. It also makes your plant more susceptible to pests like spider mites, who love dry conditions.
- Boost That Humidity:
- Humidifier: The most effective and consistent method. Place one near your Nebula (and other humidity-loving plants).
- Grouping Plants: Plants release moisture through transpiration, so grouping them together creates a more humid microclimate.
- Pebble Tray: Place the pot on a tray filled with pebbles and water. Ensure the bottom of the pot isn’t sitting in the water (prevents rot). Evaporation adds some humidity locally, though its effect is often minimal compared to a humidifier.
- Greenhouse Cabinet/Terrarium: An excellent option for maintaining consistently high humidity, especially for prized Jewel Alocasias.
- Location: Bathrooms or kitchens can be more humid, but only if they also offer adequate bright, indirect light.
- A Note on Misting: While it feels helpful, misting provides only very temporary humidity and can sometimes encourage fungal issues if leaves stay wet too long. It’s not a reliable primary solution.
Ideal Temperatures: Keeping Your Nebula Comfortable
Alocasia Nebula prefers typical warm household temperatures. Keep it in a spot where temps stay consistently between 65°F and 80°F (18°C – 27°C).
- Avoid: Cold drafts from leaky windows, doors, or air conditioning vents are stressful. Sudden temperature drops can shock the plant, potentially triggering dormancy. Also, keep it away from direct heat sources like radiators or heating vents, which can dry it out quickly.
Feeding Time: Fertilizing Your Alocasia Nebula
During the active growing season (usually spring and summer), your Nebula will appreciate some extra nutrients to fuel that gorgeous foliage.
- When: Feed only when you see active growth.
- What: A balanced liquid houseplant fertilizer (like a 10-10-10 ratio or similar) works well.
- How Much: This is important – less is more! Alocasias can be sensitive to over-fertilizing. Always dilute the fertilizer to half-strength (or even quarter-strength) of what the package recommends. Too much fertilizer can burn the roots and damage leaves.
- Frequency: Apply the diluted fertilizer every 2-4 weeks during the growing season.
- Stop in Winter: Reduce or completely stop fertilizing in the fall and winter when growth naturally slows down or the plant goes dormant.
Solving Common Alocasia Nebula Problems: Don’t Panic!
Okay, sometimes things go a bit sideways. It happens to all of us! Here’s a look at common alocasia nebula problems and how to troubleshoot them.
Pesky Invaders: Dealing with Alocasia Nebula Pests
Alocasias, unfortunately, can be magnets for Spider Mites. These tiny pests are hard to spot initially but look for fine webbing (like tiny spider webs) on stems and under leaves, and small yellow or white dots (stippling) on the leaf surface where they’ve been feeding. They thrive in warm, dry conditions (another reason high humidity helps!).
- Other Potential Pests: Keep an eye out for thrips (tiny black or pale insects) and mealybugs (white, cottony masses) too, though spider mites are often the most frequent visitors for Alocasias.
- Prevention:
- Inspect your plants regularly, paying close attention to the undersides of leaves. A magnifying glass can help!
- Quarantine any new plants for a few weeks before introducing them to your collection.
- Maintain good humidity levels.
- Treatment:
- Isolate: Move the infested plant away from others immediately to prevent spreading.
- Wipe Down: Gently wipe down every leaf (top and bottom) and stem with a damp cloth, perhaps with a drop of mild soap or diluted rubbing alcohol. This physically removes many pests.
- Treat: Use an insecticidal soap or neem oil spray. Follow the product instructions exactly, ensuring you coat all surfaces of the plant, especially leaf undersides. Test on a small area first if concerned about sensitivity.
- Repeat: Pest treatment often requires multiple applications spaced several days or a week apart to catch hatching eggs and new arrivals. Be persistent!
The Mystery of Yellow Leaves on Your Alocasia Nebula
Seeing alocasia nebula yellow leaves can definitely be alarming, but it’s often a fixable issue or even a natural process. It’s easy to panic when you see a yellow leaf – we’ve all been there as plant parents! But often it’s just the plant adjusting, shedding an older leaf, or signaling a need for a care tweak. Let’s play detective and decode the potential causes:
- Overwatering: The #1 suspect usually. Often affects lower leaves first, they turn yellow and may feel soft/mushy at the base. The potting mix stays consistently wet. Solution: Check roots for rot (brown/mushy?), trim any damage, repot in a much chunkier, faster-draining mix, and adjust your watering habits drastically.
- Underwatering: If the whole plant seems droopy, the soil mix is bone dry deep down, and leaves are yellowing (sometimes getting crispy too), it needs a drink! Solution: Water thoroughly, let it drain, and monitor soil moisture more closely going forward.
- Low Humidity / Water Quality: If the yellowing is accompanied by crispy brown edges or tips, low humidity or mineral buildup from tap water could be contributing. Solution: Boost humidity, switch to distilled/rainwater.
- Nutrient Deficiency: Less likely if you’re fertilizing appropriately during the growing season. If you suspect this after ruling out other causes, ensure you’re using a balanced fertilizer (but don’t overdo it!).
- Acclimation Stress: Did you just bring it home or repot it? It’s normal for a plant to sacrifice an older leaf (usually the lowest one) as it adjusts to its new environment. Solution: Be patient, provide consistent care.
- Natural Aging: The oldest, smallest leaf at the very bottom will eventually yellow and die off. This is perfectly normal! Just snip it off cleanly near the base when it’s ready.
- Approaching Dormancy: As temps cool and light decreases, the plant might start pulling energy back from its leaves. See the next section!
Action Step: Don’t just guess! Carefully examine your plant and its conditions (soil moisture, humidity levels, recent changes) to diagnose the likely cause before making drastic changes.
Is My Alocasia Nebula Dormant or Dying? Understanding Dormancy
It’s fall or winter, your Nebula has stopped growing, and leaves are yellowing and dying back one by one… is it game over? Probably not! Alocasias often enter a dormancy period, which can be triggered by cooler temperatures and lower light levels.
- What it looks like: Growth halts completely. Leaves yellow and wither, sometimes until only the underground corm remains.
- Don’t Toss It! This is a natural energy-saving strategy. The corm (think of it as a little underground battery) is alive and resting.
Alocasia nebula dormancy care:- Drastically reduce watering. Only give tiny sips of water every few weeks, just enough to prevent the corm from completely drying out. The soil mix should be mostly dry.
- Stop fertilizing completely.
- Keep it in a spot with moderate indirect light and cool (but not freezing) temperatures.
- Waking Up: Be patient. As temperatures warm up and light increases in spring, you’ll hopefully see a new sprout emerge from the soil. When you do, gradually resume your normal watering and feeding routine.
Other Worries: Crispy Edges & Drooping
- Crispy Brown Edges/Tips: Almost always a sign of low humidity. Can also be exacerbated by inconsistent watering or tap water minerals. Address humidity first!
- Drooping Leaves: Can paradoxically mean both underwatering (plant is thirsty) OR overwatering (roots are damaged and can’t absorb water). Always check the soil moisture first to determine the cause!
Spot the Difference: Alocasia Nebula vs. Melo Explained
These two Jewel Alocasias are sometimes confused, but there are key differences! Knowing the alocasia nebula vs melo difference helps ensure you’ve got the plant you think you do (or helps you appreciate both!).
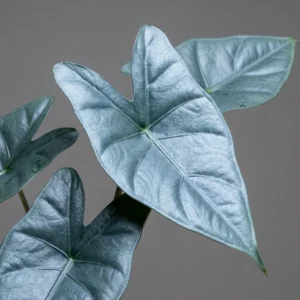
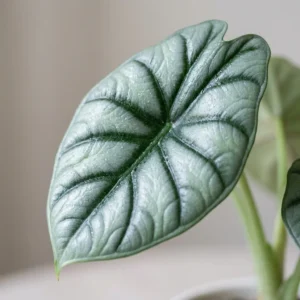
- Leaf Texture: This is the biggest giveaway. Alocasia Melo has incredibly deep, complex texture – think wrinkly, almost like a brain or a piece of reptile skin (it’s often called Alocasia ‘Rugosa’). Alocasia Nebula, while textured and thick, is comparatively smoother. Its texture is more leathery or pebbly, less deeply grooved.
- Veining: Nebula boasts very prominent, clearly defined veins that are much darker (dark green to black) than the silvery-green leaf blade, creating strong contrast. Melo’s veins are less distinct, blending more into the overall green colour and deep texture. They don’t stand out as sharply.
Both are stunning plants and, thankfully, have very similar care requirements (high humidity, excellent drainage, careful watering).
More Nebulas to Love: Alocasia Nebula Propagation Guide
Want to share the Nebula love or simply multiply your own collection? Propagation is usually done via offsets called corms (sometimes called bulbils).
- Finding Corms: These small, hard, bulb-like structures form underground around the base of the mother plant’s root system. The best time to find them is when you’re repotting your Nebula. Gently probe around the base – you might find several! This is also a good time to check the mother plant’s roots for health.
- Simple Steps for alocasia nebula propagation from corm:
- Separation: If a corm detaches easily with maybe a little root attached, great! Don’t force it if it’s firmly attached. Some people gently peel off any brown outer husk, but it’s not always necessary.
- Choose Your Medium: Sphagnum moss or perlite are popular choices. Place the medium in a small pot or clear container (like a plastic cup).
- Plant the Corm: Nestle the corm into the medium, pointy end (if discernible) facing up, usually just slightly below the surface or with the very tip exposed.
- Create Humidity: Keep the medium lightly moist (not wet!). Cover the container with a clear lid, plastic wrap, or place it inside a Ziploc bag to maintain high humidity.
- Environment: Place the container in a warm spot with bright, indirect light.
- Be Patient! It can take anywhere from a few weeks to several months for a corm to sprout roots and then a leaf. Keep the humidity up and the medium slightly moist.
- Potting Up: Once the baby plantlet has a couple of small leaves and a decent little root system, you can carefully transplant it into a small pot with your regular chunky Alocasia Nebula potting mix.
A Quick Word on Safety: Alocasia Nebula Toxicity
Like all Alocasias, the Nebula is beautiful but needs to be handled with care, especially around curious mouths.
- Warning: All parts of the Alocasia Nebula contain insoluble calcium oxalate crystals. These are tiny, sharp crystals that cause irritation upon contact or ingestion.
- Is alocasia nebula toxic to cats / alocasia nebula toxic to dogs? Yes. Ingestion can cause significant discomfort, including oral pain, swelling of the mouth, tongue, and lips, excessive drooling, vomiting, and difficulty swallowing. It’s also toxic to humans if ingested.
- Keep it Safe: The best practice is to place your Alocasia Nebula well out of reach of pets and small children who might be tempted to nibble on the leaves. Wash hands after handling extensively, especially if you have sensitive skin.
Final Thoughts: Your Alocasia Nebula Journey
Caring for an Alocasia Nebula is truly a rewarding experience. Watching those incredible, almost prehistoric-looking leaves unfurl is a special kind of plant parent joy! Remember the keys to success: provide plenty of bright indirect light, be super mindful about watering (let it dry slightly between waterings, ensure excellent drainage!), use a very chunky and airy potting mix, and keep that humidity high.
Don’t be discouraged if you hit a bump in the road – a yellow leaf here or a pest scare there is often part of the plant parenting journey. Observe your plant, respond to its needs, and celebrate its unique beauty. You’ve got this! Happy growing!