Jump to Sections
ToggleWelcome to the World of Giant Taro!
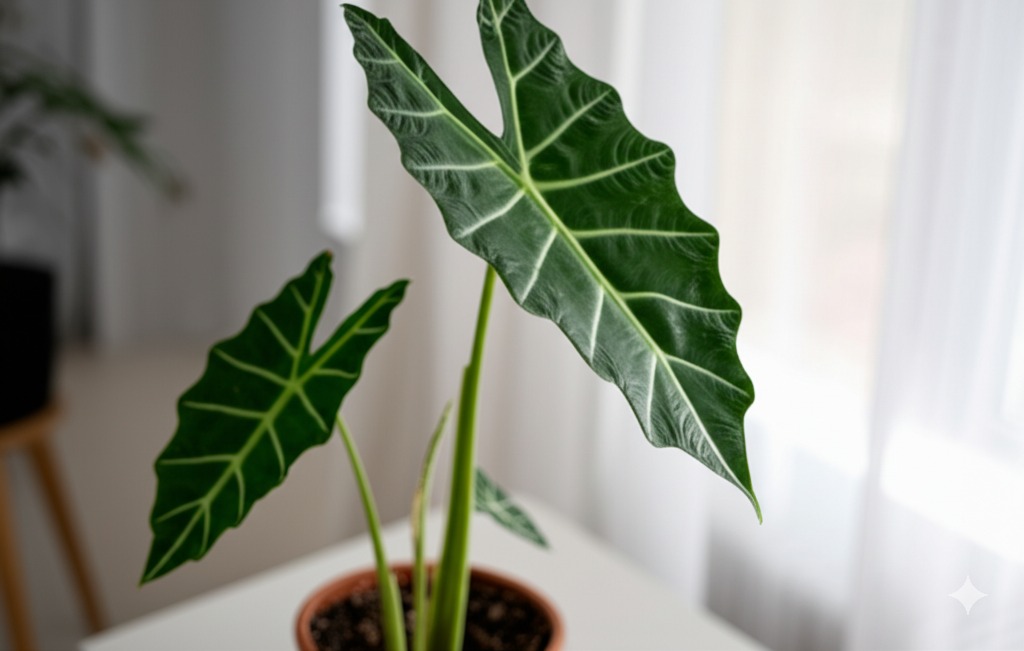
Hello fellow plant enthusiast! Are you ready to bring a touch of the jungle into your home with one of the most dramatic foliage plants around? Let’s talk about the magnificent Alocasia macrorrhizos, affectionately known as the Giant Taro or Upright Elephant Ear. With its enormous, lush green leaves pointing skyward on sturdy stalks, this plant is a true showstopper.
Growing an Alocasia macrorrhizos can feel like a big undertaking (pun intended!), but trust me, it’s incredibly rewarding. As an Alocasia aficionado myself, I’m excited to share my passion and practical tips to help you master Alocasia macrorrhizos care. This guide breaks down everything you need to know, step-by-step, in simple terms. Whether you’re just starting your Alocasia journey or looking to fine-tune your giant taro care routine, you’re in the right place! Let’s help your gentle giant thrive together.
Getting to Know Your Alocasia Macrorrhizos
What Makes This “Elephant Ear” Unique?
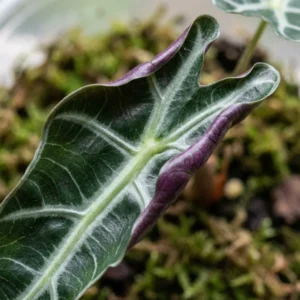
While many plants get called “Elephant Ears,” Alocasia macrorrhizos stands out. Its signature feature is how it holds those impressive, arrowhead-shaped leaves: proudly upright, like they’re reaching for the sun. This gives it a distinct architectural look compared to its cousin, Colocasia, whose leaves typically droop downwards. Spotting the difference is easy once you know: Alocasia leaves point up (think “A” for Aloft), Colocasia leaves point down. This upward habit is key to its common name, “Upright Elephant Ear.” It’s a fast grower under the right conditions, capable of reaching staggering heights outdoors, but perfectly manageable indoors with a little know-how. A quick check, alocasia macrorrhizos vs colocasia? Look at the leaf direction!
The Core Pillars of Alocasia Macrorrhizos Care
Alright, let’s dive into the essentials. Getting these right is 90% of the battle (and joy!) of growing a happy Alocasia macrorrhizos. Think of these as the foundation for success.
Finding the Perfect Light: Bright and Indirect is Key
Imagine the rainforest floor – dappled sunlight filtering through the canopy. That’s the sweet spot for your Giant Taro. It craves bright, indirect light. Too much harsh, direct sunlight, especially intense afternoon sun, will scorch those beautiful leaves, leaving unpleasant brown patches. On the flip side, while it can tolerate lower light levels (it’s quite adaptable!), its growth will slow significantly, the leaves might look a bit pale, and it won’t achieve that truly lush, vibrant look we adore.
Practical Tip: An east-facing window offering gentle morning sun is often ideal. South or west-facing windows work too, but you’ll likely need to place the plant a few feet back or filter the light with a sheer curtain. Don’t forget to rotate your plant every week or so! This ensures all sides get their share of light and helps it grow straight and evenly. Meeting the alocasia macrorrhizos light requirements is fundamental for a happy plant.
Watering Wisdom: Keeping Your Giant Taro Hydrated (Not Drowned!)
Alocasias like consistent moisture, but they absolutely despise sitting in soggy soil – that’s a fast track to unhappy roots and potential root rot! The key is balance and excellent drainage.
How to Water: Wait until the top 1-2 inches (about 2.5-5 cm) of the soil feel dry to the touch. The best tool? Your finger! Simply poke it into the soil near the edge of the pot. If it feels damp, hold off on watering for another day or two. If it’s dry, it’s time to water. When you do water, give it a good soak until water flows freely out of the drainage holes at the bottom. Crucially, after about 15-20 minutes, discard any excess water that has collected in the saucer or cachepot. Never let the pot sit in standing water.
Frequency Matters: How often you water isn’t set in stone. It depends heavily on factors like the amount of light it receives, the ambient temperature, the size of the pot, and the time of year. You’ll naturally water more often in bright light and warm temperatures during the active growing season (spring/summer) and much less frequently in the cooler, dimmer months of fall and winter when growth slows. Proper watering giant taro involves learning to read your plant and its soil.
The Right Foundation: Soil Mix for a Happy Alocasia
Forget dense, heavy garden soil or standard potting mix straight from the bag – these tend to hold too much water for too long. Your Alocasia macrorrhizos needs an airy, chunky, well-draining soil mix. This type of mix holds enough moisture for the roots but allows excess water to escape easily, preventing waterlogging and letting the roots breathe. Oxygen to the roots is just as important as water!
DIY Mix: A fantastic alocasia macrorrhizos soil mix can be created by combining roughly equal parts of:
- Good quality indoor potting soil (as a base)
- Peat moss or coco coir (for moisture retention)
- Perlite or pumice (essential for aeration and drainage)
- Orchid bark (adds chunkiness, improving airflow and drainage)
Pre-Made Option: If you prefer convenience, look for commercially available ‘Aroid Mixes’. These are specifically formulated for plants like Alocasias, Monsteras, and Philodendrons. Whichever route you choose, always ensure your pot has adequate drainage holes!
Creating a Tropical Oasis: Humidity and Temperature Needs
Remember, these stunning plants originate from tropical rainforests! They thrive in warmth and high humidity. Replicating this indoors can sometimes be a challenge, but it’s vital for keeping those large leaves looking their best.
Humidity Heroics: Aim for 60% humidity or higher if you can manage it. If you start seeing crispy brown leaf tips or edges, low humidity is the most likely culprit. Here are some practical ways to boost humidity around your plant:
- Humidifier: Generally the most effective method. Place a small humidifier nearby.
- Pebble Tray: A classic technique. Place the pot on top of a tray filled with pebbles and water. As the water evaporates, it increases humidity right around the plant. Just make sure the bottom of the pot is sitting on the pebbles, not submerged in the water.
- Grouping Plants: Plants naturally release moisture through transpiration. Grouping several plants together can create a more humid microclimate for all of them.
Temperature Tolerance: Keep your Alocasia macrorrhizos in a consistently warm spot, ideally between 65-80°F (18-27°C). Most typical household temperatures fall within this range. The main things to avoid are cold drafts (from leaky windows, doors, or AC vents) and sudden, drastic temperature fluctuations. Protect your tropical friend from the chill! Meeting the alocasia macrorrhizos humidity needs and alocasia macrorrhizos temperature tolerance goes a long way.
Feeding Your Gentle Giant: Fertilizer Fundamentals
During the active growing season (that’s typically spring and summer), your Giant Taro is working hard producing those magnificent leaves, and it appreciates some extra nutrients!
What & When: Use a balanced liquid houseplant fertilizer (look for formulations like 10-10-10 or 20-20-20 on the label). It’s generally best practice to dilute it to half the strength recommended on the package instructions – with fertilizer, less is often more, and it’s easier to fix under-feeding than over-feeding. Feed your Alocasia with this diluted solution every 2-4 weeks only while it’s actively putting out new growth.
Winter Rest: As daylight hours shorten and temperatures cool in fall and winter, your plant’s growth will naturally slow down (it might even go dormant). During this period, stop fertilizing altogether. You can resume feeding in the spring when you notice signs of fresh growth. Using the right fertilizer for alocasia macrorrhizos at the right time supports healthy development.
Growing Alocasia Macrorrhizos Indoors: Tips for Success
So, the big question: can you really grow this jungle giant inside your home? Absolutely! Proper giant elephant ear plant indoor care just requires a bit more mindful planning compared to smaller houseplants.
Can Giant Taro Thrive Inside Your Home?
Yes, with the right conditions and commitment! Just be realistic about its potential size and dedicate yourself to meeting its humidity needs, which is often the biggest indoor challenge. While it likely won’t reach the truly colossal 15-foot size it can achieve outdoors in tropical climates, it can still become a magnificent and impressive specimen indoors, often reaching a manageable 5-8 feet tall if happy and given adequate space.
Choosing the Right Spot and Pot
Location, location, location! Select a spot that receives plenty of bright, indirect light and offers enough vertical and horizontal space for the plant to grow without feeling cramped against walls or furniture. Use a sturdy pot that feels substantial enough to support the plant’s weight as it grows. Choose a pot size that’s appropriate for the current root ball – usually only 1-2 inches larger in diameter than the previous pot. And, of course, I can’t stress this enough: the pot must have drainage holes at the bottom.
Managing Size and Growth Indoors
Unlike many shrubs or trees, you don’t typically prune an Alocasia for size control. Its ultimate indoor size is mainly influenced by pot size (restricting root growth can limit top growth) and the quality of care provided. You should, however, regularly prune away any old, yellowing, or damaged lower leaves. Use clean, sharp scissors or pruning shears and snip the leaf stalk (petiole) close to the main stem. This tidies up the plant’s appearance and helps direct energy towards healthy new growth. And don’t forget that regular rotation! Turning the pot a quarter turn each week encourages upright, even growth and prevents leaning.
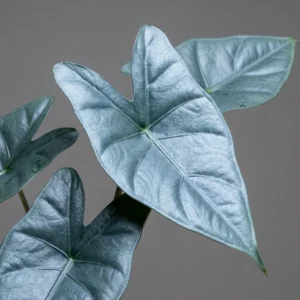
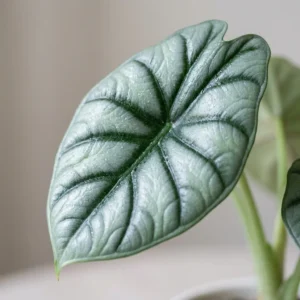
Spotlight on Alocasia Macrorrhizos ‘Variegata’ Care
Ah, the coveted ‘Variegata’! This stunning version, with its unpredictable splashes of white or cream across the leaves, requires slightly adjusted alocasia macrorrhizos variegata care to keep it looking its best.
Special Light Needs for Variegated Beauty
Those beautiful white or cream sections on the leaves lack chlorophyll, the green pigment essential for photosynthesis. This has two important implications for care:
- More Light Needed: To maintain that striking variegation and encourage more of it on new leaves, the ‘Variegata’ generally needs brighter indirect light than its all-green sibling. Insufficient light often results in the white sections diminishing or new leaves emerging mostly or entirely green (reversion).
- Higher Scorch Risk: Paradoxically, those same non-pigmented white sections are much more susceptible to burning from direct sunlight. Finding that perfect Goldilocks zone – very bright indirect light without direct sun exposure – is the key challenge and ultimate reward with this beauty!
Other Considerations for ‘Variegata’
It’s commonly observed that variegated plants, including A. macrorrhizos ‘Variegata’, are often slightly less vigorous growers than their non-variegated counterparts. So, you might expect somewhat slower growth. They can also sometimes be a tad more sensitive to inconsistencies in watering, humidity, or temperature. Careful observation and providing stable conditions are particularly important for this special variety. Patience truly is a virtue here!
Troubleshooting Common Alocasia Macrorrhizos Problems
Okay, let’s talk troubleshooting. Even experienced plant parents encounter issues sometimes, so don’t panic if your Alocasia isn’t looking perfect! Most common problems are quite fixable once you know what to look for.
Decoding Yellow Leaves: What Your Plant is Telling You
Yellowing leaves (alocasia macrorrhizos yellow leaves) are one of the most frequent signs that something’s amiss. Here’s a quick diagnostic checklist:
- Overwatering? Check the soil – is it constantly damp or soggy? Are the lower leaves yellowing first? Does the base of the stem feel soft or mushy? If signs point here, let the soil dry out more between waterings, double-check your pot’s drainage, and perhaps even inspect the roots for rot (more on that below).
- Underwatering? Is the soil pulling away from the sides of the pot or completely bone dry when you check? Are the leaves wilting, perhaps looking a bit limp, and becoming yellow and possibly crispy? If so, give your thirsty plant a thorough watering.
- Nutrient Needs? If it’s been a long time since you fertilized (especially during the growing season) and the yellowing is more general, particularly on older leaves, your plant might be hungry. A dose of balanced fertilizer (properly diluted!) could help.
- Light Issues? Too little light can sometimes cause leaves to become pale and yellowish. Too much direct sun, as we discussed, causes scorched yellow or brown patches. Assess the plant’s location and adjust if needed.
- Just Natural Aging? It’s perfectly normal for the oldest, lowest leaf on an Alocasia to gradually yellow, wither, and eventually drop off as the plant produces new growth higher up. If it’s just one leaf at a time doing this, and the rest of the plant looks healthy and vigorous, there’s usually no cause for concern!
Banishing Brown Crispy Tips and Edges
Seeing those dreaded brown, crispy leaf tips or edges (alocasia macrorrhizos brown tips)? This is almost always a sign of insufficient humidity in the air. Your Alocasia is craving more moisture! Refer back to the “Humidity Heroics” section and implement one or more of those strategies. Less commonly, persistent brown tipping can sometimes be related to the minerals in your tap water (if you have very hard water, try using filtered, distilled, or rainwater) or from letting the soil get completely dry too often between waterings.
Why is My Alocasia Drooping?
A sudden case of the droops (alocasia macrorrhizos drooping) is often the plant’s dramatic way of saying it’s thirsty. Check the soil moisture first! If it’s dry, a good watering should perk it up within a few hours. However, drooping can also be a sign of other stresses, such as recent repotting (transplant shock), sudden exposure to cold drafts or temperature extremes, or, more seriously, significant root rot (if the roots are damaged, they can’t absorb water, leading to wilting even if the soil is moist). Investigate the recent conditions and soil moisture carefully.
Pesky Pests: Identifying and Treating Common Intruders
Keep a vigilant eye out for unwelcome guests, as early detection makes treatment much easier! The most common alocasia macrorrhizos pests indoors are:
- Spider Mites: These tiny arachnids are hard to see individually but leave tell-tale signs. Look closely at the undersides of leaves (they love it there!) for fine, silky webbing, especially where the leaf meets the stem. You might also see tiny yellow or bronze dots (stippling) on the leaf surface where they’ve been feeding. They thrive in dry conditions, so your first line of defense is boosting humidity! You can also physically remove them by wiping the leaves (top and bottom) thoroughly with a damp cloth. For more persistent infestations, use an insecticidal soap spray, making sure to get complete coverage, especially on leaf undersides. Repeat treatments every few days for a couple of weeks are usually necessary to catch newly hatched mites. It’s easy to miss them at first – I once had a scare when I finally spotted tiny webs after weeks of wondering why a leaf looked dull! Always check under the leaves.
- Mealybugs: These look like small, white, cottony blobs and tend to cluster in protected areas like leaf axils (where the leaf joins the stem), along stems, or on the undersides of leaves. For a few bugs, you can dip a Q-tip in rubbing alcohol (isopropyl alcohol) and dab each one directly – it dissolves their waxy coating. For larger outbreaks, insecticidal soap or neem oil sprays can be effective, again requiring thorough coverage and repeat applications. Always isolate an infested plant immediately to prevent these critters from spreading to your other houseplants.
Avoiding the Dreaded Root Rot
Root rot is perhaps the most serious threat, typically caused by overwatering or using a soil mix that retains too much moisture and doesn’t drain well. These conditions suffocate the roots, leading to decay (alocasia macrorrhizos diseases often relate to fungal issues from wetness). Prevention is truly the best medicine: always use an airy, well-draining soil mix, ensure your pot has drainage holes, and resist the urge to water until the top layer of soil is dry. If you suspect root rot (symptoms include persistent wilting even when soil is moist, yellowing leaves, a foul smell from the soil, or a mushy stem base), you’ll need to act fast. Gently remove the plant from its pot, wash away the old soil, and inspect the roots. Healthy roots are typically firm and white or light-colored. Trim away any roots that are brown, black, soft, mushy, or smelly using clean, sterilized scissors. If significant root loss occurred, you might need to downsize the pot. Repot the plant in fresh, appropriate soil mix, and water very sparingly until you see signs of recovery and new growth.
Sharing the Green Love: Propagating Your Alocasia Macrorrhizos
Want to multiply your magnificent Giant Taro or share one with a friend? Good news – propagation is quite straightforward!
Simple Division for More Plants
The easiest and most common method for alocasia macrorrhizos propagation division is done when you repot your plant, ideally during the active growing season (spring or summer). When you have the plant out of its pot, you might notice smaller ‘pups’ or offsets growing from the base of the main plant, connected to the central rhizome (the fleshy, underground stem). If these offsets have developed their own roots, you can gently separate them from the mother plant using your hands or a clean knife. Alternatively, if the main rhizome is large, you can carefully cut it into sections using a sterile knife, ensuring each section has at least one visible ‘eye’ or growth point (a small bump or node where new growth emerges) and some healthy roots attached. Pot these new divisions up in their own appropriately sized containers using the recommended Alocasia soil mix. Keep them in a warm, humid environment with bright indirect light, and water lightly, keeping the soil just barely moist until they establish and show new growth.
An Important Note on Toxicity
Before we wrap up, a crucial safety reminder: Alocasia macrorrhizos, like all plants in the Alocasia genus, contains insoluble calcium oxalate crystals throughout its tissues (leaves, stems, roots). These crystals make the plant toxic if ingested by humans, cats, dogs, or other pets. Chewing or swallowing plant parts can cause immediate and painful irritation, burning, and swelling of the mouth, lips, tongue, and throat, as well as drooling, vomiting, and difficulty swallowing. Therefore, it is extremely important to keep this plant well out of reach of curious children and pets who might be tempted to nibble. It’s also a good idea to wear gloves when handling the plant, especially when pruning or repotting, as the sap can cause skin irritation in sensitive individuals. Addressing alocasia macrorrhizos toxicity cats dogs concerns means placement is key!
Embracing Your Alocasia Macrorrhizos Journey
Phew, we’ve navigated the exciting world of Giant Taro care together! Remember those core pillars we discussed: providing plenty of bright indirect light, mastering the art of consistent watering combined with excellent drainage, ensuring high humidity, and maintaining warm temperatures. While its size and tropical nature might seem daunting at first, Alocasia macrorrhizos is actually a remarkably resilient and rewarding plant when its fundamental needs are thoughtfully met.
The most valuable advice I can give? Become a keen observer of your own plant. It will communicate its needs through the way its leaves look and feel. Check the soil moisture regularly rather than sticking to a rigid schedule. Keep an eye out for any early signs of pests or problems. Growing these incredible statement plants is a continuous learning journey, and believe me, witnessing a giant new leaf slowly unfurl is a truly special moment worth celebrating! You’ve got this. Happy growing, fellow Alocasia lover!