Hello fellow plant enthusiasts and Alocasia admirers! Alex here. If you’re anything like me, you’ve fallen head over heels for the stunning, sometimes dramatic, beauty of Alocasia plants. These ‘jewels of the jungle’ bring such unique flair to our homes. But let’s be honest, they can sometimes be a little… particular, especially when it comes to watering. If you’ve ever battled root rot or struggled to get the moisture levels just right in soil, you might have heard whispers about growing alocasia in leca.
So, what’s the deal with those little clay balls? LECA, which stands for Lightweight Expanded Clay Aggregate, is becoming a popular alternative to traditional potting soil for many houseplants, including our beloved Alocasias. Growing in LECA is a form of semi hydroponics for alocasia, meaning we’re growing without soil, using these clay pebbles and a water reservoir to deliver moisture and nutrients.
Is it a magic bullet? Not exactly. But for many Alocasia parents, it can be a game-changer. This guide will walk you through the honest pros and cons, show you exactly how to get started transferring alocasia from soil to leca, and cover the essential care needed to help your plant thrive in its new home. Let’s dive in!
Jump to Sections
ToggleThe Perks: Unpacking the Benefits of Alocasia in LECA
Let’s start with the bright side! Why are so many plant lovers making the switch? There are some compelling reasons why LECA can be fantastic for Alocasias:
- Superior Root Aeration: This is arguably the biggest win. Alocasias notoriously dislike sitting in soggy soil, a common cause of the dreaded root rot. LECA pebbles create tons of air pockets around the roots, allowing them to breathe freely and significantly reducing the risk of alocasia root rot leca prevention being a constant worry. Healthy, airy roots often lead to a happier plant!
- Consistent Moisture Access: LECA acts like a wick, drawing water up from a reservoir at the bottom of the pot. This provides your Alocasia with consistent access to moisture without the roots being constantly submerged or going through harsh dry spells. It helps take much of the guesswork out of watering.
- Simplified Watering Routine: Once you establish a routine, watering can become simpler. You typically just need to top up the reservoir when it gets low (usually allowing it to almost dry out first promotes good air exchange). For many, this means less frequent watering compared to smaller soil pots that dry out quickly. Plus, using a clear cache pot gives you a perfect visual cue.
- Reduced Soil-Borne Pests: Say goodbye to those annoying fungus gnats! Since there’s no organic soil, LECA eliminates the breeding ground for many common soil-dwelling pests.
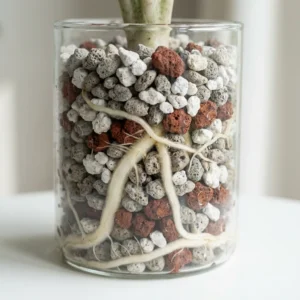
- Easy Root Inspection: If you use a clear net pot or glass vessel, you can easily keep an eye on your Alocasia’s root development and health without having to unpot it. It’s quite rewarding to watch those new, fuzzy water roots grow!
- Cleaner Growing Environment: Let’s face it, soil can sometimes be messy. LECA is generally tidier to handle, with fewer spills during repotting or maintenance.
Potential Pitfalls: Understanding the Challenges of LECA
Now, for the honest truth, because balanced expectations are crucial for plant parenting success. Switching to LECA isn’t without its hurdles, and it’s important to be prepared:
- The Potential for Transition Shock: This is probably the most significant challenge, especially with famously sensitive Alocasias. When you move a plant from soil to LECA, the existing ‘soil roots’ often struggle to adapt to the constantly moist, airy environment. Some may die back as the plant focuses energy on growing new ‘water roots’ better suited to LECA. Expect some potential yellowing or dropping of leaves during this phase. It can be nerve-wracking, but patience is truly key. It’s often a temporary setback, and many plants bounce back beautifully.
- Thorough Root Cleaning is Non-Negotiable: This is critical for success and probably the most labor-intensive part of the transfer. You MUST remove as much soil as humanly possible from the roots before potting into LECA. Any remaining soil particles can decay in the wet environment and potentially lead to rot. This process needs to be done very gently to avoid damaging the delicate roots.
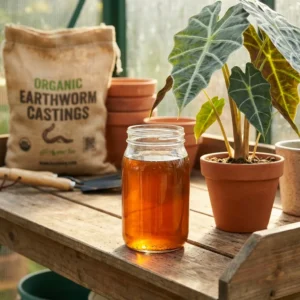
- Nutrient Management is Essential: Remember, LECA pebbles are inert – they contain zero nutrients. Unlike soil, which provides some baseline nutrition, you are entirely responsible for providing everything your Alocasia needs through a liquid hydroponic fertilizer. Standard houseplant food is generally insufficient and unbalanced for hydroponic systems. Trust me on this one, using the right food makes all the difference. You’ll need a formula specifically designed for hydroponics or semi-hydroponics. Furthermore, many Alocasias are known to be heavy feeders of Calcium and Magnesium, elements often lacking in standard formulas, so adding a specific CalMag supplement is highly recommended by many experienced growers. Getting the nutrient strength right (not too strong to burn roots, not too weak to cause deficiencies) is a learning curve.
- Regular Flushing Required: Over time, mineral salts from fertilizers and tap water can accumulate on the LECA pebbles and around the roots. This buildup can eventually ‘burn’ the roots or interfere with nutrient uptake (lockout). To prevent this, you’ll need to periodically flush the LECA and roots thoroughly with plain water – standard practice suggests roughly monthly intervals.
- Initial Setup Costs: Getting started with LECA involves purchasing the LECA pebbles themselves, suitable pots (often a net pot inside a cache pot), and appropriate hydroponic nutrient solutions. This initial investment can sometimes be higher than sticking with basic soil and pots.
- Potential for Algae: If your LECA setup (especially the reservoir in a clear pot) receives significant light, you might notice some green algae growth. It’s usually harmless to the plant itself but can be unsightly. Using opaque cache pots helps minimize this.
Understanding these potential problems with alocasia in leca upfront helps you approach the transition with realistic expectations and a proactive mindset.
Making the Move: Your Step-by-Step Guide to Transferring Alocasia to LECA
Ready to give transferring alocasia from soil to leca a try? Deep breath – you absolutely can do this! Here’s a step-by-step guide:
Gather Your Supplies: You’ll need:
- LECA pebbles
- A net pot (a plastic pot with lots of holes/slits) appropriately sized for your plant’s root ball
- A cache pot (a decorative outer pot with no drainage holes) slightly larger than the net pot
- A good quality hydroponic nutrient solution (choose one for general hydro use)
- CalMag supplement
- Lukewarm water
- A bowl or basin for rinsing
- A soft brush (like an old, clean toothbrush or makeup brush) or just your fingers
- Clean, sharp scissors or pruning shears
Step 1: Prepare the LECA
Rinse your LECA pebbles very well in a colander or sieve under running water. This removes the pervasive clay dust. Many growers recommend soaking the LECA for several hours or overnight in water afterward; this helps fully hydrate the pebbles before use.
Step 2: Gently Unpot Your Alocasia
Carefully slide your Alocasia out of its current soil pot. Try to handle the root ball gently at this stage.
Step 3: The Crucial Root Clean
This is the most important and often time-consuming step. Gently crumble away as much loose soil as possible with your fingers over a trash bin or newspaper. Then, take the root ball to a sink or use a basin of lukewarm water. Swish the roots gently in the water, using your fingers or a very soft brush to meticulously dislodge remaining soil particles, especially from dense root clusters. Be incredibly patient and thorough – work bit by bit. Your goal is to get the roots as clean as possible, ideally soil-free. Inspect the roots closely once cleaned. Trim away any roots that are clearly black, brown, mushy, or stringy using your clean scissors. Healthy Alocasia roots are typically firm and creamy white, light tan, or sometimes slightly yellow/orange depending on the plant and previous conditions.
Step 4: Potting Up in LECA
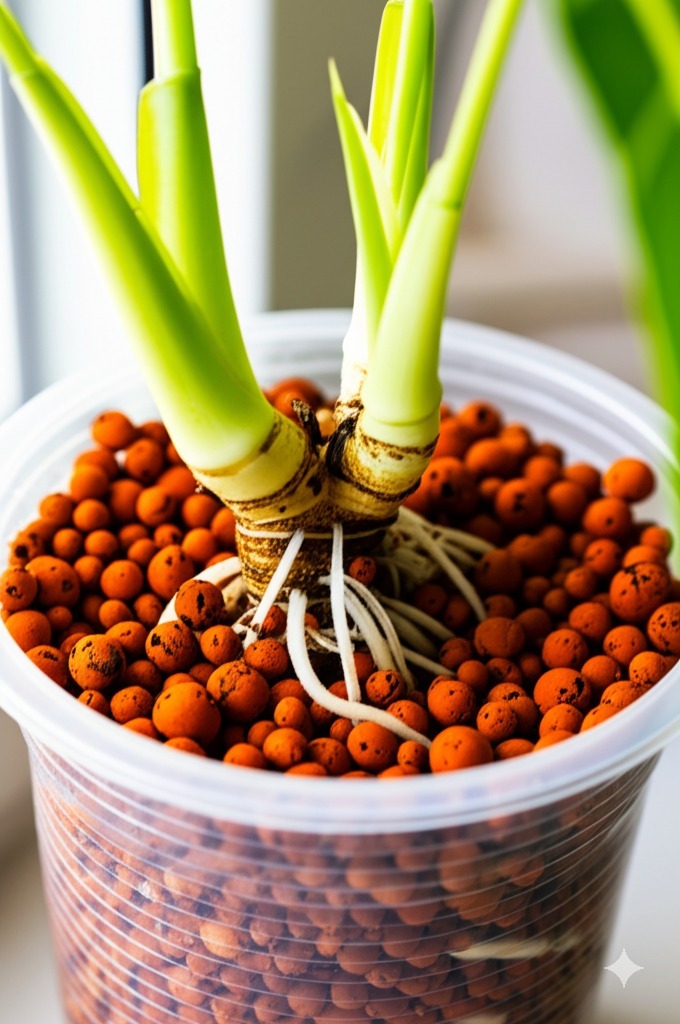
Place a small layer (an inch or so) of rinsed LECA in the bottom of your net pot. Hold your Alocasia so the base of the plant (where the stems emerge from the corm/roots) will sit at or slightly above the final level of the LECA. Gently fill in around the cleaned roots with more LECA pebbles, supporting the plant upright as you go. You can tap the pot gently on your work surface a few times to help the pebbles settle naturally around the roots. Avoid packing them down tightly – remember, good airflow is a major benefit! Ensure the crown/base of the plant isn’t buried beneath the pebbles.
Step 5: Initial Watering & Reservoir Setup
Place the newly potted net pot inside its cache pot. Now, prepare your initial reservoir solution. For the first crucial week or two of acclimation, it’s generally best practice to use either plain, pH-adjusted water (if you have the means to test and adjust pH to the ideal range of 5.5-6.5) OR, more commonly, a very dilute hydroponic nutrient solution. Think 1/4 of the manufacturer’s recommended strength, mixed according to instructions, and do include the CalMag supplement at the same diluted rate. Pour this solution into the cache pot (not directly through the LECA yet) until the water level reaches about 1/3 of the way up the height of the net pot. You want the lowest roots to be able to reach the water, but avoid submerging the entire root system, especially the base of the plant.
Step 6: Acclimation Care
Place your newly potted Alocasia in its usual spot with bright, indirect light. Now comes the waiting game and observation. Monitor the plant closely. As mentioned, don’t panic if you see a leaf or two yellow or perhaps even drop – this is often part of the adjustment process (transplant shock). Maintain the water level in the reservoir around the 1/3 mark, refilling only with the same plain water or very dilute nutrient solution as needed when it gets low. Resist the temptation to give it full-strength nutrients for at least a few weeks, maybe even a month, while the plant focuses its energy on developing those vital new water roots.
This alocasia semi hydroponics care transition requires patience above all, but following these steps carefully gives your precious plant the best possible start in its new LECA home.
Life in LECA: Ongoing Care Essentials
Once your Alocasia shows signs of settling in – perhaps unfurling a new leaf or you spot new fuzzy white roots through the net pot (this can take several weeks to a couple of months) – you can transition to a more regular care routine:
- Watering Wisdom: Continue using the reservoir method. Check the water level in the cache pot regularly. A common and effective approach is to allow the reservoir to become almost completely empty before refilling it back to the approximate 1/3 mark. This brief ‘air gap’ period ensures roots get plenty of oxygen. How often you’ll need to refill depends entirely on your home’s environment (light intensity, temperature, humidity) and the plant’s size and thirst, but it might range from weekly to bi-weekly or even longer. Observe your plant and the reservoir. For watering alocasia in leca, consistency is generally appreciated once established.
- Feeding Your Plant: Now that it’s actively growing in LECA, your Alocasia needs regular feeding because the clay pebbles provide none. Always use a high-quality nutrient solution specifically formulated for hydroponics or semi-hydroponics. Follow the mixing instructions on the product label carefully – avoid the temptation to make it ‘a little stronger’, as this can easily lead to nutrient burn. It’s often wise to start at 1/2 strength after the initial acclimation phase and gradually work up to the manufacturer’s recommended full strength if the plant is responding well with healthy growth. And remember that CalMag supplement – it’s frequently beneficial for Alocasias in hydro systems. It’s also common practice to reduce nutrient frequency or strength during the winter months when growth naturally slows down. Using appropriate nutrients for alocasia in leca is absolutely vital for long-term health.
- The Flushing Routine: This is a key maintenance step for long-term success. Roughly once a month (or every 4-6 weeks is a common recommendation), take the net pot out of the cache pot and bring it to a sink or shower. Run lukewarm tap water gently but thoroughly through the LECA pebbles and over the roots for a minute or two. This helps wash away any accumulated mineral salts from fertilizers and water. Afterward, empty the old water from the cache pot and refill with your fresh nutrient solution. Regular flushing leca alocasia setups helps prevent toxic buildup and keeps roots happy.
- Environmental Needs: Don’t forget the basics! Your Alocasia’s fundamental requirements for bright, indirect light (no harsh direct sun), warmth (stable temperatures, avoiding cold drafts), and relatively high humidity remain exactly the same whether it’s potted in soil or LECA. Grouping plants, using pebble trays, or employing a humidifier can all help boost ambient humidity levels, which Alocasias generally love.
- Monitoring is Key: Make it a habit to observe your plant regularly. If you used a clear pot, check the visible roots – healthy water roots are often white or cream-colored and may look slightly fuzzy. Watch the leaves for any signs of stress or deficiency (patterns of yellowing, spots, crisping). New, healthy, vibrant leaf growth is always the best indicator that your Alocasia is adapting well!
Troubleshooting Common Issues in Your LECA Setup
Even with diligent care, you might encounter occasional bumps in the road. Here’s a quick guide to tackling common problems with alocasia in leca:
- Yellowing Leaves:
- Shortly After Transfer: Most likely transplant shock. Focus on providing stable conditions, correct (low) initial water/nutrient levels, and giving it time.
- Oldest, Lowest Leaves: One or two lower leaves yellowing and eventually dying off over time is a natural part of the plant’s life cycle (senescence).
- Widespread or Patterned Yellowing: This often points towards a nutrient issue. Could it be nutrient burn (solution too strong)? Try flushing and using a weaker solution. Could it be a deficiency (solution too weak or missing key elements like CalMag)? Ensure you’re using a complete hydro formula + CalMag. Or could it be root problems? Always gently check root health if unsure. Alocasia yellow leaves in leca requires a bit of detective work.
- Root Rot: Yes, despite LECA’s excellent aeration, alocasia root rot leca can still occur, usually if the initial root cleaning wasn’t thorough enough, the water reservoir level is consistently kept too high (drowning the upper roots/base), or if there were pre-existing root issues. If you suspect rot (mushy, black, smelly roots), act quickly: unpot, trim away all affected parts with sterile scissors back to healthy tissue, clean the remaining roots very well (some growers use a brief soak in diluted hydrogen peroxide solution as an extra precaution – research dilution carefully if trying this), rinse, and repot in fresh, clean LECA, ensuring a proper (lower) initial water level.
- Brown Leaf Tips/Edges: Often a symptom of low ambient humidity, a classic Alocasia complaint. However, in LECA, it can also indicate inconsistent watering (letting the reservoir stay bone dry for extended periods repeatedly) or potentially nutrient burn / salt buildup from infrequent flushing. Address humidity, ensure consistent reservoir management, and stick to your flushing schedule.
- Pests (e.g., Spider Mites): While soil pests are largely eliminated, airborne pests like spider mites can still find your prized Alocasia. Inspect leaves regularly, especially the undersides and junctions. The good news? Treatment can often be mechanically easier – you can thoroughly rinse the leaves, stems, and even the LECA/roots under a shower without creating muddy chaos.
- Algae Growth: Seeing green fuzz appear on the LECA surface or the inside of the cache pot? This is common when nutrient-rich water is exposed to light. It’s primarily an aesthetic issue and generally harmless to the plant. You can reduce it significantly by using an opaque cache pot to block light from reaching the reservoir. You can also gently rinse the top layer of LECA during flushing if it bothers you, and be sure to clean the cache pot itself periodically.
Final Thoughts: Is LECA the Right Fit for You and Your Alocasia?
So, after exploring the ins and outs, should you make the switch to growing your precious alocasia in leca?
LECA could be a fantastic growing method for you if:
- You frequently struggle with getting watering just right for Alocasias in traditional soil (either over or under-watering).
- You want to significantly minimize the risk of devastating root rot.
- You’re keen to banish fungus gnats from your plant area.
- You appreciate having precise control over nutrient delivery.
- You enjoy the process of observing root growth and health directly.
- You’re willing to learn the basics of hydroponic nutrients and commit to a regular flushing routine.
On the other hand, sticking with soil might be preferable if you:
- Prefer a very hands-off, low-maintenance approach to plant care.
- Are particularly apprehensive about the potential stress of the transition phase and possible leaf loss.
- Have a tight budget for initial setup supplies (LECA, pots, specific nutrients).
- Simply enjoy the feel, look, and natural buffering capacity that soil provides.
Ultimately, the best way to grow your Alocasia is the way that works best for you and allows your plant to thrive in your specific environment and care style. There’s no single “right” answer! Many Alocasia enthusiasts discover tremendous success and enjoyment with LECA once they navigate the initial learning curve. If you’re feeling adventurous, perhaps start by transitioning just one of your less rare Alocasias? Treat it as a learning experiment.
Whatever path you choose on your Alocasia parenting journey, embrace the process. Observing, learning, and adjusting your care is all part of the rewarding experience of helping these incredible plants flourish. Happy growing!