Jump to Sections
ToggleThat Sinking Feeling: When Your Stunning Alocasia Starts Yellowing
Okay, fellow plant parent, let’s talk about something that can make even seasoned growers a little anxious: seeing those beautiful, often dramatic leaves on your Alocasia starting to turn yellow. Whether you have a striking ‘Polly’, a velvety ‘Black Velvet’, or a statuesque ‘Zebrina’, these plants are true jewels. So, when a leaf starts to lose its vibrant green, it’s natural to worry!
You might be wondering, “What did I do wrong?” or “Is my precious plant dying?” Deep breath! Yellowing leaves on your Alocasia, sometimes called an Elephant Ear plant, are a signal – your plant is trying to tell you something isn’t quite right. The good news? It’s often something you can fix!
This guide is here to walk you through the top 7 common reasons why your alocasia leaves turn yellow. More importantly, we’ll cover clear, actionable fixes for each one. Think of me as your friendly guide in decoding your Alocasia’s signals. Let’s get that green back (well, on the new leaves at least!) and help your Alocasia thrive.
Is Some Yellowing Normal? Understanding Alocasia Leaf Lifecycles
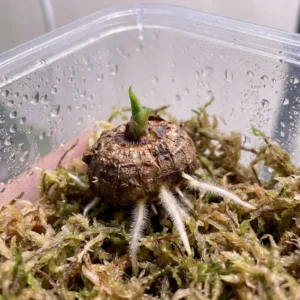
First things first, sometimes a yellow leaf isn’t cause for alarm. Alocasias grow from corms (like bulbs) and often maintain only a certain number of leaves per stem or growth point. As a vibrant new leaf unfurls, the plant might decide to redirect energy by letting the oldest, lowest leaf gradually turn yellow and fade away. You’ll often see these bottom leaves alocasia yellow one by one while the rest of the plant looks perfectly healthy and happy. That’s just nature’s recycling program!
Also, keep in mind that some Alocasia varieties can go dormant or semi-dormant during the cooler, darker months of fall and winter. This alocasia dormancy yellow leaves pattern might involve more widespread yellowing and leaf drop as the plant conserves energy. We’ll touch on this again later, but it’s good to know it’s not always a sign of poor health.
So, while we investigate the problems, remember that context is key!
Decoding the Yellow: Top 7 Causes & How to Fix Them
Alright, let’s get down to the detective work. Here are the most frequent culprits behind yellowing Alocasia leaves:
Cause 1: Overwatering Woes – Loving Your Alocasia Too Much?
This is probably the most common reason I see for yellowing Alocasias, especially with enthusiastic new owners! It’s easy to do – we just want them to be happy! But too much water is a big no-no for these plants.
- What it Looks Like: Often, the lower leaves start yellowing first, sometimes feeling a bit soft or limp even though the soil is wet. You might notice the base of the stems getting mushy, or even catch a whiff of a sour, swampy smell from the pot. Sometimes yellowing is accompanied by brown, mushy spots – a tell-tale sign of root rot. These are classic alocasia overwatering symptoms.
- Why it Happens: When the soil stays constantly soggy, the roots can’t breathe (they need oxygen!). This creates the perfect environment for fungal or bacterial root rot, which damages the roots’ ability to take up water and nutrients, leading to those sad yellow leaves. Poor drainage or watering way too frequently are the usual suspects.
- The Fix (Step-by-Step):
- Stop Watering: Immediately! Let the soil start to dry out.
- Check the Roots (If you suspect rot): Gently slide the plant out of its pot. Healthy roots are usually firm and white/cream. If you see brown, black, mushy, or smelly roots, that’s rot. Carefully trim away all affected parts with clean scissors or shears. Some folks rinse the remaining roots gently or use a diluted hydrogen peroxide solution (1 part 3% H2O2: 2 parts water) as a quick dip according to standard practices.
- Improve Drainage: Repot (especially if you found rot) into fresh, well-draining potting mix. An Aroid mix containing orchid bark, perlite, coco coir, and charcoal is fantastic. Make SURE the pot has drainage holes!
- Adjust Watering: This is key for how to fix yellow leaves on alocasia caused by overwatering. Only water when the top 1-2 inches of soil feel dry to the touch. When you do water, water thoroughly until it runs out the bottom, then empty the saucer – never let it sit in water.
- Prevention Tip: Get the soil right (chunky and airy!), always check soil moisture before reaching for the watering can (many plant parents I chat with agree this is the game-changer!), and ensure good airflow around your plant.
Cause 2: Underwatering Stress – Is Your Alocasia Thirsty?
While less common than overwatering for Alocasias (they do like consistent moisture), letting them dry out completely too often can also cause yellow leaves.
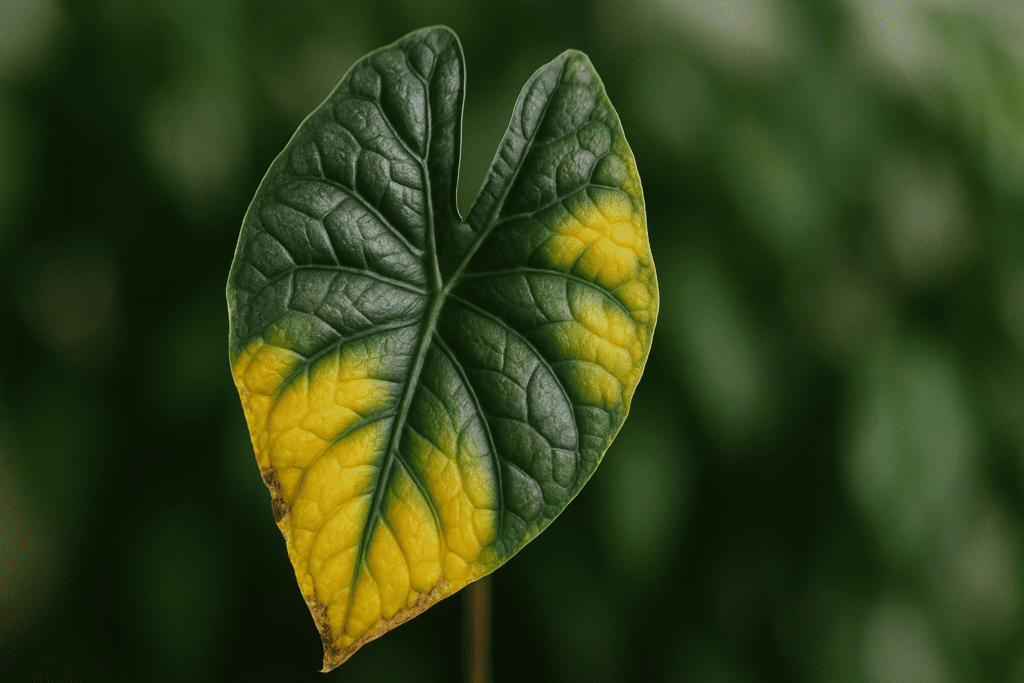
- What it Looks Like: Similar to overwatering, lower leaves might yellow first. However, the key difference is often the presence of crispy brown edges or tips along with the yellowing. The leaves will likely look wilted or droopy, and the soil will be noticeably dry and possibly pulling away from the sides of the pot. These are typical alocasia underwatering symptoms. You might also see alocasia leaves turning yellow and brown.
- Why it Happens: Simply put, the plant doesn’t have enough water to sustain its leaves and functions. It starts sacrificing older leaves to conserve moisture.
- The Fix (Step-by-Step):
- Water Thoroughly: Give your plant a good, long drink. If the soil is rock hard, bottom watering can be very effective. Place the pot in a sink or tub with a few inches of water and let it soak up water from the bottom for 30-60 minutes, until the topsoil feels moist.
- Monitor Consistently: Don’t swing from bone dry to soaking wet. Aim for consistently moist (but not soggy) soil. Check the top inch or two regularly.
- Prevention Tip: Check your Alocasia’s soil moisture more frequently, especially during warm weather or if it’s in a fast-drying terracotta pot. Find a rhythm that keeps the soil lightly moist.
Cause 3: Lighting Issues – Finding the Sweet Spot
Alocasias have definite opinions about light! Getting it wrong can lead to yellowing.
A. Too Much Direct Sun: These jungle plants thrive under canopy cover in nature. Blasting them with direct, harsh sunlight will scorch their leaves.
- What it Looks Like: You’ll see yellowing often accompanied by crispy, brown scorched patches or spots, especially on the leaves getting the most sun. The color might look faded or bleached.
- The Fix: Move your Alocasia immediately to a spot with bright, indirect light. Think near an east-facing window, several feet back from a sunny south or west window, or filtered through a sheer curtain.
B. Too Little Light: While often causing slow growth or legginess first, consistently low light can also contribute to yellowing.
- What it Looks Like: General paleness, lack of vibrancy. Yellowing might occur on older leaves as the plant sheds them to save energy in low-light conditions. It’s usually a weaker, faded yellow rather than a bright, alarming one.
- The Fix: Move it to a location with brighter indirect light. If your home is naturally dark, consider investing in a grow light to provide the necessary energy. Understanding alocasia light requirements yellow leaves info is helpful – they need brightness!
Prevention Tip: Understand your specific Alocasia’s needs (most love bright, indirect light). Observe how the light hits it throughout the day. Acclimate it slowly if moving it to a significantly different light level.
Cause 4: Nutrient Problems – Hungry or Overfed?
Like all plants, Alocasias need food, but the balance has to be right.
- What it Looks Like:
- Lack of Nutrients (Deficiency): Often shows as general yellowing, typically starting on the older, lower leaves (especially for Nitrogen deficiency, as the plant moves mobile nutrients to new growth). You might also see yellowing between the green veins (interveinal chlorosis), which can indicate Magnesium or Iron issues (Magnesium usually affects older leaves first, Iron newer ones). Overall growth might be stunted. These are potential alocasia nutrient deficiency symptoms.
- Too Much Fertilizer (Burn): This often causes yellowing along with brown, crispy leaf tips or edges. It can affect leaves more randomly, not just the oldest ones. You might even see a whitish crust on the soil surface from salt buildup.
- Why it Happens: The soil is either depleted of essential nutrients, or there’s an excess buildup of fertilizer salts damaging the roots.
- The Fix (Step-by-Step):
- For Deficiency: During the growing season (spring and summer, usually), feed your Alocasia with a balanced liquid houseplant fertilizer. Crucially, dilute it to half or even quarter strength of what the package recommends – Alocasias can be sensitive. Feed every 2-4 weeks while actively growing. A good fertilizer for alocasia yellow leaves is simply a balanced one, used correctly according to standard practices.
- For Burn: Stop fertilizing immediately. Flush the soil thoroughly by watering heavily and letting it drain completely several times to wash out excess salts. Wait at least a month before considering feeding again, and always dilute properly.
- Prevention Tip: Feed regularly but conservatively during the growing season. Dilute your fertilizer! Flush the soil with plain water every few months to prevent salt buildup. Don’t fertilize dormant plants.
Cause 5: Pesky Pests – Uninvited Guests
Ugh, pests. Several common houseplant pests seem to particularly enjoy Alocasias, and their feeding can cause yellowing leaves.
- What it Looks Like: Look closely! Yellowing might appear as tiny yellow dots (stippling), patches, or just an overall sickly yellow hue. Check under leaves and where stems meet leaves.
- Spider Mites: These are tiny (you might need a magnifier!) and leave fine, wispy webbing. They cause stippled yellowing. Spider mites alocasia yellow leaves are a common complaint, especially in dry homes.
- Mealybugs: Look like little bits of white cotton, often tucked into crevices.
- Thrips: Tiny, slender insects that cause silvery patches followed by yellowing and distortion.
- Why it Happens: These pests pierce the leaves and suck out the sap, draining the plant of nutrients and moisture.
- The Fix (Step-by-Step):
- Isolate: Move the infested plant away from others immediately!
- Remove: Wipe down leaves (top and bottom) with a damp cloth or give the plant a good shower (use lukewarm water). You can dab mealybugs with a cotton swab dipped in rubbing alcohol.
- Treat: Spray thoroughly with insecticidal soap or neem oil solution, making sure to cover all surfaces, especially leaf undersides. Repeat treatments every 5-7 days for several weeks, as this breaks their life cycle. Persistence is key! Always follow product label instructions carefully for application and safety.
- Prevention Tip: Inspect your plants often, especially new arrivals. Wiping down leaves regularly helps. Boosting humidity can make the environment less inviting for spider mites. Check for alocasia pests yellow leaves regularly.
Cause 6: Environmental Shock & Acclimation Stress
Alocasias can react dramatically when their environment changes suddenly!
- What it Looks Like: Yellowing, often starting with lower leaves, drooping, or just looking generally unhappy shortly after you’ve moved the plant, repotted it, or if it’s experienced a sudden temperature drop (like being near a drafty window or AC vent). Alocasia yellowing after repotting is extremely common.
- Why it Happens: The plant is stressed by the abrupt change in its conditions (light, temperature, humidity) or by physical disturbance to its roots during repotting (alocasia transplant shock yellow leaves). It often sacrifices older leaves to conserve resources while it adjusts or repairs roots.
- The Fix (Step-by-Step):
- Stabilize: Provide the most consistent environment possible. Avoid drafts, keep temperatures stable, maintain good humidity (use a pebble tray or humidifier if needed), and ensure appropriate light.
- Post-Repotting Care: Be patient! This is the most important thing. Provide good, consistent care as mentioned above. Do not fertilize for at least 4-6 weeks after repotting, as this can burn sensitive roots. Expecting one or two lower leaves to yellow and drop after repotting is often normal – don’t panic and repot again! Look for signs of new growth as an indicator of recovery.
- Prevention Tip: Acclimate your Alocasia gradually to new spots if possible. When repotting, be gentle with the roots. Only repot when necessary (e.g., it’s significantly rootbound). Consistency is your friend!
Cause 7: Natural Aging & Dormancy – The Circle of Leaf Life
As we mentioned earlier, sometimes yellowing is just part of the natural process.
- What it Looks Like:
- Natural Aging: Just the single, oldest leaf at the very bottom slowly turns yellow, then brown and shrivels. The rest of the plant looks healthy, green, and might even be pushing out a new leaf.
- Dormancy Prep: As days get shorter and cooler in fall/winter, you might see more widespread yellowing and leaf drop. Growth slows down or stops completely. Some Alocasias might even die back entirely to their underground corm.
- Why it Happens: It’s either the end of that specific leaf’s lifecycle, or the plant is preparing to conserve energy during less favorable conditions (dormancy).
- The Fix (No ‘Fix’ needed!):
- For Aging: Simply let nature take its course. Once the leaf is fully yellow or brown and dry, you can snip it off near the base with clean shears for tidiness.
- For Dormancy: Recognize the signs. Reduce watering significantly – just enough to keep the soil from becoming bone dry. Stop fertilizing completely. Keep the plant in a stable, slightly cooler spot if possible. Be patient and wait for signs of regrowth in the spring. If it dies back to the corm, you can keep the corm in the pot with minimal water or store it according to common practices for dormant corms (like in slightly damp moss/perlite in a cool, dark place).
- Prevention Tip: Learn to recognize these natural phases! Don’t panic and overwater or fertilize a dormant plant – that can cause serious harm.
Putting It All Together: How to Save Your Yellowing Alocasia
So, you see a yellow leaf. What now?
- Observe Carefully: Don’t just see yellow; see how it’s yellow. Is it the oldest leaf? Are there spots? Crispy edges? Webbing? Mushy stems? Where is the yellowing starting?
- Check the Soil: Is it soggy? Bone dry? Compacted?
- Inspect the Plant: Look under leaves for pests. Gently check the base of the stems. If multiple signs point towards root issues (like overwatering), carefully checking the roots might be necessary.
- Consider Recent Changes: Did you just move it? Repot it? Has the weather changed drastically?
Based on your observations, match the symptoms to the causes we’ve discussed. This is the key to applying the right remedy for yellow leaves on your alocasia.
Should I cut yellow leaves off my Alocasia? Generally, yes. Once a leaf is significantly yellow, can yellow alocasia leaves turn green again? No, unfortunately, the green chlorophyll responsible for photosynthesis is gone. Removing fully yellow or heavily damaged leaves allows the plant to direct energy towards healthy growth and new leaves. Use clean scissors or pruning shears and cut the stem close to the base. If a leaf is only slightly yellow, you can wait until it progresses further if you prefer.
The best overall prevention? Consistency! Provide the bright, indirect light most Alocasias love, maintain good humidity (often crucial for these plants), use a well-draining soil mix, and master the art of checking the soil before watering.
A Special Note on Repotting Stress
It’s worth repeating because alocasia yellowing after repotting causes so much worry! It is very common for an Alocasia to sacrifice one or even two of its older leaves after being repotted due to transplant shock. Don’t immediately assume you’ve done something terrible. Focus on providing excellent post-repotting care: stable conditions, high humidity, correct watering (moist, not wet), and no fertilizer for about a month or so. Patience is your superpower here. Watch for new growth – that’s your sign that it’s settling in.
Happy Alocasia Parenting: Keep Learning and Growing!
Seeing yellow leaves on your beautiful Alocasia can be disheartening, but please don’t be discouraged! Think of them as messages from your plant. Now you’re armed with the knowledge to understand the most common reasons why alocasia leaves turn yellow and, more importantly, how to address them.
These plants are incredibly rewarding, and learning their language is part of the fun. Keep observing, be patient with the fixes, and celebrate every new, healthy leaf that unfurls. You’ve got this! Happy growing with your gorgeous Alocasia ‘jewels’!