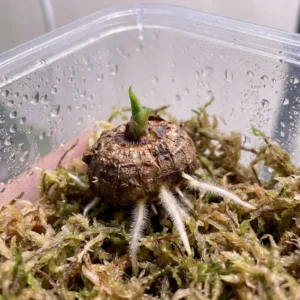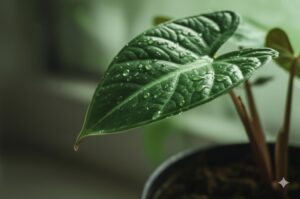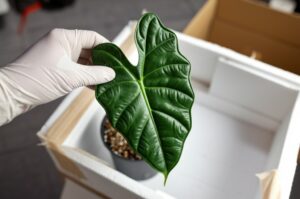
Hello fellow Alocasia enthusiasts! Isn’t it just captivating how these plants bring such drama and tropical beauty into our homes? From the striking veins of a ‘Polly’ to the velvety darkness of a ‘Black Velvet’, these ‘jewel’ Alocasias truly are special. But sometimes, even with our best intentions, our leafy friends try to communicate with us in ways we don’t immediately understand – like showing off some unexpected yellow or brown patches, or just seeming a bit… sluggish.
Often, when an Alocasia looks unhappy, our minds jump to watering woes or light levels. And those are definitely important! But sometimes, the issue lies a little deeper, down in the soil – it might be crying out for some essential nutrients. Think of nutrients as the vital ‘food’ your Alocasia needs to build those gorgeous leaves, strong stems, and healthy roots.
Before we dive into the world of plant nutrition, let’s quickly acknowledge: yellowing or browning leaves aren’t always a sign of hunger! Overwatering, underwatering, not enough light, too much direct sun, pesky pests (always check under those leaves!), or even just the natural shedding of the oldest leaf can cause similar signs. We’ll touch on ruling those out later.
But for now, this guide is designed to be your visual helper, focused specifically on decoding the signs of potential nutrient deficiencies. Let’s learn to read what those stunning leaves might be telling us! We’ll cover the most common issues you might encounter with your Alocasia, making alocasia care troubleshooting a little less mysterious.
Jump to Sections
TogglePlant Nutrition 101: Macronutrients vs. Micronutrients for Alocasias
Okay, let’s talk food! Just like us, plants need a balanced diet. This diet consists of Macronutrients and Micronutrients.
- Macronutrients: These are the big ones, needed in larger quantities. Think Nitrogen (N), Phosphorus (P), and Potassium (K) – you often see these numbers on fertilizer bags (like 10-10-10). They’re crucial for major growth processes.
- Micronutrients: These are needed in much smaller amounts, but they’re absolutely essential! Iron (Fe), Magnesium (Mg), Manganese (Mn), Calcium (Ca), and others fall into this category. They play vital roles in everything from creating that green chlorophyll to helping the plant use other nutrients effectively.
Your Alocasia needs a steady supply of both macros and micros to thrive. While fresh potting mix usually starts with a good supply, over time, as your plant grows, it uses up these nutrients. That’s where gentle, regular fertilizing comes in, but first, let’s figure out if your plant is showing signs of needing specific ones. Understanding plant nutrient deficiencies is the first step.
Mobile vs. Immobile Nutrients: A Key Clue on Your Leaves
Here’s a super helpful tip that experienced growers often use: nutrients behave differently inside the plant. Some are mobile, meaning the plant can effectively move them around, usually shifting them from older leaves to support new growth when supplies run low. Nitrogen, Phosphorus, Potassium, and Magnesium are typically mobile.
Others are immobile, meaning once they’re incorporated into a leaf or stem structure, they tend to stay put. Iron and Calcium are common examples in this group.
Why does this matter for diagnosis? It’s a fantastic clue!
- If you see deficiency symptoms starting on the older, lower leaves, it frequently points to a shortage of a mobile nutrient (N, P, K, Mg). The plant is essentially sacrificing the old to feed the new.
- If the symptoms appear first on the newest, youngest leaves, it often suggests a lack of an immobile nutrient (like Fe or Ca), or an issue preventing its uptake by the roots.
Keep this “old vs. new leaf” clue in mind as we look at specific symptoms!
Visual Guide: Common Macronutrient Deficiencies in Alocasia
Alright, let’s put on our detective hats! Here’s a breakdown of what common macronutrient deficiencies might look like on your Alocasia. Think of this as our text-based approach to an identifying plant nutrient deficiencies chart.
Nitrogen (N) Deficiency: The Pale Yellow Fade
- What to Look For: This is one of the most common deficiencies you might encounter. You’ll see a general yellowing (chlorosis) that typically starts on the oldest, lowest leaves and gradually progresses upwards. It’s not usually patchy; the whole leaf tends to lose its vibrant green, turning pale green and then a washed-out yellow, often including the veins. You might also notice overall stunted growth and new leaves coming in smaller than usual.
- Think of it like this: The plant is pulling that vital Nitrogen from its older storage (the lower leaves) to fuel new growth because it isn’t getting enough from the soil.
- Common Causes: The soil is simply depleted of Nitrogen, or you haven’t fertilized in a while during the growing season.
Phosphorus (P) Deficiency: Stunted Growth & Purple Hues
- What to Look For: Phosphorus deficiency can be a bit more subtle indoors. The most common sign is significantly stunted growth. Sometimes, you might notice the leaves, stems (petioles), or especially the undersides of leaves taking on a purplish or dull, bronze-like tint. Like Nitrogen deficiency, this tends to show up on older leaves first. You won’t see the roots, but they’re likely underdeveloped too.
- Note: While essential, obvious P deficiency symptoms are generally less frequent for typical indoor Alocasia care compared to Nitrogen or Potassium issues.
- Common Causes: Depleted soil, but also soil that’s too cold (which hinders uptake) or has an unsuitable pH level.
Potassium (K) Deficiency: Crispy Brown Edges
- What to Look For: Watch the edges of the leaves! Potassium deficiency often shows up as yellowing, quickly followed by browning, dry, crispy edges (necrosis), usually starting on the older leaves. This browning might begin at the very tip and work its way down the sides. Sometimes yellow spots appear in the leaf interior as well. The plant might also seem generally weak or floppy.
- Think of it like this: The leaf edges look almost ‘burnt’ or dried out, even if your watering routine seems correct.
- Common Causes: Potassium depleted from the soil, or sometimes an imbalance caused by an excess of other nutrients like calcium or magnesium.
Visual Guide: Key Micronutrient Deficiencies to Watch For
Now for the micros! Remember, these are needed in smaller amounts, but deficiency symptoms can be quite distinct and telling. Spotting these signs is key to solving alocasia nutrient deficiency puzzles.
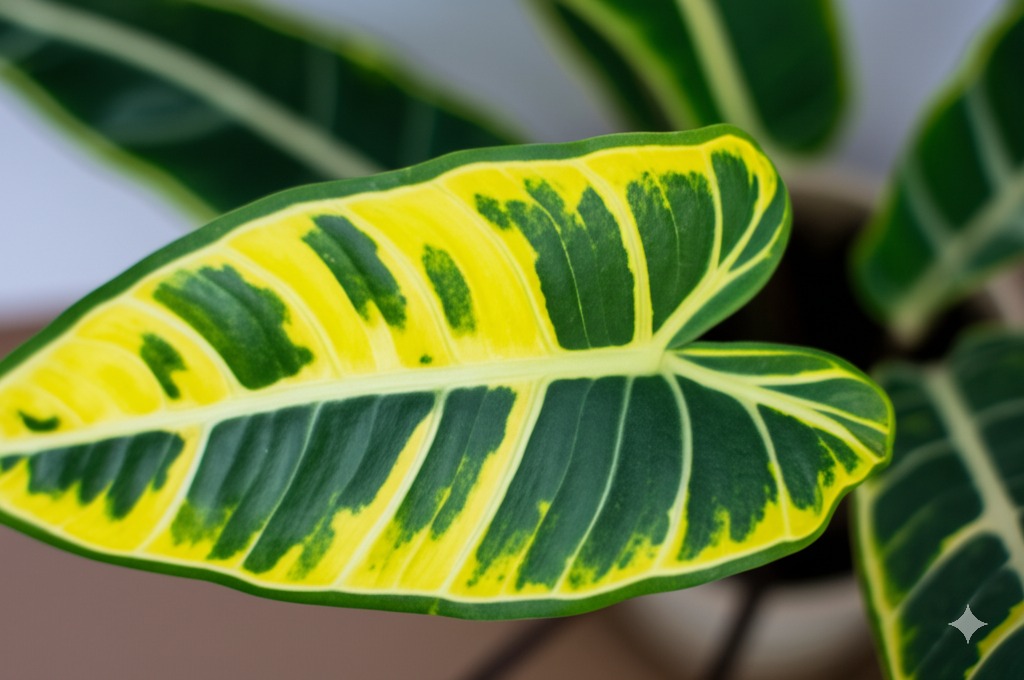
Magnesium (Mg) Deficiency: Green Veins, Yellow Background (Older Leaves)
- What to Look For: This one often presents a classic look: interveinal chlorosis on the older leaves. This means the tissue between the veins turns yellow, while the veins themselves remain noticeably green. It can create striking patterns, sometimes described as green ‘Christmas trees’ or inverted V-shapes along the main veins. In severe cases, the yellow patches might eventually turn brown, and leaf edges could curl upwards.
- Key Clue: It might resemble Iron deficiency symptoms, but Magnesium issues typically start on the OLDER leaves because Magnesium is a mobile nutrient.
- Common Causes: Insufficient Magnesium in the potting mix or fertilizer (especially common in peat-heavy mixes if not supplemented with something like dolomite lime), very acidic soil (low pH), or sometimes applying excessive Potassium fertilizer can interfere with Mg uptake.
Iron (Fe) Deficiency: Green Veins, Yellow Background (Newest Leaves)
- What to Look For: This looks very similar symptomatically to Magnesium deficiency – that distinct interveinal chlorosis (yellowing between green veins). BUT, here’s the crucial difference: Iron deficiency affects the NEWEST, youngest leaves first because Iron is immobile in the plant. The fresh growth emerges looking pale, sometimes almost white in severe cases, while the older leaves might still look perfectly green and healthy.
- Key Clue: Focus your attention on the NEW growth!
- Common Causes: The most frequent culprit isn’t usually a complete lack of Iron in the soil, but rather high soil pH (too alkaline). This ‘locks up’ the Iron, making it unavailable for the plant to absorb, even if it’s physically present. Poor drainage and consistently waterlogged soil can also hinder root function and nutrient uptake.
Briefly Mentioning Others (Calcium, Sulfur, etc.)
- While less common as simple deficiencies in typical houseplant scenarios, be aware that Calcium (Ca) issues (often related to uptake problems linked to inconsistent watering or pH extremes) can potentially cause stunted growth and deformed, curled, or distorted new leaves. Sulfur (S) deficiency is rare but might cause a general yellowing of newer leaves, somewhat resembling Nitrogen deficiency but appearing on the wrong end of the plant (new growth vs. old). Generally, focusing on N, P, K, Mg, and Fe covers the most likely nutrient suspects for common Alocasia issues.
Important Note: Don’t Jump to Conclusions! Rule Out the Mimics
Okay, pause! Before you rush out and start dosing your plant based solely on this visual guide, PLEASE take a moment to rule out the more common culprits that can mimic nutrient deficiencies. Many growers (myself included!) have gone down the wrong path by skipping this step. Ask yourself:
- Watering? Stick your finger an inch or two into the soil. Is it soggy wet? Or completely bone dry? Both overwatering (leading to root rot and preventing nutrient uptake) and severe underwatering (causing stress and leaf drop) can result in yellowing and browning. This is frequently the number one issue!
- Light? Is your Alocasia getting scorched by harsh direct sun (causing brown crispy patches or bleaching)? Or is it languishing in a very dark corner, leading to pale, weak growth and the yellowing of lower leaves as it struggles? Most common Alocasias prefer bright, indirect light.
- Pests? Get up close and personal! Carefully inspect the undersides of leaves, stems, and where stems meet leaves. Spider mites (look for fine webbing, tiny moving dots, and a stippled or dusty appearance on leaves), mealybugs (small, white, cottony spots), and thrips (tiny slender insects, often leaving silvery damage and black specks) are unfortunately common Alocasia pests that literally suck the life (and color) out of leaves.
- Natural Aging? It’s perfectly normal for the very oldest, lowest leaf on a healthy Alocasia to gradually yellow, wither, and eventually die off as the plant redirects energy towards new growth. If it’s just one leaf doing this slowly, it’s likely just part of the natural cycle and not a major deficiency concern.
- Fertilizer Burn? If you recently applied fertilizer, perhaps too strong a dose or too frequently, you might see sudden browning tips and edges appearing on multiple leaves (not just the oldest or newest). This indicates too much fertilizer, not too little.
Always check these fundamental care aspects first! It will save you time, money, and the potential stress of misdiagnosing your beloved plant’s needs.
Taking Action: First Steps for Fixing Nutrient Deficiencies in Alocasia
So, you’ve diligently checked for mimics, and you still strongly suspect a nutrient deficiency based on the visual cues and where they appear (old vs. new leaves)? Great! Here’s a sensible, step-by-step approach to start fixing nitrogen phosphorus potassium deficiency alocasia or other suspected nutrient issues:
Step 1: Observe and Tentatively Identify
- Look closely at your Alocasia again using the visual descriptions above. Which symptoms seem to match best? Critically note whether they are predominantly on the older, lower leaves (suggesting mobile nutrients like N, P, K, Mg) or the newest, youngest leaves (suggesting immobile nutrients like Fe, Ca). Make your best-educated guess based on the evidence.
Step 2: Review Your Care Routine
- Think back honestly: When was the last time you fertilized your Alocasia? What kind of fertilizer did you use? Was it a balanced formula? Have you been consistent with your watering schedule? Has the plant been in the same pot and soil for a very long time (say, more than a year or two without repotting)? This background context is vital for diagnosis.
Step 3: Start with a Balanced Feed (If Appropriate)
- If you haven’t fertilized in a while (especially during the main growing season – typically spring and summer) and suspect a general deficiency (like N, P, or K causing older leaf yellowing or slow growth): The safest and often most effective first step is to apply a balanced liquid houseplant fertilizer. Look for one with reasonably equal N-P-K numbers (like 10-10-10 or 20-20-20), and ideally, choose a formula that also includes essential micronutrients.
- Crucially: Dilute it! Start with half or even quarter the strength recommended on the product label, especially if you’re unsure or haven’t fertilized before. You can always apply a slightly stronger dose next time if needed, but over-fertilizing is much harder to correct. Apply the diluted fertilizer to already slightly moist soil (never bone-dry soil, water lightly first if needed).
- Then, be patient. Nutrient deficiencies don’t correct overnight. It can take several weeks, sometimes even a month or more, to see noticeable improvement, and this improvement will primarily be visible in the new growth the plant produces. Old, already damaged leaves usually won’t revert to perfect green.
Step 4: Consider Specific Supplements (Use with Caution!)
- If the symptoms very strongly and clearly point to a specific deficiency that a general balanced fertilizer might not quickly or fully address:
- Magnesium: If you observe that classic interveinal yellowing primarily on older leaves, you could try a very dilute solution of Epsom salts (magnesium sulfate). A common recommendation is about 1 teaspoon dissolved per gallon of water, used once in place of a regular watering or feeding. Monitor subsequent new growth.
- Iron: If you see clear interveinal chlorosis specifically on the new leaves and suspect your water or soil pH might be high (alkaline), using chelated iron might be beneficial. Chelated iron is formulated to remain available to the plant even in less acidic conditions. Follow the product instructions meticulously – these products are often concentrated, and a little goes a long way!
- Word of Caution: I generally recommend starting with a balanced fertilizer approach unless you’re quite confident in identifying a specific micronutrient deficiency. Adding too much of one single nutrient can sometimes lock out others and inadvertently create new imbalances. Always start gently and observe.
Step 5: Check Your Soil & Roots
- If deficiency symptoms persist despite appropriate feeding, or if the plant hasn’t been repotted in ages, the underlying issue might be the soil environment itself. Is the soil old, overly compacted, and likely nutrient-depleted? Does the pot have adequate drainage holes to prevent waterlogging? Gently sliding the plant out of its pot can offer clues – are the roots tightly circling (root-bound)? Do they look white and healthy, or brown and mushy (indicating potential rot)?
- Repotting into fresh, high-quality, well-draining Alocasia potting mix can often resolve persistent issues by providing a renewed nutrient supply and a healthier environment for root function. For stubborn problems possibly related to Iron uptake (new leaf chlorosis), checking the soil pH with a simple home test kit is a more advanced diagnostic step. Most Alocasias prefer slightly acidic conditions (typically pH 5.5-6.5) for optimal nutrient availability.
Prevention is Better Than Cure: Keeping Your Alocasia Nourished
Of course, the easiest way to deal with nutrient deficiencies is to try and prevent them from occurring in the first place! Consistent, thoughtful care goes a long way. Here are some tips for maintaining happy, well-fed Alocasias, applicable whether you have an Alocasia sarian, ‘Polly’, ‘Zebrina’, or other varieties:
- Feed Regularly (But Gently): During the active growing season (usually spring and summer for most climates), feed your Alocasia roughly every 2-4 weeks. Use a balanced liquid fertilizer, always diluted to half strength or even less, to avoid burning the roots. Reduce or stop feeding entirely during the fall and winter months when the plant’s growth naturally slows down.
- Use Quality Potting Mix: Start with or repot into a chunky, airy, well-draining mix specifically designed for Aroids or tropical plants. These mixes often contain ingredients like peat moss or coco coir, perlite, orchid bark, and perhaps horticultural charcoal to ensure good aeration and drainage while retaining some moisture. Healthy soil structure supports healthy roots, which are crucial for absorbing nutrients effectively.
- Water Wisely: Master the watering routine. Water thoroughly when the top inch or two of the soil feels dry to the touch. Allow excess water to drain away completely from the bottom drainage holes. Crucially, avoid letting the pot sit in a saucer full of water, as this leads to oxygen deprivation, root rot, and seriously hinders nutrient uptake.
- Provide Bright, Indirect Light: Ensure your Alocasia receives adequate light. Sufficient bright, indirect light is essential for photosynthesis – the process where the plant actually uses nutrients, water, and CO2 to create its energy. Find that ‘sweet spot’ near a window but shielded from harsh, direct afternoon sun.
- Flush Occasionally: Every few months or so, consider giving your plant a good flush. Take it to a sink or tub and water it thoroughly, letting a generous amount of water run through the potting mix and out the drainage holes. This simple practice helps to wash out any accumulated fertilizer salts that can build up over time and potentially harm sensitive roots or interfere with water and nutrient absorption. Remember that individual plants and environments can vary slightly, so observe your plant’s specific needs.
Conclusion: Happy Alocasia, Happy Plant Parent!
Whew! That was a deep dive into the world of Alocasia nutrition, but hopefully, you now feel more empowered to ‘listen’ to what your Alocasia’s leaves might be trying to tell you. Learning to spot the visual signs of potential nutrient deficiencies, and importantly, distinguishing them from other common care issues, is a fantastic skill for any dedicated plant parent.
Remember the key takeaways: observe carefully, pay attention to whether symptoms appear on old or new leaves, always consider the mimics (watering, light, pests) first, and if you do suspect a nutrient issue, start with gentle, balanced solutions. Patience is truly a virtue in plant care – recovery and new, healthy growth take time.
The reward for your careful observation and thoughtful care? Watching your ‘jewel’ Alocasia unfurl stunning, healthy, vibrant new leaves is one of the great joys and satisfactions of nurturing these tropical beauties. Keep observing, keep learning, and thoroughly enjoy the process!
Do you have any personal experiences spotting or successfully treating nutrient deficiencies in your own Alocasias? Feel free to share your insights or ask questions in the comments below – the Alocasia community thrives on shared knowledge!