Hey there, fellow Alocasia enthusiasts! We all adore these stunning plants with their dramatic foliage, but let’s be honest – they can be a little bit picky sometimes, right? If you’ve ever battled yellowing leaves or the dreaded mushy stems, you know that keeping an Alocasia happy often comes down to what’s happening beneath the surface. Getting the soil right is absolutely crucial.
The wrong potting mix can spell disaster, often leading to root rot, one of the most common reasons Alocasias falter. But don’t despair! There’s a fantastic, plant-friendly, and sustainable ingredient that can make a world of difference: coco coir.
Ready to unlock the secret to happier Alocasia roots? Let’s dive into why coco coir is such a game-changer for your Alocasia soil mix and walk through the surprisingly easy steps to prepare it. We’ll turn that dense, hard brick into fluffy, root-loving goodness for your precious plants!
Jump to Sections
ToggleWhat is Coco Coir, Anyway? (And Why Your Alocasia Will Thank You!)
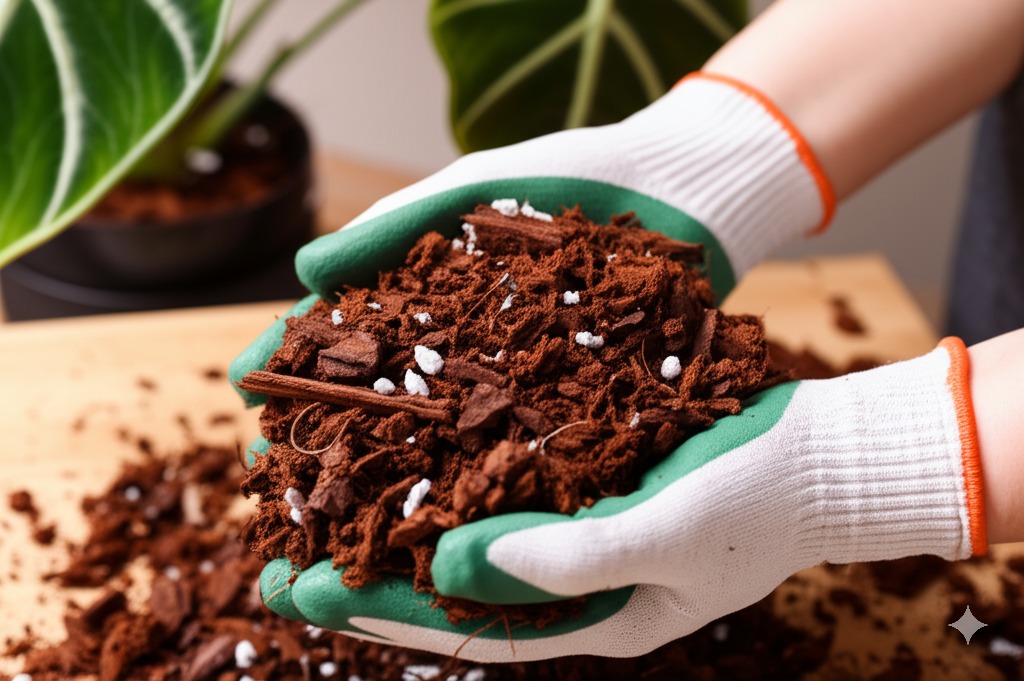
So, what exactly is this stuff many plant parents are raving about? Simply put, coco coir (pronounced ‘koy-er’) is made from the fibrous husks of coconuts – the part between the hard inner shell and the outer coating. Think of it as a brilliant way nature helps us recycle! Instead of being waste, this byproduct of the coconut industry becomes gardening gold.
But why is it so good, especially for our sometimes-fussy Alocasias? Let’s break down the key benefits based on widely observed results:
The Amazing Benefits of Coco Coir for Alocasia Roots
- Benefit 1: Superb Aeration & Drainage: This is perhaps the BIGGEST win for Alocasias. These plants notoriously hate having their roots sit in waterlogged soil – often called ‘wet feet,’ it’s a fast track to root rot. Coco coir’s naturally stringy, fibrous texture creates loads of tiny air pockets throughout the mix. This excellent coco coir aeration allows excess water to drain away freely, helping those sensitive roots breathe and stay healthy. Think of it as giving your Alocasia’s roots room to wiggle and access vital oxygen! Reliable coco coir drainage is non-negotiable for these plants.
- Benefit 2: Excellent Water Retention (Without the Sog!): Now, this might sound contradictory to drainage, but here’s the clever part: while coco coir lets excess water escape efficiently, its fibers also act like tiny sponges, holding onto moisture and releasing it gradually to the roots as needed. Many users find this means the soil stays consistently damp (which Alocasias appreciate) for longer periods, potentially reducing watering frequency, but crucially, without becoming a dense, swampy mess. It offers beneficial coco coir water retention without the risk of suffocation.
- Benefit 3: Generally Ideal pH: Most Alocasias thrive in a slightly acidic to neutral soil pH, typically in the 5.5 to 6.8 range according to horticultural resources. Coco coir naturally falls within this sweet spot most of the time, providing a comfortable foundation for your plant’s roots often without needing extra pH adjustments.
- Benefit 4: Less Inviting to Pests: Because it drains well and doesn’t decompose as quickly as some other organic materials like peat moss, coco coir is generally observed to be less attractive to common soil pests like those annoying fungus gnats. It also offers a less hospitable environment for certain fungal diseases that thrive in overly wet conditions.
- Benefit 5: Easy to Re-Wet: Ever had a bag of traditional potting soil dry out completely and then struggle to get it to absorb water again? Some mediums, like peat moss, can become hydrophobic (water-repellent) when bone dry. Coco coir typically doesn’t have this issue. Even if it dries out significantly, it usually rehydrates readily, soaking up water easily when you next water it.
Coco Coir vs. Peat Moss: Why Consider Making the Switch?
You’ve likely seen peat moss listed as a primary ingredient in countless potting mixes; it’s been a horticultural staple for decades. However, there are compelling reasons, both practical and environmental, why using coco coir instead of peat moss is a switch many thoughtful houseplant parents are making.
The Sustainable Choice
This is a significant factor for many. Standard horticultural practice recognizes that peat moss is harvested from peat bogs – unique, vital ecosystems that take thousands of years to form. Harvesting them releases stored carbon dioxide into the atmosphere and destroys sensitive wildlife habitats. Coco coir, conversely, is a byproduct of the existing global coconut harvest. Using it makes productive use of a resource that might otherwise be discarded. Choosing coir is therefore widely considered a much more sustainable potting mix option. It’s a greener choice that benefits your plants and the planet.
Practical Perks
Beyond the important environmental considerations, coco coir offers functional advantages too:
- Effortless Wetting: As highlighted before, say goodbye to battling hydrophobic soil! Coir accepts water easily.
- Lasting Structure: Peat moss can compact over time in pots, reducing vital air space around roots. Coco coir tends to maintain its airy structure for longer, according to many growers.
- pH Advantage: While peat is naturally quite acidic (often requiring additions like lime to suit many plants), coir’s more neutral pH is often a better starting point for Alocasias, simplifying your mix preparation.
Get Ready to Hydrate! Preparing Your Coco Coir Block Step-by-Step
Okay, time for the fun part – let’s transform that dense brick! Preparing coco coir block for potting mix is much simpler than it looks and quite rewarding. It’s a standard process many plant lovers enjoy. Here’s your step-by-step guide:
Gather Your Supplies
First, assemble your gear:
- Your compressed coco coir block or brick.
- A large waterproof container, tub, or bucket. Remember, it expands significantly (5-7 times its dry volume is common!), so choose something generously sized. A large storage tote or even a clean wheelbarrow works wonders.
- Warm water (it helps hydrate faster than cold water).
- Optional but recommended: Gardening gloves, a sturdy garden trowel or small spade, and a large colander, mesh sieve, or a clean nursery pot with plenty of drainage holes for the rinsing step.
Step 1: Place the Block in Your Container
Simply place the dry coco coir brick inside your large container. Ensure there’s ample space around it for the expansion.
Step 2: Add Warm Water Gradually
Begin adding warm water. How much? The packaging usually provides a guideline (e.g., a common 650g brick might need around 1 gallon / 4-5 liters), but it’s best to add it gradually rather than all at once. Pour water over the brick and watch the magic happen as it starts to absorb and swell. This is the hydrating coco coir brick process unfolding!
Step 3: Wait, Break Apart, and Fluff
Let the brick sit and soak for about 15-30 minutes (or follow specific package instructions). It will soften considerably as it absorbs the water. Now, using your gloved hands or a trowel, start breaking the coir apart. Work through the entire mass, crumbling any large chunks and mixing it thoroughly. If you encounter dry patches, add a little more warm water. Continue until all the coir is uniformly damp, loose, and fluffy, with no hard, dry clumps remaining.
Step 4: The All-Important Rinse! (Don’t Skip This for Happy Roots)
This step is crucial for the long-term health of your Alocasias. Why is washing coco coir before use so vital? It’s generally accepted that coco coir, particularly some less expensive varieties, can retain natural salts from the coconut processing (often done near coasts). If not rinsed away, these salts can accumulate in the pot, potentially burning sensitive Alocasia roots and interfering with nutrient uptake over time. So, the answer to do I need to rinse coco coir? is yes – it’s a highly recommended preventative measure based on best practices.
Here’s an effective way to rinse:
- Place the hydrated, fluffed coir into a container with excellent drainage – a large nursery pot with lots of holes works well, or use a large colander (you may need to rinse in batches depending on size).
- Put this container under a tap or use a hose outside, and run plenty of fresh water through the coco coir, allowing it to drain freely. Gently stir or agitate the coir as you rinse.
- Repeat this flushing process two or three times. You’ll likely notice the water draining out is quite brown initially (like weak tea). Keep rinsing until the water running out becomes significantly clearer. This indicates excess salts have likely been flushed away.
A Quick Note on Buffering: You might sometimes hear about ‘buffering’ coco coir, which involves soaking it in a Calcium and Magnesium (Cal-Mag) solution. This is generally a more advanced step addressing the coir’s natural tendency to bind these specific nutrients initially. However, for most home gardeners using coir as part of a mixed potting soil, a thorough rinsing to remove excess salts is the most critical preparation step recommended by many experienced growers. High-quality coir brands are often pre-washed or buffered, reducing this concern, but rinsing provides extra peace of mind.
Step 5: Squeeze Out the Excess Water
You’re almost ready to mix! Your coir is now hydrated and rinsed, but it’s probably holding quite a bit of water. Before incorporating it into your final potting mix, you want it to be evenly damp, not soaking wet. Grab handfuls of the rinsed coir and gently squeeze out the excess water. The goal is a consistency similar to a well-wrung-out sponge – it should feel moist to the touch but shouldn’t be dripping water when you release your grip.
Putting It All Together: Using Coco Coir in Your Alocasia Soil Mix
Now that you have beautifully prepped coco coir, how do you best use it for your demanding Alocasias? Heed this golden rule based on collective growing experience:
Crucial Tip: Never Use 100% Coco Coir for Alocasias!
Yes, we just celebrated its benefits, but using it straight from the bag (or after hydrating) is a common mistake that can lead to trouble. (So, Can you plant Alocasia in just coco coir? For sustained health, it’s definitely not recommended!) While coir drains better than dense soil, used alone in a pot, it can still retain too much moisture right around the crown and roots without sufficient air pockets. Alocasias absolutely require a chunkier, airier mix to thrive and avoid root rot.
Think Chunky! Aim for Excellent Aeration
The secret to a successful Alocasia soil mix featuring coco coir lies in combining it with other materials that significantly boost drainage and create lasting air spaces. Your objective is a substrate that water flows through readily, moistening the components but never becoming waterlogged or compacted mud.
- Your Go-To Amendments: Perlite (those lightweight white volcanic rocks), Pumice (similar function, slightly heavier), fine-to-medium grade Orchid Bark, and horticultural Charcoal are all excellent partners commonly used to mix with prepared coco coir. They create the structure and air pockets Alocasias love.
A Simple Starting Recipe for Happy Alocasias
Searching for the best soil for alocasia? While the absolute “best” can depend slightly on your specific plant and environment, here’s a fantastic, easy-to-make starting alocasia potting mix recipe widely used with success. It leverages the benefits of coco coir while ensuring that essential chunkiness:
- Approx. 2 parts Prepared Coco Coir (Your fluffy, rinsed, squeezed coir)
- Approx. 2 parts Perlite (or Pumice, or a 50/50 blend)
- Approx. 1 part Fine or Medium Orchid Bark
- Optional Add-ins: Consider adding a small amount (roughly 5-10% of the total mix volume) of horticultural charcoal (believed to improve drainage and potentially adsorb impurities) and/or worm castings (adds beneficial microbes and slow-release nutrients).
Mixing Instructions: Simply combine all your chosen ingredients in a clean tub or on a tarp. Mix them thoroughly with your hands (gloves recommended!) until everything is evenly distributed.
Remember: This recipe is a great foundation! Feel free to adjust the ratios slightly based on your observations and home conditions. For instance, if you live in a very humid climate, you might increase the proportion of bark or perlite for even faster drainage. If your home is exceptionally dry, this mix might be perfect as is. Pay attention to how quickly the mix dries between waterings for your specific Alocasia – learning your plant’s needs is part of the fun!
Remember to Fertilize!
This is non-negotiable for success with coir-based mixes. Do you need to add nutrients to coco coir? Yes, absolutely. It’s a fundamental principle that coco coir provides an excellent physical structure and moisture management but contains very few inherent nutrients plants need for robust growth. To keep your Alocasia pushing out those magnificent leaves and staying healthy, you must provide nutrients regularly. Use a balanced liquid houseplant fertilizer, diluted according to the product label, roughly every 2-4 weeks during the active growing season (typically spring through summer). Reduce frequency or pause fertilizing during the slower growth period of fall and winter, as is standard practice.
Conclusion
So there you have it – the essential guide to using coco coir for your Alocasias! It truly is a stellar component for crafting a superior soil mix. By providing that critical balance of aeration, drainage, and moisture retention, it directly addresses the factors that help prevent common Alocasia issues like devastating root rot. Plus, choosing coco coir is a sustainable decision you can feel great about.
Preparing it from a compressed block might seem like an extra step initially, but as you’ve seen, it’s a straightforward process that yields perfectly prepped material. Don’t hesitate to mix your own Alocasia soil – taking control of the substrate empowers you to create the ideal environment for these captivating jungle jewels to truly flourish.
Give coco coir a place in your next repotting project. Following these steps, your Alocasia’s roots (and likely its stunning leaves too!) will likely thank you for it.
Happy Alocasia parenting!