Hello fellow plant lovers! Are you gazing at your stunning Alocasia, maybe a ‘Polly’ with its dramatic leaves or a velvety ‘Black Velvet’, and thinking, “I wish I had more of these beauties”? Or perhaps your favourite plant is starting to look a little crowded in its pot, with little babies popping up around the base? Well, you’re in luck! Dividing your Alocasia is a fantastic way to multiply your collection, keep your parent plant healthy, and it’s genuinely easier than you might think.
I know the idea of taking a knife to your precious plant can seem daunting, especially if you’re newer to the world of these ‘jewel’ Alocasias. But trust me, with a little guidance and patience, you absolutely can do this. This guide is here to walk you through the entire process, step-by-step, in simple terms. We’ll cover everything from figuring out the perfect time to make the split, to gathering your tools, the actual division process, and that crucial aftercare. Ready to turn one Alocasia into two, three, or even more? Let’s dive in!
Jump to Sections
ToggleWhy Bother Dividing Your Alocasia? More Than Just Free Plants!
Okay, the most exciting reason is pretty obvious, right? More plants! But there are other great reasons to consider dividing your Alocasia periodically.
The Joy of Multiplication: Expanding Your Collection for Free
This is the big one! Instead of buying new plants, division lets you propagate your existing favourites. Sharing these new plant babies with friends is also incredibly rewarding. Imagine gifting a homegrown Alocasia ‘Zebrina!
Healthy Parent, Happy Plant: Benefits of Decongesting
When Alocasias produce pups, their pot can get crowded quickly. All those plants compete for water, nutrients, and light. Dividing gives everyone some breathing room, allowing the parent plant to focus its energy and potentially grow even stronger. Better airflow around the base also helps prevent fungal issues.
Perfect Timing: Combining Division with Repotting
If you notice your Alocasia is root-bound (roots circling the bottom or poking out the drainage holes) and needs repotting anyway, it’s the perfect opportunity to check for pups and perform a division at the same time. Two birds, one stone!
Spotting the Right Moment: When to Separate Alocasia Pups
Timing can make a real difference in how smoothly the division and recovery process goes. Get it right, and your plants will barely skip a beat.
Catch the Growing Wave: Best Season for Division
The ideal time for dividing alocasia plants is during their active growing season – typically Spring and Summer in most UK/US climates. During this time, the plant has plenty of energy to heal from the separation and establish new roots. Avoid dividing during late Autumn or Winter when the plant is naturally slowing down or dormant; recovery will be much slower and riskier.
Reading the Signs: Is Your Alocasia Ready?
Look for these clues:
- Visible Pups: The most obvious sign! You’ll see smaller versions of the main plant (pups or offsets) emerging from the soil near the base.
- Pot Condition: While being pot-bound is a good opportunity to divide, your Alocasia doesn’t need to be bursting out of its pot. If mature pups are present, you can divide even if repotting isn’t strictly necessary yet.
Size Matters: How Big Should Pups Be Before Separating?
This is a key question when considering when to separate alocasia pups. Resist the temptation to separate tiny, new sprouts. For the best chance of success, wait until a pup has developed at least 2-3 of its own leaves and looks like a sturdy, miniature version of the parent. At this stage, it has likely started developing its own independent root system, which is crucial for survival after separation. Aim for pups roughly 1/4 to 1/3 the size of the mother plant. Separating them too early makes them much more vulnerable to shock and failure.
Gearing Up: Your Essential Alocasia Division Toolkit
A little preparation goes a long way! Having everything ready before you start makes the process much less stressful for both you and your plant.
Must-Have Tools and Supplies (Checklist)
- Clean Cutting Tool: A sharp knife, sterilised scissors, or clean secateurs. Crucially, sterilise your tool with rubbing alcohol or a diluted bleach solution (rinse well after bleach!) before you start and ideally between cuts on different sections. This prevents spreading potential diseases – think of it like minor surgery for your plant!
- New Pots: Choose pots with good drainage holes for your new divisions. Select a size that’s just slightly larger than the root ball of each pup – don’t put a tiny pup in a huge pot, as this can lead to overwatering issues. You might also need a fresh pot for the parent plant if it’s being repotted.
- Gloves: Highly recommended! Alocasia sap contains calcium oxalate crystals that can irritate your skin.
- Rubbing Alcohol: For sterilising your cutting tools.
- Workspace Cover: Newspaper, a plastic tarp, or an old baking tray to catch soil and keep your area tidy.
- Watering Can: For the gentle first watering.
The Foundation: Choosing the Best Potting Mix
Alocasias hate sitting in soggy soil, especially after the stress of division. You need a chunky, airy, well-draining mix. You can often buy pre-made ‘Aroid Mixes’, or create your own using components readily available like:
- Peat moss or Coco coir (as the base)
- Perlite (for aeration)
- Orchid bark (for chunkiness and drainage)
- A bit of horticultural charcoal (optional, helps with ‘sweetness’ and drainage)
Avoid using heavy standard potting compost or garden soil on its own – it holds too much moisture.
The Main Event: Your Step-by-Step Guide to Dividing Alocasia Plants
Okay, deep breath! You’ve got your tools, your mix, and your plant is ready. Remember those clean tools! Let’s get started.
Step 1: Gently Unpotting the Mother Plant
Carefully tip the pot on its side and gently slide the entire plant out, supporting the base of the stems. If it’s stuck, try gently squeezing the plastic pot or running your (clean!) knife around the inside edge to loosen it. Avoid yanking the plant out by its stems.
Step 2: Reveal the Roots – Loosening the Soil
Place the root ball on your covered workspace. Gently start teasing away the old soil from the roots with your fingers or a blunt tool like a chopstick. Your goal is to get a clearer view of the root system, where the pups are attached, and identify any corms without ripping too many roots.
Step 3: Identify Your Targets – Pups and Corms
Now you can clearly see what you’re working with. Look for the pups you identified earlier – follow their stems down to see where they connect to the parent rhizome and check for their own roots. You might also find small, hard, brownish ‘bulbs’ in the soil or attached near the base – these are Alocasia corms, little nuggets of potential new plants!
Step 4: Making the Cut – How to Separate Alocasia Pups Cleanly
This is the moment! For pups that have their own substantial root system, you might be able to gently tease them apart from the parent plant by hand. If they are connected by a thicker piece of rhizome (the fleshy underground stem), you’ll need to make a cut. Use your sterilised knife or shears to make a clean cut through the connecting rhizome, ensuring the pup retains as many of its own roots as possible. Try to be precise and avoid crushing tissue.
Step 5: Treasure Hunt! Dealing with Alocasia Corms
Don’t discard those little corms! Gently detach any firm, healthy-looking corms you find. They often pop off quite easily. Discard any that feel soft or mushy. We’ll pot these up separately – they need a bit more patience but can definitely grow into new plants.
Step 6: New Homes – Repotting Everyone
Almost there! Now it’s time to give everyone their own pot.
- Parent Plant: Inspect the parent’s roots. Trim off any dead, mushy, or badly circling roots with your clean tool. Repot it back into its original pot (if size is still okay) or one size up, using your fresh, well-draining potting mix. Plant it at the same depth it was previously growing.
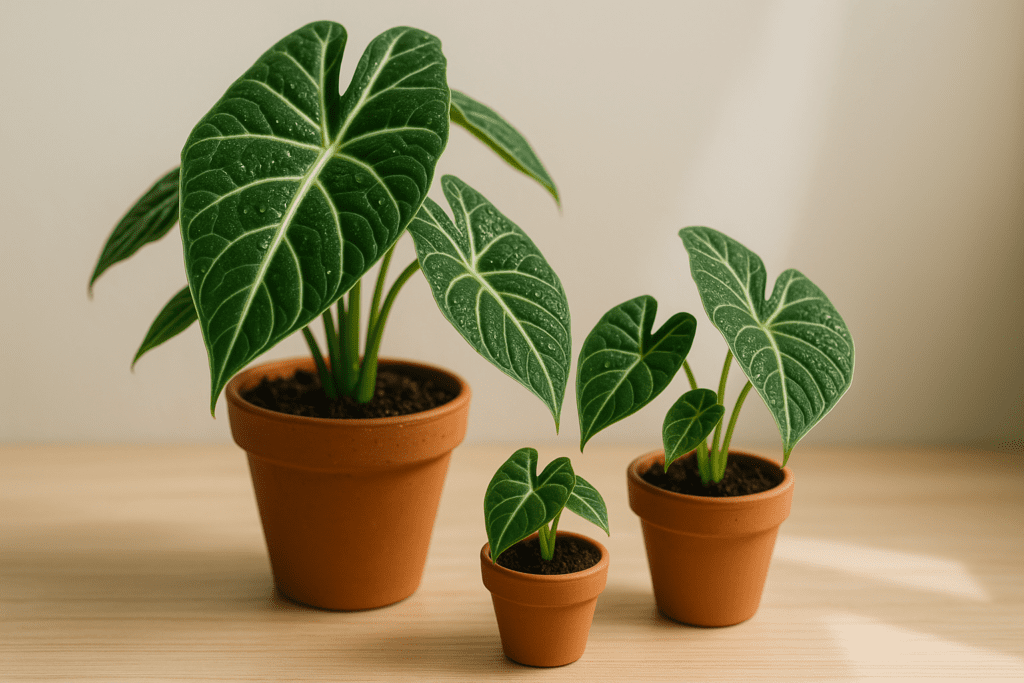
- Pups/Divisions: Pot each pup (with its roots) into its own individual pot. Remember, choose a pot size that just comfortably accommodates the roots with a little room to grow. Don’t overpot! Use the fresh potting mix and plant them at the same depth they were growing next to the parent. This step is the same whether you are repotting and dividing large alocasia or smaller ones; the scale is just different.
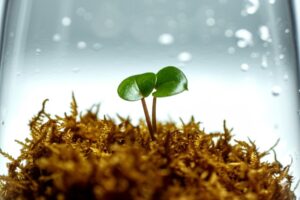
- (Corms): Pot the corms individually in small pots filled with moist potting mix or sphagnum moss. Plant them just below the surface, maybe half an inch deep. If you can tell which end is pointy, that usually goes up. Keep these pots warm and consistently humid (a plastic bag or cloche can help).
Tender Loving Care: Post-Division Alocasia Care Tips
The work isn’t quite over yet! Giving your newly separated Alocasias the right care immediately after division is crucial for helping them recover from the stress and settle into their new homes.
Creating a Recovery Haven: Light and Humidity
- Light: Place both the parent plant and the new divisions in a spot with plenty of bright, indirect light. Direct sunlight will scorch the leaves and add unnecessary stress.
- Humidity: Alocasias thrive in humidity, and it’s extra important during recovery. If your home environment is dry (especially with central heating/air con), boost humidity around the plants. You can group them together, place them on pebble trays filled with water (don’t let the pot sit in water), or use a small humidifier nearby. This is also vital for encouraging corms to sprout.
Watering Wisdom: Quenching Thirst Without Drowning
After potting, give everyone a light watering – just enough to settle the soil around the roots. Then, be cautious. Allow the top inch or so of the potting mix to dry out before watering again. Overwatering is a major risk for newly divided plants with disturbed root systems, leading quickly to root rot. When in doubt, wait another day.
Hold the Fertiliser! Feeding Newly Divided Plants
Resist the urge to fertilise your new divisions right away! Their roots are recovering and vulnerable to fertiliser burn. Wait at least 4-6 weeks, or until you see clear signs of active new growth (like a new leaf unfurling). Then, you can start with a diluted balanced liquid fertiliser, following the product instructions.
Patience, Young Plant Parent: What to Expect
It’s normal for newly divided Alocasias (and the parent) to show some signs of stress, often called transplant shock. Don’t panic if you see a bit of wilting or if growth seems slow initially. Give them consistent care, maintain that humidity, and be patient. They usually bounce back within a couple of weeks. Corms are the real test of patience – they can take anywhere from a few weeks to several months to sprout, depending on conditions. Keep them warm and moist, and eventually, you should see a tiny shoot emerge!
Uh Oh! Troubleshooting Common Alocasia Division Worries
Even with the best care, you might hit a snag. Here are a few common concerns and how to handle them:
Help! My Divided Alocasia Looks Droopy (Transplant Shock)
This is probably the most common sight after division. The plant is just adjusting. Ensure it’s not in direct sun, keep the humidity high, and check the soil moisture – it should be lightly moist, not waterlogged or bone dry. Usually, the plant perks up within a week or two as its roots settle. Avoid fussing with it too much.
Why Are Leaves Turning Yellow After Dividing?
A yellowing leaf or two can also be part of transplant shock as the plant conserves energy. It can also signal a watering issue – either too much or too little. Double-check your watering routine: is the soil constantly wet, or are you letting it dry out completely for too long? Gently feel the soil moisture. It’s also natural for the oldest leaf (often the smallest, lowest one) to yellow and die off as the plant redirects energy. You can snip off fully yellow or brown leaves.
How Long Until My New Alocasia Pups Take Off?
Once the initial shock wears off (a week or two), you should start to see signs of settling. New root growth happens beneath the soil first. Visible new leaf growth might take a few weeks to a month or more, depending on the pup’s size, health, and the growing conditions (light, warmth, humidity). Be patient!
Tackling the Giant: Tips for Dividing Large Alocasia Plants
Dealing with repotting and dividing large alocasia specimens presents a few extra challenges, mainly due to size and weight.
- Plan Ahead: Get help if needed! A large Alocasia root ball can be heavy and awkward.
- More Roots, More Tangles: Expect a more extensive and potentially tangled root system. Take your time gently teasing it apart. You might need to use a sturdy, clean knife or even a small saw for very thick rhizome connections.
- Root Pruning the Parent: When repotting a large parent plant after division, don’t be afraid to prune some of the older, thicker, circling roots to encourage fresh growth and manage its size. Make clean cuts.
- Sturdy Support: Ensure the repotted parent plant is stable in its new pot. You might need stakes temporarily if it’s top-heavy after root disturbance.
You Did It! Enjoy Your Growing Alocasia Family
Congratulations! You’ve successfully navigated the process of dividing alocasia plants. Taking that step might have felt a bit nerve-wracking, but look at you now – you’ve multiplied your gorgeous Alocasia collection and given your parent plant a healthy refresh. I remember feeling nervous the first time I divided an Alocasia, but following these steps carefully really helps build confidence!
Pat yourself on the back, find the perfect spots for your new plant babies, and enjoy watching them grow. There’s something truly special about nurturing plants you’ve propagated yourself. Happy Alocasia parenting!