Jump to Sections
ToggleHey Plant Friends! Ready to Multiply Your Alocasia Treasures?
Hey there, fellow Alocasia enthusiasts! Alex here. Isn’t it just the best feeling when you’re repotting one of your gorgeous Alocasias – maybe a stunning ‘Black Velvet’ or a classic ‘Polly’ – and you stumble upon those little hidden treasures in the soil? I’m talking about Alocasia corms! Often mistaken for pebbles or little bulbs, these tiny nuggets hold the potential for whole new plants.
If you’ve ever wondered what to do with those little guys, you’re in the right place! Propagating Alocasias from corms is surprisingly straightforward and incredibly rewarding. It’s like getting bonus plants just for taking good care of the parent! This guide will walk you through the alocasia propagation corms process, step-by-step. Trust me, it’s easier than you might think, and soon you could have a whole family of your favorite ‘jewel’ Alocasias growing. Let’s dig in!
First Things First: What Exactly Are Alocasia Corms?
Okay, let’s clear something up. You might hear people call them Alocasia ‘bulbs’, and they do look similar, but technically, they’re corms. Think of it this way: a true bulb (like an onion) has fleshy layers which are modified leaves. A corm, however, is actually a swollen, underground stem that stores energy for the plant. Both help the plant survive and multiply, but they’re structurally different. For our purposes, just know they’re the little powerhouses we’re looking for!
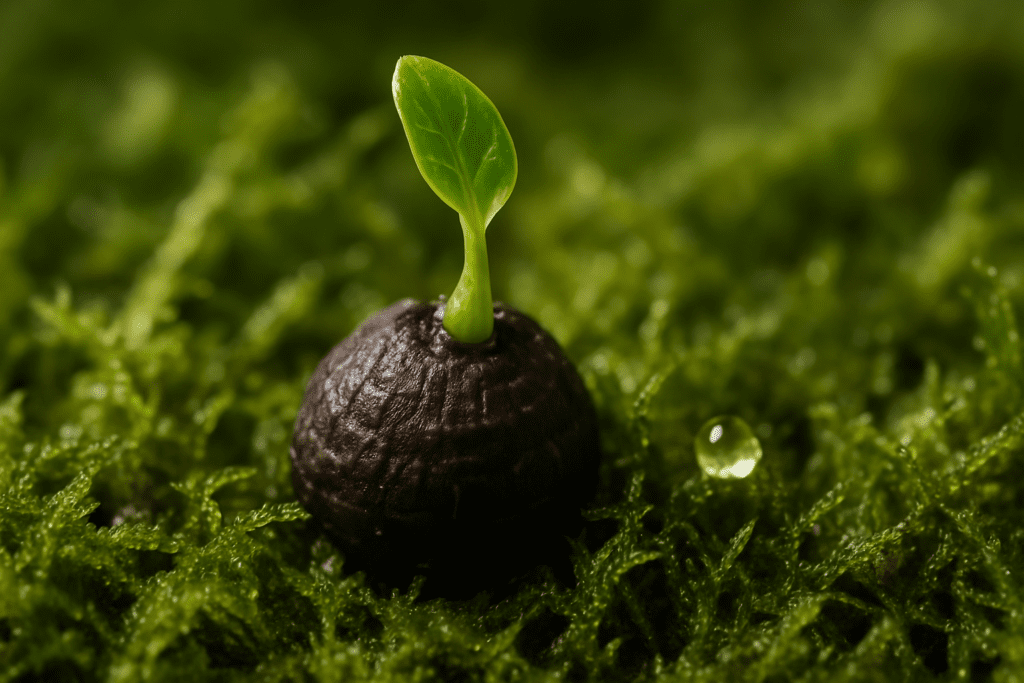
So, what do they look like? Alocasia corms are usually small, ranging from the size of a pea to a small grape, though sometimes you find bigger ones. They’re typically dark brown and should feel quite firm to the touch – that firmness is a good sign they’re healthy and viable! They can easily hide amongst soil clumps, perlite, or even slow-release fertilizer balls, so give the soil a gentle sift during repotting. You’ll often find them attached to the main root system or nestled near the base of the mother plant. Gently detach them if they don’t come loose easily. If a corm feels mushy or hollow, it’s likely not viable, so focus on the firm ones.
Gearing Up: Your Alocasia Corm Propagation Toolkit
Ready to play plant parent? Here’s what you’ll need to gather for successful alocasia corm propagation:
- Small Containers: Think small nursery pots (2-4 inches with drainage holes – very important!) if you’re using a solid medium, or clear small jars, shot glasses, or even condiment cups if you’re trying the water method. Clear containers are great for watching root growth in water!
- Your Chosen Growing Medium: We’ll dive into options right after this list, but have your sphagnum moss, perlite, light potting mix, or just plain water ready.
- Humidity Haven: A clear plastic storage bin with a lid, a Ziploc bag, clear plastic wrap to cover a pot, or a dedicated plant cloche (humidity dome). This is super important!
- Labels & Marker: Trust me on this one. Label your containers with the Alocasia variety (if you know it) and the date you started. It helps track progress, especially if you’re doing multiple corms.
- (Optional but helpful):
- Heat Mat: Especially useful if your home is on the cooler side. Consistent warmth can really speed things up.
- Rooting Hormone: Some growers use it, some don’t. Its effectiveness on corms is debated, but it generally doesn’t hurt to try a little dusting if you have some.
Choosing Your Sprouting Medium: Water, Moss, Perlite, or Soil?
Now that you have your supplies, let’s talk about the alocasia corm sprouting medium. You’ve got options! There’s no single “best” way, as different growers find success with different methods. Here’s a quick rundown:
- Sphagnum Moss: A very popular choice. It holds moisture well but stays airy, reducing rot risk if not kept soaking wet.
- Perlite: Just perlite! Offers fantastic aeration. You’ll need to keep a closer eye on moisture levels as it dries out faster. Can be mixed with moss too.
- Water: Simple and lets you see roots develop easily. Requires regular water changes, though.
- Light Aroid Potting Mix: A very chunky, well-draining mix (like you’d use for the adult plant, maybe with extra perlite) can work. The main advantage is an easy transition later, but be extra careful not to overwater as small corms can rot easily in dense, wet soil.
Think about what works best for your plant care style and environment. Many folks, myself included, like to experiment with a few corms in different mediums to see what works best for them!
Prep School: Getting Your Alocasia Corms Ready
Once you’ve rescued your corms during repotting, there’s just a tiny bit of prep work:
- Gentle Cleaning: Rinse off any clinging soil or old roots under lukewarm water. Be gentle – no need to scrub hard.
- To Peel or Not to Peel? The Husk Question
- This is a common question in the Alocasia world! Some growers swear by carefully peeling off the dark brown, papery outer husk. The idea is that it might expose the growing point more directly to moisture and potentially speed up sprouting.
- However, there’s a risk: if you’re not careful, you could damage the delicate corm or the tiny growth point hidden underneath.
- My advice? If you’re a beginner, maybe start by leaving the husk on. It’s the safer bet. Many corms sprout perfectly fine with their ‘jacket’ on. If you feel adventurous later, you can try peeling one carefully with your fingernail or tweezers on a less precious corm. Honestly, I’ve had success both ways!
- (Optional Soak): Some people like to soak their corms for about 30-60 minutes in room temperature water before planting. It’s not essential, but it doesn’t hurt if you want to give it a try.
Let’s Get Sprouting! Step-by-Step Propagation Methods
Alright, this is where the magic happens! Whichever method you choose below, remember the two golden rules for success: consistent warmth and high humidity. These are non-negotiable for waking up those sleepy corms.
Method 1: Sprouting Alocasia Corms in Water (The Clear View)
This method is great if you love watching progress. You’re essentially sprouting alocasia bulbs in water (well, corms!).
- Container & Water: Choose a small, clear container (like a shot glass). Add enough clean, room-temperature water (tap water left out overnight is fine) so that the bottom third or half of the corm is submerged. Don’t drown it completely! Some people create a little ‘nest’ with plastic wrap over the cup rim, poke a hole, and suspend the corm so only the very base touches the water – this works great too.
- Location: Place the container in a warm spot. Bright, indirect light isn’t crucial until you see green growth, but warmth is key from the start.
- Water Changes: This is important! Change the water regularly, ideally every 2-3 days. Fresh water prevents stagnation and potential rot.
- Observe: Keep an eye out for tiny white roots emerging from the base or a small pointed shoot starting to peek out.
- Pros & Cons Recap: Pros: Easy to see root development. Minimal supplies. Cons: Higher potential for rot if water isn’t changed frequently. Corms might experience more transplant shock when moved to soil later.
Method 2: How to Plant Alocasia Corms in a Medium (The Cozy Start)
This is a very popular method using moss, perlite, or a light soil mix. Here’s how to plant alocasia corms this way:
- Prepare Medium: Moisten your chosen medium (sphagnum moss, perlite, or a mix). If using moss, it should be damp like a wrung-out sponge, not dripping wet. If using perlite, just moisten it lightly. For soil mix, ensure it’s barely damp. Using the best soil for alocasia corms principle means focusing on excellent drainage.
- Potting Up: Fill a small pot (with those crucial drainage holes!) or container with your prepared medium. Make a small indent and place the corm inside. Try to position it with the slightly more pointed end facing up (if you can tell which end that is!). If you’re unsure, just lay it on its side – it’ll figure things out! The top of the corm should be just below or level with the surface of the medium.
- Humidity Dome: Cover the pot or container with clear plastic wrap, a Ziploc bag, or place it inside a clear plastic bin with a lid. This creates the essential high alocasia corm humidity.
- Location & Care: Place it in a warm spot (a heat mat underneath is fantastic here!). Check the medium’s moisture every few days – don’t let it dry out completely, but also don’t let it get waterlogged. Mist lightly only if the top feels dry.
- Ventilation: After a few days, poke a couple of small holes in the plastic wrap/bag or briefly open the lid of your prop box daily for a little air exchange. This helps prevent mold growth.
- Pros & Cons Recap: Pros: Often leads to faster leaf development. Less transplant shock when ready for a bigger pot. Medium provides stability. Cons: Harder to see initial root growth. Risk of the medium drying out unnoticed or staying too wet. Requires vigilance with airflow.
The Non-Negotiables: Warmth and Humidity
I know I sound like a broken record, but I can’t stress this enough! Alocasia corms need cozy conditions to wake up.
- Warmth: Aim for a consistent temperature, ideally in the 70-80°F (21-27°C) range. Avoid drafty windowsills. A heat mat designed for seedlings is a worthwhile investment if you plan on propagating often, as it provides that gentle, consistent bottom heat they love.
- Humidity: Think tropical rainforest! That plastic cover or prop box is creating a mini-greenhouse effect, keeping humidity levels high (aim for 80%+). This prevents the tiny corm from drying out before it can sprout.
Patience, Grasshopper: What to Expect During Sprouting
Now comes the hardest part: waiting! Knowing how long for alocasia corms to sprout can be tricky because it varies wildly. Some might show signs of life in just 2-3 weeks, while others might take 2-3 months (or even longer!). It really depends on the corm’s health, the specific Alocasia variety, and how consistent your conditions are.
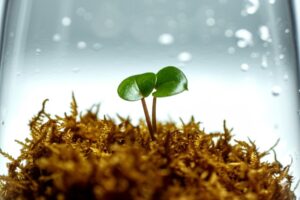
Don’t get discouraged if nothing happens for a while! Keep the conditions stable (warm and humid) and resist the urge to constantly poke or dig it up! Look for the positive signs: tiny white or pinkish root nubbins emerging, or a small, pointed green or pale shoot pushing through the medium or starting in the water. Every little bit of progress is a win! The main sign of failure is if the corm becomes soft and mushy – that usually indicates rot has set in.
They’re Alive! Caring for Your New Alocasia Sprouts
Hooray! You see roots or a tiny leaf! That’s fantastic! What now? The alocasia corm care transitions smoothly into baby plant care.
- From Water to Soil: If you used the water method, wait until the roots are about 1-2 inches long. Then, very carefully transplant the corm into a small pot filled with a light, well-draining aroid mix. Water it in gently.
- Acclimation is Key: Your sprout has been living in a high-humidity spa! Don’t shock it by moving it straight into dry household air. If it was under a dome or in a bag, start by opening the bag or propping the dome slightly for increasing periods each day over a week or two. This gradual exposure helps the new leaves harden off and adapt.
- Light: Once you have a leaf (or even just the shoot emerging strongly), move the pot to a spot with bright, indirect light. No direct sun, please, as it can scorch the tender new growth.
- Watering: Keep the potting mix consistently moist, but never soggy. Think ‘damp sponge’ consistency. The small, developing root system can easily rot if overwatered. A good rule of thumb is to let the top inch or so of the mix dry slightly before watering again.
- Fertilizing: Hold off on fertilizer for a little while. The corm itself provides the initial energy boost. Once your baby plant has developed 2-3 healthy leaves, you can start feeding it with a heavily diluted balanced liquid fertilizer (start at 1/4 or even 1/8 strength of the recommended dose) every few waterings during the active growing season.
Uh Oh! Troubleshooting Common Corm Propagation Hiccups
Sometimes things don’t go perfectly to plan, and that’s okay! It happens to all of us. Here are a few common issues and how to handle them:
- Issue 1: My Alocasia corm not sprouting!
- Check Temp: Is it consistently warm enough (70-80°F / 21-27°C)? Cold temps are a common reason for delays.
- Check Moisture: Is the medium too dry? Or constantly waterlogged? Aim for that consistent light dampness. If in water, are you changing it regularly?
- Check Viability: Was the corm nice and firm to begin with? Sometimes they just aren’t viable, unfortunately.
- Patience! Seriously, sometimes they just take their sweet time. Don’t give up too soon if the corm still feels firm!
- Issue 2: Help! My Alocasia corm rot! (It’s mushy!)
- This is usually caused by too much moisture and/or not enough air circulation. Unfortunately, once a corm turns to mush, it’s usually game over. It’s best to discard it to prevent spreading any potential issues.
- Prevention is Key: Ensure your medium drains really well, don’t oversaturate it (especially important with soil mix), allow for some air exchange under your humidity dome/bag, and change water frequently if using that method.
- Issue 3: I see fuzzy mold!
- This often happens in high humidity with stagnant air. The fix is usually simple: increase ventilation. Poke more holes in your plastic cover or air out your prop box more often (once or twice a day briefly). You can try gently wiping minor surface mold off the medium (try not to disturb the corm) with a cotton swab. Ensure the medium isn’t overly wet, as that encourages mold too.
Happy Propagating! Your Growing Alocasia Family Awaits
And there you have it! Everything you need to know to start multiplying your beautiful Alocasias using their amazing little corms. There’s truly something special about watching a tiny, unassuming corm burst into life and grow into a whole new plant that you nurtured from the very beginning. It never gets old!
Remember the magic ingredients: Patience, Warmth, and Humidity. Get those right, and you’re well on your way. Don’t be afraid to experiment a little with different mediums to find what works best in your home environment. I once had a corm take nearly three months to show any signs of life, but that little sprout was extra rewarding when it finally appeared!
I hope this guide empowers you to give alocasia propagation corms a try. It’s such a fun and sustainable way to expand your collection or share your plant love with friends. Let me know how it goes – I always love hearing about successful plant parenting moments!
Happy growing!
- Alex Green