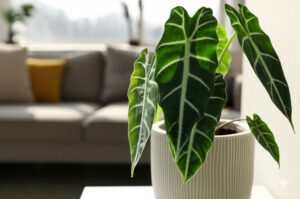
Hello fellow plant enthusiasts and Alocasia admirers! It’s Alex here, your friendly guide in the sometimes-tricky, always-rewarding world of Alocasia care. If you’ve welcomed one of these stunning ‘jewel’ plants into your home – maybe a striking ‘Polly’, a velvety ‘Black Velvet’, or a dramatic ‘Zebrina’ – you already know they bring incredible jungle vibes. But to keep them truly happy and looking their best, there’s one secret ingredient they absolutely crave: humidity!
Jump to Sections
ToggleWhy Your Jewel Alocasia Craves Humidity (More Than You Think!)
Straight from the Rainforest: Understanding Alocasia’s Tropical Roots
These beauties originally hail from the warm, damp floors of tropical and subtropical rainforests in Asia. Picture it: dappled sunlight filtering through a lush canopy, and air thick with moisture. That high-humidity environment is literally baked into their DNA. It’s a well-understood principle in tropical plant care that mimicking their native conditions leads to healthier plants.
Why High Humidity Matters for Lush Alocasia Leaves
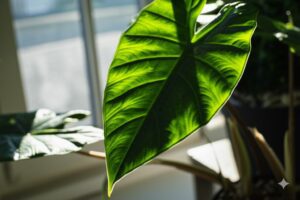
Alocasias have large, gorgeous leaves that release water vapor through a process called transpiration. In their native habitat, the high ambient humidity helps them regulate this process naturally, keeping their leaves plump and healthy. When our indoor air is too dry (which is common, especially with central heating or air conditioning), they lose moisture faster than their roots can sometimes replenish it. This puts stress on the whole plant, often starting with those magnificent leaves. Proper alocasia humidity levels are crucial for preventing this stress and achieving that signature lush look.
Uh-Oh! Signs Your Alocasia is Thirsty for More Humidity
Not sure if your humidity is cutting it? Your Alocasia will often give you clues! Keep an eye out for these common signs of low humidity in alocasia:
- Crispy brown leaf edges or tips: This is the most classic and telling sign.
- Yellowing leaves: While other care issues can cause yellowing, low humidity is a frequent contributor, especially if leaves also show crispy edges.
- Drooping or curling leaves: The plant might be trying to conserve moisture by reducing leaf surface area exposure.
- Slowed or stunted growth: When stressed, the plant focuses energy on survival rather than producing vibrant new leaves.
- Unwelcome guests like spider mites: These tiny pests absolutely thrive in dry conditions and are unfortunately common on stressed Alocasias. Maintaining high humidity is a key preventative measure.
The Sweet Spot: How Much Humidity Do Alocasias Need?
So, how much humidity do alocasias need to feel like they’re basking in their rainforest home?
Finding the Ideal Alocasia Humidity Percentage
Most Alocasia varieties truly thrive when the relative humidity (RH) is consistently between 60% and 80%. Think comfortably steamy, like a bathroom after a warm shower. As experienced growers know, consistency is often just as important as hitting the peak number – try to avoid drastic day-to-day fluctuations if possible.
Can Alocasias Tolerate Lower Humidity?
Technically, some Alocasias might survive in humidity levels down to around 50%, but they likely won’t exhibit their full potential or look their absolute best. Below 50% RH, you’re almost certainly going to see those stress signs we talked about. Why settle for mere survival when you can aim for a thriving, stunning plant? Let’s target that 60-80% sweet spot!
5 Easy Ways to Boost Indoor Humidity for Happy Alocasias
Okay, creating a personal rainforest might sound daunting, but don’t worry! Here are five relatively easy and practical ways you can increase humidity indoors for your precious Alocasias:
1. Group Your Plants: Create a Mini Humid Oasis Together
This is nature’s own humidity hack! Plants naturally release moisture through transpiration. By grouping plants closely together, you create a shared microclimate where the combined moisture noticeably raises the local humidity around them.
- Pros: It’s completely free, looks wonderfully lush, and benefits all the plants involved!
- Cons: You need several plants fairly close to each other for a significant effect. It’s also important to ensure there’s still adequate air circulation between the plants to prevent potential mould or fungal issues.
2. The Classic Pebble Tray: A Simple Humidity Hack
This is a time-tested and popular DIY humidity for houseplants method! Find a shallow tray or saucer that’s wider than the base of your Alocasia’s pot. Fill it with a layer of pebbles, gravel, or LECA balls. Add water until the level is just below the top surface of the pebbles. Then, place your Alocasia pot so it sits on top of the pebbles, not touching the water.
- How-it-works: The water in the tray evaporates slowly, increasing humidity directly around the plant’s foliage. The crucial point: Ensure the bottom of the pot and its drainage holes are above the waterline. If the pot sits in water, you risk devastating root rot!
- Pros: Very inexpensive and easy to set up using readily available materials.
- Cons: Provides only a modest, localized humidity boost directly around the pot. The water needs to be refilled regularly as it evaporates, and the tray should be cleaned periodically to prevent algae growth or fungus gnats.
3. Misting Your Alocasia: Helpful or Harmful? (Proceed with Caution!)
Ah, misting. It feels so tropical and caring, doesn’t it? Misting alocasia leaves with a fine spray can provide an immediate, but very temporary, moisture boost.
- Pros: Instant gratification, feels like you’re actively helping.
- Cons: The humidity increase from misting literally lasts only a few minutes as the water evaporates. To achieve any sustained effect, you’d need to mist multiple times a day. More importantly, allowing water to sit on Alocasia leaves for extended periods, especially in rooms with poor airflow or cooler temperatures, can unfortunately encourage fungal or bacterial leaf spot diseases – something these plants can be susceptible to.
- Best Practices: If you decide to mist occasionally, always use a sprayer that produces a very fine mist (not large droplets). Do it only in the morning hours so the leaves have plenty of time to dry fully before nightfall. Ensure good air circulation around the plant. Using distilled or rainwater is preferable to avoid leaving mineral deposit spots on those beautiful leaves. Frankly, most seasoned Alocasia growers rely more heavily on other methods for consistent humidity.
4. Strategic Placement: Bathrooms & Kitchens to the Rescue?
Consider the naturally more humid zones within your home. Often, these are the bathroom (thanks to steam from showers and baths) or the kitchen (from cooking, boiling water, and dishwashing).
- Pros: It’s free and utilizes existing ambient conditions! An alocasia in bathroom humidity can sometimes be very happy.
- Cons: The major challenge is often light. Bathrooms and kitchens frequently lack the bright, indirect sunlight that Alocasias crave. Humidity levels in these rooms can also fluctuate significantly throughout the day. Before relocating your plant, make sure the spot truly meets all its essential needs – adequate light being paramount.
5. Using a Humidifier: The Most Reliable Humidity Boost
For the most significant, consistent, and controllable impact on your indoor humidity, especially if you live in a dry climate or use heating/air conditioning frequently, investing in a humidifier is undoubtedly the most effective solution.
- Pros: Provides the most substantial and stable increase in relative humidity. Modern units allow you to set a target humidity level, and they can cover a much larger area than pebble trays or grouping alone.
- Cons: There’s an initial purchase cost and a minor ongoing electricity cost. Crucially, humidifiers require regular cleaning (typically weekly, following manufacturer instructions) to prevent the growth and dispersal of mold, bacteria, or algae into your air. This is absolutely vital for both your health and your plants’ health! They also need periodic refilling.
Choosing the Best Humidifier for Alocasia Plants
If you’ve decided a humidifier is the way to go, choosing the best humidifier for alocasia plants doesn’t need to be overwhelming. Here’s what plant parents should look for:
Cool Mist vs. Warm Mist: What Your Alocasia Prefers
For general home and plant use, cool mist humidifiers are typically the preferred choice. These come in two main types: ultrasonic (using high-frequency vibrations to create mist) and evaporative (using a fan to blow air through a wet wick). Both effectively raise humidity without adding heat to the room, and they don’t involve boiling water, making them inherently safer if you have curious children or pets around. Ultrasonic humidifiers are often quieter in operation. Warm mist humidifiers work by boiling water; they use more energy and have a heating element, but achieve the same end goal of adding moisture to the air.
Key Humidifier Features for Plant Parents
- Built-in Humidistat (or Hygrostat): This feature is incredibly useful! It includes a sensor that measures the room’s current humidity and automatically turns the humidifier on or off to maintain the specific humidity level you set (e.g., 65%). This prevents the air from becoming too damp (which can also be problematic) and makes operation much more efficient.
- Ease of Cleaning: Before buying, consider how easy the tank and base will be to access and clean thoroughly. Wide openings and simple designs are a plus. Remember, regular cleaning is non-negotiable!
- Appropriate Room Size/Capacity: Check the manufacturer’s recommendation and choose a model rated for the square footage of the room where your Alocasias reside. An underpowered unit won’t keep up.
- Tank Size / Runtime: A larger water tank means you’ll need to refill it less frequently. Consider how often you’re willing to top it up.
Our Top Tip for Using a Humidifier Effectively
Place your humidifier reasonably close to your Alocasia grouping, but not so close that the mist is constantly blowing directly onto the leaves. Good air circulation in the room is still beneficial. Using distilled or filtered water is highly recommended, especially with ultrasonic models, as it helps prevent mineral buildup within the machine and reduces potential ‘white dust’ settling on furniture or plant leaves (caused by minerals in tap water).
Keeping Track: How to Monitor Humidity Levels Like a Pro
You’ve implemented one or more of these humidity-boosting strategies… but how do you know if you’re hitting that magic 60-80% target?
Invest in a Hygrometer: Your Essential Humidity Gauge
You can’t effectively manage what you don’t measure! A digital hygrometer is a relatively inexpensive but absolutely essential tool for any serious Alocasia parent. It provides a clear digital readout of the current relative humidity percentage in the air.
- Placement Tips: Place the hygrometer near your Alocasias, ideally at about the same height as their leaves, but not directly in the path of humidifier mist or drafts. This gives you the most accurate reading of the conditions your plants are actually experiencing.
Observe Your Alocasia: The Ultimate Feedback System
Beyond the numbers, your plant itself is the best indicator of success! Learn to ‘read’ your Alocasia’s signals. Look for these positive signs:
- New leaves unfurling perfectly, without brown or crispy edges.
- Existing leaves looking vibrant, supple, and holding their shape well.
- A noticeable absence of spider mites or other pests often associated with dry conditions.
- Steady, healthy new growth during the growing season.
Conclusion: Consistent Humidity = A Thriving Alocasia Jewel
Meeting the unique alocasia humidity needs might seem like an extra chore at first, but trust me, it’s one of the most impactful elements of care you can provide to keep these tropical stunners looking magnificent indoors.
Quick Recap: Your Humidity Toolkit
Remember your easy options: strategically grouping plants, setting up pebble trays, misting (very cautiously!), choosing humid locations like bathrooms if light permits, or investing in a humidifier for the most reliable and controllable results. Often, combining a couple of these methods works wonders!
Patience and Observation are Key
Finding the perfect humidity balance for your specific home environment takes a little time, patience, and careful observation. Don’t get discouraged if you don’t nail it instantly! Pay close attention to both your hygrometer readings and, more importantly, how your Alocasia is responding. Make small adjustments as needed. I remember early on struggling with crispy tips on my Alocasia Polly until I finally invested in a small humidifier – what a difference consistent humidity made! You’ve absolutely got this!
Happy growing, and may your home be filled with the lush, vibrant beauty of perfectly humidified, thriving Alocasias!