Jump to Sections
ToggleHey Alocasia Lovers! Let’s Tackle Those Tiny Black Flies Buzzing Around
Hello fellow Alocasia enthusiasts! If you’re reading this, chances are you’ve noticed some unwelcome little visitors flitting around your prized Alocasia plants. You know the ones – those tiny, dark flies that seem to appear out of nowhere and hang around the soil. Yep, we’re talking about fungus gnats, and dealing with them, especially when it comes to our beloved fungus gnats alocasia situation, can be incredibly frustrating. I’ve been there!
Fungus gnats are small flies naturally drawn to moist environments, and unfortunately, the conditions that keep our gorgeous Alocasias happy (that lovely, consistently moist soil) can also be a five-star resort for these pests. Whether you nurture an Alocasia ‘Polly’, a ‘Black Velvet’, or a striking ‘Zebrina’, these gnats can quickly become a nuisance.
But don’t despair! While they might be annoying, fungus gnats are a common issue, and definitely one you can manage. This guide is here to walk you through exactly how to identify them, understand if they’re actually harming your plant, and most importantly, give you practical, easy-to-follow steps for getting rid of fungus gnats in houseplants – particularly your precious Alocasias – and keeping them away for good. Let’s get started!
Identifying the Enemy: Is it Really Fungus Gnats in Your Alocasia Pot?
First things first, let’s make sure we’re dealing with the right culprit. Correct identification is key to choosing the right battle plan.
What to Look For: Spotting Adult Fungus Gnats
Adult fungus gnats are pretty small, typically about 1/8th of an inch long, dark (greyish to black), and have long legs and antennae, somewhat resembling tiny mosquitoes. You’ll often spot them:
- Fluttering weakly and erratically near the soil surface. They aren’t strong fliers like houseflies or even fruit flies.
- Running across the topsoil.
- Gathering near drainage holes or on the pot rim.
- Sometimes flying towards windows, but usually staying low around the plant base.
If you see little flies matching this description consistently hanging around your Alocasia’s soil, you’ve likely got fungus gnats.
Don’t Forget the Larvae: The Hidden Problem in the Soil
While the adults are annoying, the real heart of the infestation lies unseen in the soil: the larvae. These are the reason the adults keep appearing.
Fungus gnat larvae are tiny (up to ¼ inch long), translucent or whitish, legless worm-like creatures with distinct shiny black head capsules. They live and feed in the top 1-2 inches of moist potting mix. They can be tricky to spot, but if you gently scratch the surface of damp soil, you might see them wriggling.
- Quick Tip: Want confirmation? Place a slice of raw potato, cut-side down, on the soil surface for a few hours or overnight. Larvae are often attracted to it, making them easier to see when you lift the slice.
Why Your Alocasia? The Moist Soil Magnet (alocasia soil issues)
So, why do Alocasias seem to be such fungus gnat magnets? It boils down to their care needs. Alocasias thrive in soil that is kept consistently moist, but not waterlogged. This constant moisture, especially in the top layer of soil, combined with the organic matter present in most potting mixes, creates the absolute perfect environment for fungus gnat larvae to feed and mature. Factors like signs of overwatering Alocasia (like constantly wet soil), poor pot drainage, or a very dense, water-retentive soil mix can make your plant even more inviting to these pests.
Annoying Nuisance or Real Threat? Do Fungus Gnats Harm Alocasias?
This is a question I get asked a lot. Are these gnats just irritating, or are they actually hurting my beautiful Alocasia?
The Obvious: Adult Gnats Are Just Plain Annoying
Let’s be honest, the adult flies are mostly a nuisance. Having tiny flies buzzing around your face or landing in your drink is nobody’s idea of fun. Thankfully, they don’t bite people or pets.
The Larvae Factor: Potential Risk to Roots?
The larvae are where the potential for plant damage lies. Their primary food source is fungi and decaying organic matter in the soil – which is actually helpful in a way! However, based on common horticultural advice, when populations become very large, or if other food sources are scarce, they can start to nibble on the fine, delicate root hairs of your Alocasia. They might also feed on the very base of the stem in young seedlings.
It’s also worth noting that fungus gnats thrive in the same damp conditions that can lead to Alocasia root rot. While the gnats themselves don’t cause root rot (that’s usually fungal pathogens thriving in overly wet soil), a heavy infestation in already struggling, overwatered roots certainly won’t help the situation.
When to Be Extra Vigilant
For healthy, well-established Alocasias, a small number of fungus gnats is usually more annoying than harmful. However, you should be more concerned if:
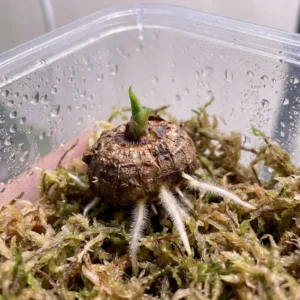
- You have very young Alocasia plants or seedlings.
- Your plant is already stressed (e.g., recovering from underwatering, overwatering, or recent repotting).
- The infestation is massive, with clouds of gnats and visibly numerous larvae.
In these cases, the larval feeding could potentially hinder growth or exacerbate existing problems.
Your Action Plan: Getting Rid of Fungus Gnats in Houseplants (Especially Alocasias!)
Alright, time to roll up our sleeves and show these gnats the door! The key is a multi-pronged approach that targets both the adults and, crucially, the larvae to break their lifecycle.
Step 1: Master Moisture Control (Your #1 Weapon!)
This is, without a doubt, the most important step in controlling fungus gnats. Remember, they need moist topsoil to breed successfully.
- Dry It Out: Make it a habit to let the top 1-2 inches of your Alocasia’s soil dry out completely before watering again. Stick your finger in the soil to check – don’t just rely on a schedule. This dryness kills existing eggs and larvae and makes the soil unattractive for adults to lay new eggs. Finding the right balance for moisture-loving Alocasias takes practice, but it’s crucial.
- Embrace Bottom Watering: This technique is fantastic for bottom watering prevent fungus gnats. Instead of watering from the top, place your Alocasia’s pot (it must have drainage holes!) in a sink or tray filled with a few inches of water. Let the plant soak up water from the bottom for 15-30 minutes, or until the topsoil feels slightly damp. Then, let it drain completely. This keeps the top layer of soil significantly drier.
- Check Your Drainage: Ensure your pot has adequate drainage holes and isn’t sitting in a saucer full of water after watering. Good drainage prevents the topsoil from staying constantly soggy.
Step 2: Reduce the Adult Population with Sticky Traps
While drying the soil tackles the source, yellow sticky traps fungus gnats are excellent for catching the flying adults. This helps reduce the number of adults available to lay more eggs and gives you a good visual indicator of how bad the infestation is.
- How they work: Gnats are attracted to the yellow color and get stuck on the adhesive surface.
- Placement: Place them close to the soil surface – you can lay small ones flat on the soil (sticky side up!) or use traps on small stakes inserted into the pot.
- Benefits: They’re cheap, non-toxic, and very effective at reducing the adult swarm. A staple for getting rid of fungus gnats in houseplants.
Step 3: Target the Larvae Where They Live (The Soil!)
Trapping adults helps, but to truly break the cycle, you need to deal with the larvae in the soil. Here are some effective options:
Bacillus thuringiensis israelensis (BTI): The Safe & Super Effective Larva Killer
This is my go-to recommendation and often considered the best natural fungus gnat control houseplants method.
- What it is: BTI is a naturally occurring soil bacterium that specifically targets the larvae of gnats, mosquitoes, and blackflies. It’s harmless to plants, humans, pets, and beneficial insects like bees and earthworms.
- How it works: When larvae ingest BTI, it releases a specific protein that destroys their digestive system, stopping them from feeding. Highly effective!
- How to use mosquito bits fungus gnats: BTI is commonly sold as granules (“Mosquito Bits”) or dunks (“Mosquito Dunks”). Steep the recommended amount (check product label) in your watering can water for about 30 minutes. Then, remove the solids (or strain) and use that BTI-infused water to thoroughly drench the soil of your affected Alocasia. Repeat this treatment every 1-2 weeks for at least 3-4 cycles to catch all life stages hatching out.
Beneficial Nematodes: Microscopic Pest Hunters
Another excellent biological control option.
- What they are: Steinernema feltiae are microscopic predatory worms that actively seek out and destroy fungus gnat larvae (and other soil pests) from within.
- How to use: They usually come refrigerated in a powder or sponge. Mix with water according to instructions and apply as a soil drench. Keep the soil consistently moist (but not soaking) for a week or two after application for them to establish. They can be very effective but might be slightly more costly and require specific temperature conditions compared to BTI.
Hydrogen Peroxide Drench: A Quick Flush (Use Carefully)
This is a popular DIY method, but requires caution.
- Dilution: Use standard 3% hydrogen peroxide (the kind from the drugstore). Crucially, dilute it: Mix 1 part 3% H2O2 with 4 parts water (hydrogen peroxide dilution for fungus gnats). Never use it undiluted.
- How it works: The solution fizzes on contact with soil, releasing oxygen. This action can kill larvae and eggs on contact and help aerate compacted soil.
- Cautions: Use this method sparingly. Frequent or stronger applications could potentially harm delicate root hairs and beneficial soil microbes. Think of it as an occasional flush rather than a regular treatment. Ensure the soil dries reasonably well afterwards.
Neem Oil Soil Drench: Another Tool in the Kit
Neem oil can also be used as a soil drench.
- How it works: Neem contains compounds that act as insect growth regulators, deter feeding, and repel pests. It affects larvae and pupae developing in the soil.
- Application: Look for products specifically formulated for soil drenching, or mix pure, cold-pressed neem oil with water and an emulsifier (like insecticidal soap) according to label directions. Follow instructions carefully.
- Cautions: Some plants can be sensitive to neem. Over-application can potentially clog soil pores. Ensure good soil drainage. It’s generally slower acting than BTI or peroxide but offers residual effects.
Last Resort: When Repotting is the Best Option
If you have a truly severe, persistent infestation that isn’t responding to other treatments, or if your Alocasia is also suffering from significant root rot, repotting might be necessary.
- Process: Gently remove the plant from its pot. Discard all of the old, infested soil (do not reuse it!). Inspect the roots, trimming any mushy, brown (rotted) ones with clean scissors. Rinse the roots gently if needed. Thoroughly clean the pot with hot, soapy water (a weak bleach solution rinse, followed by thorough rinsing with plain water, is also effective). Repot your Alocasia into a fresh batch of sterile, well-draining potting mix suitable for its needs. Water lightly and monitor closely.
Fortress Alocasia: Best Soil Practices to Prevent Fungus Gnats Long-Term
Eliminating an active infestation is great, but prevention is where the real victory lies! Making your Alocasia’s home less inviting is key to avoiding future battles. Here are the best soil practices prevent fungus gnats:
The Foundation: Choosing the Right Alocasia Soil Mix
This is fundamental! Alocasias need moisture, yes, but they hate sitting in dense, waterlogged soil. Excellent Alocasia soil mix drainage is non-negotiable.
- Go Chunky: Avoid standard potting mixes straight out of the bag, as they often hold too much water at the surface. Amend your mix heavily! Good best potting soil components for Alocasia include:
- Orchid bark
- Perlite or pumice
- Coco coir chunks (not just fine peat)
- Horticultural charcoal
- Aim for a mix that holds some moisture but allows excess water to drain freely and air to reach the roots. This discourages the perpetually damp top layer that fungus gnats love.
Watering Wisely: Consistency is Key
We’ve covered this, but it bears repeating:
- Always check the soil moisture before watering. Let the top inch or two dry out.
- Avoid letting your Alocasia sit in a tray of runoff water. Empty saucers after watering.
- Consider making bottom watering your regular method.
Remember, signs of overwatered Alocasia plant (like yellowing leaves, droopiness despite wet soil) often go hand-in-hand with fungus gnat issues.
Consider a Top Dressing Barrier
Adding a half-inch layer of coarse sand (sand top dressing fungus gnats) or fine decorative gravel on top of the soil can create a dry physical barrier. This makes it difficult for adult gnats to reach the moist soil beneath to lay their eggs. Just be aware that it can make it slightly harder to judge soil moisture by touch, so you might need to rely more on pot weight or a moisture meter if you use this method.
Quarantine New Arrivals!
It’s so easy to bring pests home on new plants! Always inspect any new plant (Alocasia or otherwise) thoroughly for signs of pests, including checking the soil for gnats. Ideally, keep new plants isolated from your main collection for a few weeks to ensure they aren’t carrying any unwanted passengers.
Keeping Your Jewel Alocasia Healthy and Gnat-Free
Dealing with fungus gnats alocasia can feel like a persistent battle, but it’s definitely one you can win! I remember how frustrating it was seeing those little flies hovering around my prized Alocasia ‘Black Velvet’ for the first time – but tackling the larvae in the soil made all the difference.
The key takeaways are: control that soil moisture (let it dry!), use yellow sticky traps for adults, and deploy BTI (like Mosquito Bits) consistently to target the larvae safely and effectively. Combine this with preventative measures like a well-draining soil mix and smart watering, and you’ll make your Alocasia’s pot a much less appealing place for fungus gnats to call home.
It takes a little diligence and patience to break their lifecycle, but don’t get discouraged. You’ve got this! Soon you’ll be back to simply admiring the stunning beauty of your thriving, healthy, and blissfully gnat-free Alocasia. Happy planting!